Pages

Showing posts with label cooking. Show all posts

Wednesday, April 6, 2016

Waiting Room Magazine Cuisine


One of the best things about going to the dentist is the magazine rack in the waiting room.  I don't subscribe to many magazines, so being in the waiting room is like getting a glimpse into other worlds -- Midwest Living, Simple, who knows what I'll find?  On Saturday, after chatting with the receptionist a few minutes -- how's the family, how 'bout this weather (snow flurries) -- I settled down with a magazine with lovely pastel Easter eggs on the cover.  Partway through, I came across a recipe for beef brisket that looked fresh and different.  I showed it to the husband; he agreed.  I thumbed through a few more pages.  Then I thought maybe I should write that recipe down, so I started to rummage in my purse for a pen and scrap of paper.  The door opened.  "Come on back."  I hastily put the magazine back in the rack and meekly followed the hygienist.

With my teeth cleaned, X-rays taken, and a figurative pat on the head from the dentist, I returned to the waiting room. The husband was still in the back, so I figured I'd get that recipe.  The magazine was gone!  No pastel Easter eggs to be seen in the rack or on the chairs.  Hummpf.  Some other middle-aged lady (there had been one in the waiting room) had no doubt taken it with her back to the dentist's chair.

When I got home, I began searching online for the recipe.  I didn't know what magazine it was, only that it had Easter eggs on the cover.  I searched for a recipe with the ingredients, and I struck gold.  I found it in Good Housekeeping. The name of the recipe is a mouthful, Soy-Braised Beef and Tomato-Mint Salad.  Here's the link.  


I made it for last night's dinner, and it was a hit.  It's super easy, too, as the beef cooks all day in the crock pot.  I served it, as suggested, with jasmine rice.  Next time, both of us agreed, maybe replace the red onion with green onions or shallots.  The onion flavor was a little strong.  (The husband said this first and he loves onions.)  In the magazine, they used whole mint leaves, which looked prettier, but my mint leaves were gargantuan, so I chopped them.  One important note: I used low sodium soy sauce and it was plenty salty.

photo from Kikkoman web site

Speaking of soy sauce, did you know that much of the Kikkoman soy sauce produced in the U.S. comes from Walworth, Wisconsin?  It's a tiny town just over the Illinois border.  We used to live seven miles from Walworth, so I usually buy Kikkoman.  I remember the first time we drove north on Rt. 14 into Wisconsin and I saw that big Kikkoman plant sitting out in the middle of a field.  Such a surprise.  But it makes sense, since the Midwest grows a lot of soybeans.  Might as well put the plant near the source, right?

Anyway, next time you're at the dentist, keep your eyes open, be sure to have a pen and paper, and don't let anyone snatch your magazine and carry it to the back before you get your recipe.  But if that does happen, there's always the internet.

Monday, January 11, 2016

Warming Up a Cold Evening


Brrr! Where's that El Nino they promised us this winter? It was four degrees yesterday, so I made a spicy skillet jambalaya to warm us up. I got the recipe from the January issue of Country Living magazine, but I'm sure there are lots of others online. I used chicken andouille sausage, which lowered the fat a little, and added a bit of smoked paprika to up the smokiness of the dish.  It was flavorful, but not too hot.  A warming bowl of jambalaya and later an episode of Downton Abbey -- not bad for a cold, winter evening.

P.S. A digital stove tip: Recently the digital control on my gas stove goofed up. It would not go above 287 degrees. I called the repairman, who came out, unplugged my stove and plugged it back in. Problem solved. Only $76 to unplug the stove. I hope this tip can save someone else a service call charge. 

Tuesday, July 7, 2015

Beans, a Bathroom, and a Beetle for Good Measure

What do you get when you mix garbanzo beans, a bathroom renovation, and a red beetle?  A post about my summer. Here it is, already July.  The summer is flying by.  Summer is the time we do a lot of grilling and I begin to crave salads.  Yesterday, I finished up a bowl of tabouli at lunch and immediately wondered what kind of salad I could concoct for dinner (without a trip to the store).  Answer -- garbanzo, tomato, basil.  Yum.


There are lots of versions of this salad on the internet, but this is my take on it.

Tomato Garbanzo Salad

1 15-ounce can garbanzo beans (chickpeas), rinsed and drained
2 medium tomatoes, chopped
¼ cup chopped fresh basil
2-3 tablespoons finely minced onion
1 clove garlic, minced
2 tablespoons olive oil
2 tablespoons red wine vinegar
¼ teaspoon salt


Mix together beans, tomatoes, basil, onion, and garlic.  Whisk oil, vinegar and salt together in small bowl and pour over the salad.  Mix well.  Cover and chill for 30 minutes to an hour.  Use slotted spoon to transfer salad to serving dish. 


In other news, we spent nine days last month at our daughter's house continuing the bathroom remodel.  We worked probably eight hours a day, but we were really down to the wire at the end.  The husband was grouting the tiled walls the Saturday she and I moved her furniture in.  Fortunately, the plumber came promptly the following Monday to hook up the faucets, etc.

There is still work to do -- priming and painting and some trim work -- but the hard work is all finished.  New cement board and drywall, tile floor and walls (hard to see here, but there is white subway tile up about four feet and all the way to the ceiling around the tub), new sink and medicine cabinet, new wood trim around door and window and a new bifold door.  The old door opened in and hit the sink.  It had to be closed in order to wash one's hands.  Not ideal.  We had hoped to install a sliding door, but the walls were not large enough to accommodate one.

I think it turned out pretty well.  But about that floor . . . .  The one-inch hexagon tiles come on a mesh sheet to make application easier.  The trouble is, the design has a lot more black in it than what you see here.  "Too busy. Too much black."  So the daughter pulled off about thirteen black tiles for every square foot of tile. That meant that when laying it (while the daughter was conveniently away at work), we had to hand insert white tiles in the wet mortar. Tedious.  Then when grouting, some of the hand-inserted white tiles shifted or even came loose.  A nightmare.  As long as no one looks too closely, however, it looks fine.  As I told the daughter, we weren't charging her for labor, and you get what you pay for.

Finally, I'll leave you with a picture of a little critter we saw at the prairie the other morning.  A cute milkweed beetle resting on a milkweed that is ready to burst into bloom.


Sunday, April 19, 2015

Trying Some New Recipes

In my ongoing quest to shake up the menus around here, I recently tried a couple of new recipes.  One is a soup that appeared in the March 2015 issue of Country Living.  It's a lemony chicken orzo soup.  Since I love Panera Bread's version, I figured it was well worth a try.


It's light, yet filling.  The fresh dill adds a nice touch.  You can find the recipe on the Country Living site here.

An even better success was a scrumptious mini chocolate chip Bundt cake.  It was a big hit with me and our son.  I found this recipe in one of those compilation fundraiser cookbooks -- love those.

My cake stuck to the pan a little bit, as you can see in the photo below.  The topping is put in the pan first, and is maybe a little too buttery.  Tastes great, but leaves the fingers a little greasy if eating out of hand.

Nutty on top!

Imminently snackable
Toll House Bundt Cake
from A Cookbook by Sunset House Auxiliary Toledo Ohio (1991)


2 3/4 cup flour
2 teaspoons baking soda
1 teaspoon salt
1 Tablespoon vinegar
1 cup less 1 Tablespoon milk
1 cup butter, softened
1 cup firmly packed brown sugar
1 Tablespoon vanilla
4 eggs
1/2 cup semi-sweet mini chocolate chips

Nut Topping:
1/2 cup butter, softened
4 Tablespoons granulated sugar
1 1/3 cup chopped nuts

For topping, combine butter, sugar and nuts; mix until crumbly.  Spoon into well-greased and floured 12-inch Bundt (or tube) pan.  Chill in refrigerator while you prepare cake batter.

Preheat oven to 375 degrees F.

In small bowl, combine flour, baking soda, and salt.  Set aside.  Place vinegar in 1 cup measure, fill with milk to 1 cup line; set aside.

In large mixing bowl, combine butter, brown sugar and vanilla; beat at medium speed until light and fluffy.  Add eggs, one at a time, beating well after each addition.  Turn mixer to low.  Gradually add flour mixture, 1/3 at a time, alternating with milk.

Gently fold in chocolate mini chips with a rubber spatula.  Pour into prepared pan.  Bake at 375 degrees F for 50 minutes.  Loosen edges of cake with spatula.  Immediately invert on cooking rack.


Printable recipe

Friday, April 3, 2015

A Tale of Two Shrimp

We love seafood here at the Sweet Posy house.  Shrimp is one of my favorites (and clams, and trout, and salmon; okay, okay, I'll stop).  This is a tale of two shrimp dishes.

Our son gave me a wonderful cookbook for Christmas, The Skinnytaste Cookbook by Gina Homolka.  (Homolka also writes a blog which you can find here.)  We've been trying lots of fabulous, healthy entrees from the book.  Almost everything we've tried has been a hit except the Silky Chocolate Cream Pie, not a fan of that one.  One of my favorite recipes from the cookbook is Cilantro Lime Shrimp, which I have made several times.  Recently when I pulled out a bag of frozen shrimp to thaw for dinner, my son expressed a little bit of boredom at the prospect of Cilantro Lime Shrimp again.

So I looked around online for another shrimp recipe and, since the weather had warmed up enough to grill, a grilled Cajun shrimp recipe sounded good to both of us.  We served it over quinoa with grilled vegetables, and it turned out beautifully.  Beautiful to look at, that is.


I like fairly spicy food, but this was so spicy hot that my lips tingled for at least half an hour after dinner!  Yikes!  I didn't save the recipe, so I can't link to it, but as I recall it contained three tablespoons of Cajun seasoning for two pounds of shrimp.  (I use a homemade version of Emeril Essence.)  I know we reduced the seasoning a bit, but whatever it was, it was WAY too much.  I couldn't face peppery food for days afterward.

About a week later, I pulled out another bag of shrimp.  There was a little grumbling from a certain quarter, but I made the Cilantro Lime Shrimp again.  The husband completely understood why -- I had to get the taste and memory of that super hot shrimp out of my mind.  I served the Cilantro Lime Shrimp (recipe here) over brown rice seasoned with cumin, lime juice, and cilantro.  Bliss.


Wednesday, October 15, 2014

Too Much Bacon? Oh, Clam Up!

Yesterday was one of those cook-from-the-pantry days.  It was gray and rainy, and I didn't want to go to the grocery store.  I almost always have pasta and cans of chopped clams in my pantry, so linguine with clam sauce seemed to fill the bill.  Clams are supposed to be high in protein, iron and other minerals, and B12.  They are also low in fat.  So what's the best way to take this healthy food and make it less healthy, but very, very tasty?  Bacon!  Ten slices of bacon!  It's a lot of bacon, but too much?  I'd say, just right.

Mmmm, bacon!

Bacon and clam sauce is a special, yummy treat at our house.  Even though I usually have the ingredients for this dish on hand (except for fresh parsley in the winter), I don't make it often because of all the bacon.  We LOVE bacon, but it's not exactly health food, is it?  How cool is it, though, that a special treat dish also happens to be one I can whip up when the fridge is kind of bare?  In addition to the bacon, garlic and cayenne pepper give this dish a lot of flavor.

Luckily there was still
parsley in the garden.
This recipe, with only slight modifications, comes from a great little soft cover cookbook called All the Best Pasta Sauces by Joie Warner.  My copy is from 1987, but you can still get the book on Amazon, lots of used copies available too.  It's a wonderful little book if you like pasta.

Crispy Bacon and Clam Linguine
Slightly adapted from All the Best Pasta Sauces by Joie Warner

10 slices bacon, preferably smoked
1 tablespoon olive oil
3/4 pound linguine
1 small onion, finely chopped
3-4 large garlic cloves, minced
1/2 cup finely chopped fresh parsley (can omit if you don’t have fresh, or add a tablespoon dried parsley in last step of cooking)
1/4-1/2 teaspoon cayenne pepper
Freshly ground black pepper to taste
2 5-ounce cans chopped clams, drained, reserving 1/4 cup broth
Grated Parmesan cheese

Lots of clams, too, not just bacon.
Heat water for linguine.

Fry bacon in large skillet until crisp.  Remove bacon to paper-towel-lined plate.  Pour out bacon drippings, reserving 1/4 cup.  Return 1/4 cup bacon drippings to skillet.  Break bacon into bite-sized pieces and set aside.

Begin cooking linguine.

Add olive oil to bacon drippings in skillet.  Heat over medium heat and add onion and garlic.  Cook about 3 minutes, until tender.  Add fresh parsley, cayenne, and black pepper, and cook about 2 minutes.  Stir in clams and broth (add dried parsley here if using).   Cook until heated through.  

Combine with hot pasta, top with bacon pieces and toss to combine.  Top with grated cheese if desired.


Serves four.


Monday, August 25, 2014

Got Parsley?

It's late summer and the herb pot is full and luxurious.  There's a lot of parsley out there needing to be eaten.  What to do?  Make tabouli!

Tabouli (also spelled tabbouleh) is one of my favorite salads -- so fresh, yet hearty.  Late summer is the perfect time to make it, with lots of parsley and garden fresh tomatoes available.  Making tabouli requires a fair bit of chopping.  You can use a food processor if you wish, but I like to chop everything by hand, so that I get the sizes exactly the way I want them.  I enjoy it.  Plus, after chopping all that parsley and mint, my kitchen smells divine.  So, turn on some fun music and get chopping!

This particular salad was made to strains of The Supremes and Sly and the Family Stone.
"Everybody is a Star," especially you when you serve this yummy salad to friends and family.


Tabouli

Adapted from Nikki & David Goldbeck’s American Wholefoods Cuisine

1/2 cup cracked or bulgur wheat
1 1/2 cups hot water
1 cup finely chopped parsley
1/2 cup finely chopped mint leaves
1 cucumber, peeled and diced (about 2 cups)
1 large tomato, diced (about 1 cup)
3 scallions, sliced thin
3 tablespoons lemon juice
3 tablespoons olive oil
1/4 teaspoon salt


Soak the wheat in hot water for about 15 minutes.  Drain well, squeezing out all water.  Toss all ingredients together, stirring to mix well.  Chill or serve immediately at room temperature.

Monday, June 9, 2014

Keen for Quinoa

Quinoa is one of the current darlings of healthy eating.  While quinoa has been grown in the Andes for centuries, most Americans didn't discover it until the latter twentieth century or even the twenty-first century. It's a fun change of pace from rice, even if it isn't actually a grain. (It's a seed, did you know that?  I used to think it was a grain.)


Quinoa has become popular in my family, especially with our son.  He discovered that a local grocery store sells bulk quinoa, so he stocks up when he visits and uses it with chicken several times a week.  Because, you know, this family eats a LOT of chicken.

I often marinate chicken in some variation of a soy sauce marinade before grilling.  It's fast and I always have ingredients on hand.  Recently, I came up with my own version of a common quinoa recipe using soy sauce and garlic to pair with the grilled chicken.  This is a simple weeknight kind of meal.  It comes together quickly and is tasty and healthy.  Pair it with a salad, and dinner is ready in half an hour, tops!

I call it Fusion Quinoa Chicken because it has South American quinoa; olive oil and garlic, often associated with Mediterranean diets; and Asian-inspired soy sauce.  (I always use Kikkoman soy sauce because it is made in Walworth, Wisconsin, less than ten miles from the Illinois border, near a town we used to live in.  I was so surprised the first time, years ago, when I saw the factory sitting in a Wisconsin field.)


Fusion Quinoa Chicken

Chicken :
2 tablespoons olive oil
2 tablespoons low sodium soy sauce
2 tablespoons rice vinegar
1 tablespoon sugar
2 large chicken breasts, well trimmed

Slice chicken breasts in half horizontally to make thinner pieces.  Set these aside in a shallow dish.  Combine olive oil, soy sauce, vinegar and sugar in a small bowl and mix well with fork.  Pour marinade over chicken and allow to marinate for about 15 minutes at room temperature.  Turn chicken occasionally.  While chicken marinates, prepare ingredients for quinoa.  After quinoa has reached the simmer stage, grill chicken, turning occasionally, until cooked through.   Baste with remaining marinade whenever turning the chicken.

Quinoa:

1 tablespoon olive oil
1/4-1/3 cup diced onion
3 cloves minced garlic (about 1 1/2 teaspoons)
1 cup mixed red and white quinoa (you can use a single color if desired)
1 cup water
1 cup reduced sodium, fat free chicken broth
3 teaspoons low sodium soy sauce
1 tablespoon salted butter
3 tablespoons minced fresh parsley

Heat olive oil in medium saucepan over medium heat.  Saute onion and garlic until soft.  Add quinoa and cook about one minute, stirring constantly.  Add water, chicken broth and soy sauce.  Bring to a boil, cover, reduce heat, and simmer for about 15 minutes, until liquid is absorbed.  Turn off heat and add butter, stirring until it is melted.  Stir in parsley and transfer quinoa to serving bowl.   Top quinoa with cooked chicken breasts and serve.  

Printable recipe


Wednesday, April 16, 2014

Mmmmm, Monterey Chicken

If you've read my blog very much, you know I cook a lot of chicken.  Grilled, baked, fried, slow cooked -- if it's chicken, we'll eat it.  Yesterday, I browsed my Pinterest food board looking for something new to prepare for dinner.  And what do you suppose appealed to me?  Yep, chicken.  I came across a Monterey Chicken photo I had pinned a year ago and never tried.  I clicked through to the blog where it originally appeared, All Things Simple: Inspiration for a Simple Life, for the recipe.

Grilled and ready to pop in the oven to melt the cheese.  I used KC Masterpiece Original barbecue sauce.  I think next time I'd like to try a more smoky flavored sauce.
A hit!  It's marinated and grilled, then topped and baked.  It's easy to prepare and makes a nice presentation (once it's taken off the cookie sheet!).  Click here for the link to the original recipe on All Things Simple by Kim McCrary.  I followed her recipe pretty closely.  As Kim suggests, I marinated the chicken for about a half hour prior to grilling.  The only changes I made were:  She used Montreal Steak Seasoning in her marinade, which I replaced with Montreal Chicken Seasoning.  I also used a smaller can (10 oz.) of Rotel tomatoes and I had one additional chicken breast. Somehow, my chicken turned out just as tomato-y as hers appear in her photo.   I probably also upped the amount of cheese because, well, I just love cheese and it's hard to overdo yummy melted cheese.  I used sharp cheddar instead of colby with the monterey jack just because I didn't have any colby on hand.  The final change I made was to cook and crumble a nice smoky bacon rather than use bacon bits.  One piece of bacon per chicken breast seemed adequate.

After baking, the cheese is all melty goodness.  

We completed the meal with a mixed greens salad and some corn on the cob.  The final flourish was the white wine we got on our trip to Cedarburg, Settlement Gold.  It was delicious.  Sweet with a slight apple flavor.  A very good, inexpensive wine. 


Friday, April 4, 2014

Tax Time Pick-Me-Up

A very good friend is an accountant.  When tax season rolls around, she and her partner and their staff are always swamped with work.  They barely can come up for air.  When I stopped by recently to turn in my signed e-forms, I also dropped off a little pick-me-up snack to keep them going through the afternoon.

Sausage cheese balls: tax free but not guilt free
Sausage cheese balls are a staple at parties and breakfasts in the South.  They are definitely not a health food, but -- yum!

Sausage cheese balls have been a favorite of mine for many years.  I don't make them very often because of health concerns, but they are popular at our house around the holidays or other times people want a treat.  Our son, for example, recently requested them as part of his birthday breakfast.  A dear friend of mine from my Tennessee teenage years also now lives in northern Illinois.  She always makes sausage cheese balls for parties.  I remember her mother-in-law once sniffing, "You Southern girls certainly like your sausage cheese balls."  Why, yes, Mrs. Irish Chicago, we certainly do!  And you better not get in between us and our sausage balls or we might knock you over!  While I don't actually advocate violence, I do advocate these savory snacks.

They are a little bit of work to make, but worth it.  The recipe I use comes from Tennessee Pride, which is the only kind of bulk sausage I buy, but you can use any brand.  Sharp or extra sharp cheddar cheese is also a must.  The mixing takes time, especially depending how much biscuit mix you try to work in.  My daughter uses two cups when she makes these, but I think it is worth the trouble to mix in three full cups, but it does involve using your hands and pulling the meat and cheese mix apart to get more dry ingredients to adhere.  Here you can see the sausage/cheese combination before and after the biscuit mix is incorporated.


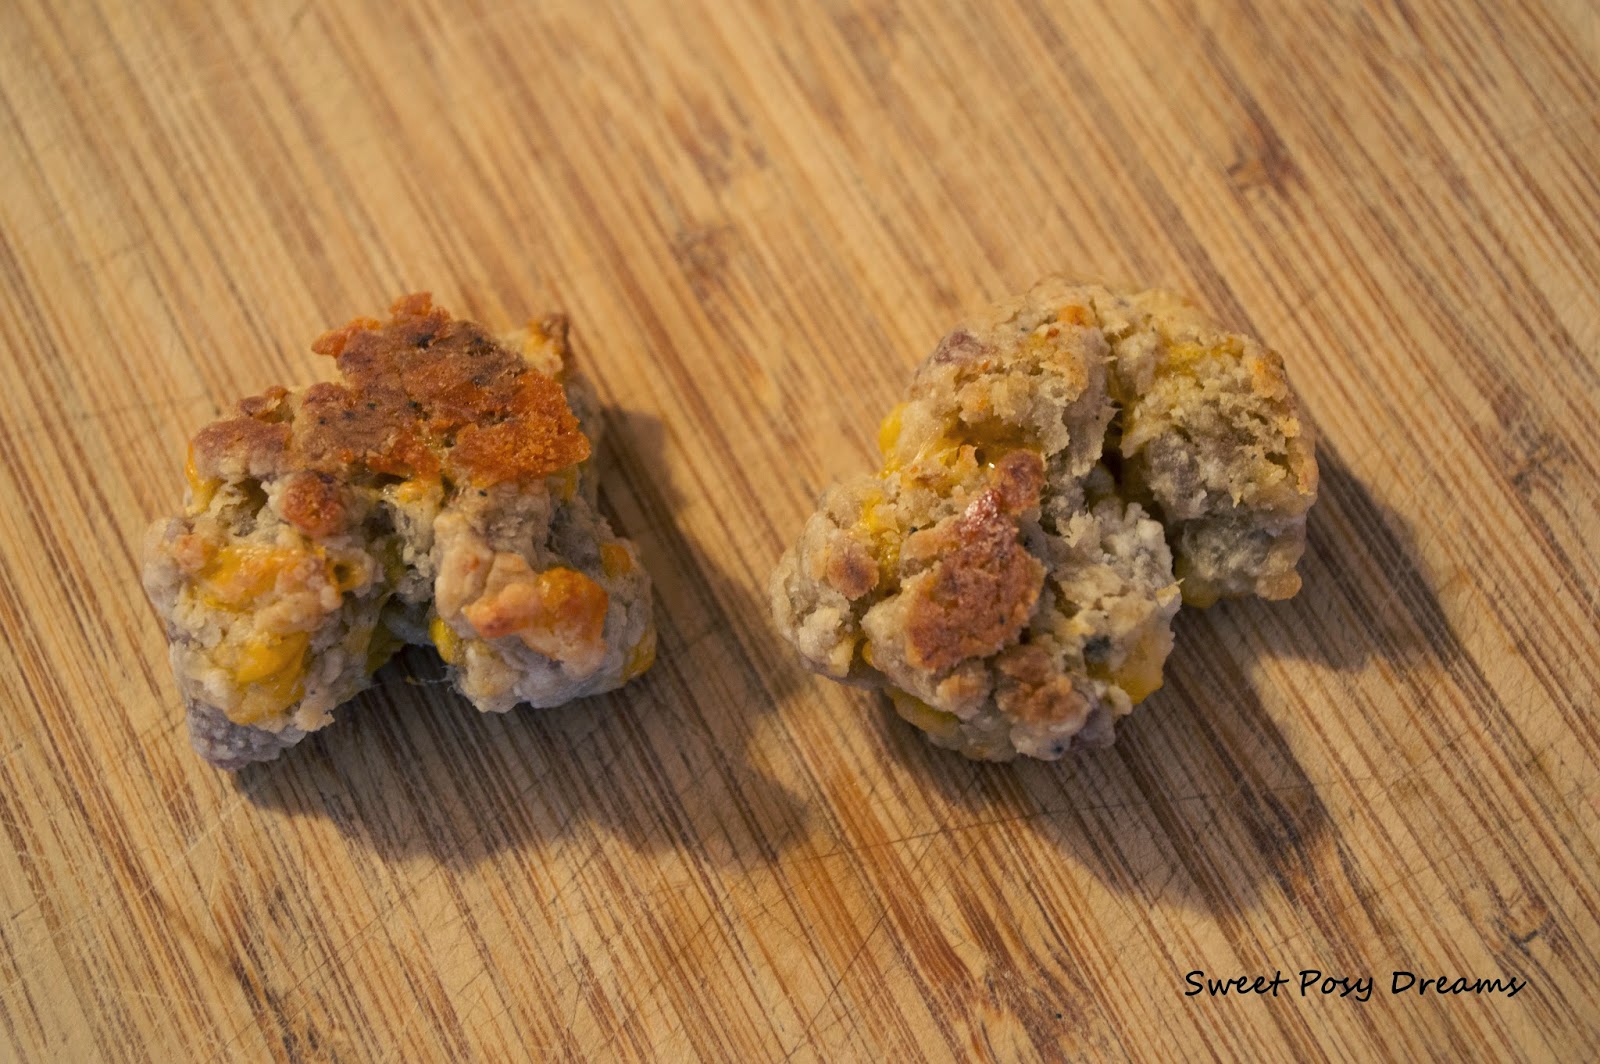
After baking, your sausage balls should be golden and crispy, round bite-sized balls like this:


But if they turn out like this,


flat or misshapen blobs, don't worry.  Eat them anyway, they'll taste just as good!


Sausage Cheese Balls

1 pound bulk (or roll) sausage, mild or hot
2 cups shredded sharp or extra sharp cheddar cheese
2-3 cups biscuit mix (like Bisquick)

Preheat oven to 375 degrees F.  Using fork or hands, combine sausage and cheese in large mixing bowl .  Blend in biscuit mix a little bit at a time, using hands, until well mixed.  Roll into 1-inch balls and place on lightly greased cookie sheet.  Bake 10-15 minutes or until golden brown.  You can flip the balls over halfway through baking if desired.  Serve warm or at room temperature.


Makes approximately 75.

Printable recipe


Monday, March 25, 2013

A Not Too Sweet Chocolate Treat


Starbucks.  I have to admit, I don't get it.  Not being a coffee drinker, I have no real way to understand the whole phenomenon.  Not that I begrudge people their addictions.  I have a well established problem with Diet Coke.  It started in the early 1980s with Tab and progressed from there.  The difference is: on a car trip, I am perfectly happy with a $1.00 medium Diet Coke from McDonald's.  I don't need to find a Starbucks and invest in a grande dolce latte whatever.  


On a recent trip to Tennessee, I stopped to pick up my daughter from her apartment about three hours south of where I live.  Like many young people, she discovered coffee drinks in high school and college.  "Can we stop for coffee and breakfast?" she asked.  My bowl of Honey Bunches of Oats with almonds was wearing off by then, so I said sure.  She directed me to the Starbucks around the corner.  Since I had no idea what kind of breakfast I would find there, we had to go in.  She knew exactly what she wanted -- a slice of banana bread and some drink name that made no sense to me.  I couldn't decide what to get.  The lemon cake looked good -- except for the icing.  The chocolate bread looked good -- except for the cinnamon.  I finally chose a cookie, which was okay, but not something that would induce me to return.  The look of that chocolate bread, though, stuck with me.

When I got home last week, I must have still had the vision of Starbucks' chocolate bread lingering in my brain because when I looked in the pantry at the cookbooks, my hand went to the Hershey's 1934 Cookbook (which is actually a 1993 updated and expanded version of the cookbook), where I found a recipe for Chocolate Tea Bread.  It's a simple recipe that results in a nice chocolate loaf that is nutty, a little chewy, and not very sweet.  Mmmm.  I'm not sure how well my cake would go with a caramel macchiato, since Starbucks' chocolate cinnamon bread has 40 grams of sugar in a single slice whereas mine has about 134 grams in the whole loaf and no cinnamon, but it goes perfectly with milk or even Diet Coke!


Chocolate Tea Bread
slightly adapted from Hershey's 1934 Cookbook

1/4 cup unsalted butter, softened
2/3 cup sugar
1 egg
1 1/2 cups all-purpose flour
1 teaspoon baking soda
1/4 teaspoon salt
1/3 cup cocoa
1 cup buttermilk
1/2 cup sour cream
3/4 cup chopped walnuts


Preheat oven to 350 degrees F.  Grease and lightly flour an 8 x 4 x 2 inch loaf pan.

In large mixing bowl, beat butter until creamy.  Gradually add sugar, beating until well blended.  Add egg; beat well.  Sift together flour, baking soda and salt; add cocoa to dry ingredients and whisk together.  Add flour mixture to butter mixture in three parts, alternately with buttermilk.  Stir in sour cream.  Add nuts and mix just until blended.  Pour batter into prepared pan.
Bake approximately 1 hour and 15-20 minutes or until wooden pick comes out clean.  Cool 10 minutes in pan and then remove to wire rack.


Thursday, March 14, 2013

Something Fishy

I am back among the living, having come out of the weeds and the zombie state of an imminent deadline.  After a weekend spent celebrating the baby's twenty-first birthday, I have now settled back into my usual routine.


It is still winter here, despite the occasional robin sighting, so last night I decided on a warming meal of seafood chowder.  I had eaten clam chowder lots of times, but didn't discover seafood chowder until a trip to Ireland in 2009.  Our daughter went to the University of Limerick for a semester, and she and I spent about ten days driving along the west coast of Ireland before school started.  Being cheap, I soon learned that a bowl of chowder, served with that wonderful Irish brown bread, made a fabulous, inexpensive meal.  It was available almost everywhere, and I never had a bad bowl.


I recently watched Ina Garten make seafood chowder on Food Network, so when I saw wild-caught shrimp at the grocery store, I decided to try it.  I followed her recipe as closely as I could, only substituting cod for monkfish, which was not available.  This is a hearty, fishy soup, loaded with fish, shrimp, scallops, and crab meat.


A pound of shrimp, half pound of scallops, a little more
than a half pound of cod, and  six ounces of crab meat

There are vegetables, too: carrots, potatoes, celery, corn, and onion, but seafood is definitely the star of this chowder. The husband actually said he would like more potatoes, and I think I agree with him.

The vegetables simmering before the stock and seafood are added.

I would also add more flavoring I think.  Some recipe reviewers said they added a touch of cayenne.  That might help.  It was very good overall, but a little mild.  The stock was flavored with thyme, onion, and garlic, but it just needed more ooomph.  Maybe I didn't add enough salt and pepper.  For the recipe, you can click the Food Network link, here.


Thursday, February 7, 2013

Souped Up Meatballs

We've finally been getting our winter snow here in northern Illinois.  It's been beautiful.

Mourning dove taken from my office window.

Snow, however, calls for hearty, warming dinners.  As I walked through the grocery store the other morning, I thought about the oniony meatballs my mother used to make.  A package of ground chuck and a stroll through the soup aisle, and I was good to go.  This makes a very easy and flavorful change of pace for ground beef.

I served them over egg noodles, but they are also very good with mashed potatoes.

Souped Up Onion Meatballs

1 pound ground chuck
3/4 cup (approx.) fresh bread crumbs
1 egg
Salt and pepper
2 teaspoons vegetable oil
1 10.5 oz. can of French onion soup (I use Campbell’s)
1/2 cup water

Mix meat, bread crumbs, and egg together.  Season with cracked pepper and very lightly with salt (the soup will add extra salt).   Shape into 1 to 1-1/2 inch meatballs.

Heat oil in non-stick skillet over high heat.  Add meatballs and reduce heat to medium high.  Brown the meatballs, turning frequently.  Add the soup and water.  Cover and reduce heat to low.  Simmer over low heat for 30 minutes, stirring occasionally.

Remove lid and cook over low to medium low heat for 15 minutes to reduce liquid.

Makes approximately 30 meatballs.


Monday, January 28, 2013

A Savory Muffin to Ward Off the Gloomies

Yesterday was a dreary day filled with gray skies and freezing rain.  Fortunately, I had planned for such a day and had all the ingredients to make a big pot of comforting vegetable beef soup (recipe here) and savory Parmesan muffins.


I don't know where I got the recipe for these muffins.  I have had it several years and I had jotted it down on a scrap of paper, so I imagine I pulled it from a magazine in the dentist's waiting room.  The muffins are pretty homely and ordinary to look at, but they make a great accompaniment to soup or even steak.  It's easy to halve the recipe, which is what I did yesterday since there were only the two of us.  Serve them hot!


Savory Parmesan Muffins

2 eggs
3/4 cup milk
1/2 cup olive oil
1 cup grated fresh Parmesan cheese, divided
1 1/2 cups flour
2 tablespoons sugar
1/4 teaspoon baking powder
1/4 teaspoon baking soda
1 teaspoon powdered or crushed dried rosemary
1/2 teaspoon salt
1/2 teaspoon black pepper
1 teaspoon fresh garlic, finely chopped
  

Preheat oven to 350 degrees F.  Grease a muffin pan.

In small bowl, whisk together eggs, milk and olive oil.  In separate, large bowl, whisk together flour, sugar, baking powder, soda, rosemary, salt, pepper, and garlic.  Add 3/4 cup of the Parmesan cheese, mixing until cheese is well distributed.  Add wet ingredients and mix until combined.
Spoon into well-greased muffin tins.  Sprinkle remaining cheese on tops.  Bake about 20 minutes.  Serve hot.

Makes 12 1/2-cup muffins.


The other bright spot in a gray few days is this bunch of sunny daffodils the husband picked up at the grocery store. They were tight buds when he brought them home, but every one has opened into a happy little harbinger of spring to come.


Monday, January 21, 2013

With One Meatball

When I was growing up, my mother would occasionally make meatballs and cabbage.  It was never my favorite dish -- I prefer my cabbage raw -- yet I made it for my own family as they grew up.  It's a simple dish of porcupine-style, rice-studded meatballs, stewed with cabbage and tomatoes.


The most appealing thing about this meal growing up was it would usually prompt my dad to sing a few bars of One Meatball, a Depression era tune recorded by The Andrews Sisters among others.  Of course, I never heard a "real" version of the song until the internet came along.  In fact, I wasn't even sure there was a real version.  And frankly, no one else sings it like my dad.  Every time I eat this dish, I hear him warbling "You don't get any bread with one meatball."

Dad isn't much of a singer, but he did have one other signature song.  As with One Meatball, my dad only sang the "good part" of his other song, Jack of Diamonds.  Here is the part I learned as a wee little child.
"If the ocean was whiskey, and I was a duck/I'd dive to the bottom and never come up."  
This was followed by a loud hiccup.  I love the complete political incorrectness of teaching that song to little kids.  By the way, my father is the next thing to a teetotaler, so it's especially funny that this is "his song."

Just as I've shared the meatball cabbage meal with my family, I also passed my father's two songs along to my kids.  I hope they'll remember to sing them to their kids someday too.

Thursday, December 20, 2012

Santa, Are You Reading?

I keep an electric hand mixer around for small jobs or when I just don't want to lug out the heavy Kitchen Aid.  I've been nursing mine along for a while -- one of the beaters had a broken wire.  And then today:

That peppermint filling was just too much!

Hello Santa, are you reading?


UPDATE:
My lovely daughter got me a new KitchenAid handmixer for Christmas!  Yay!

Wednesday, December 19, 2012

A Dark and Stormy Christmas Cookie

Twas the week before Christmas and all through the house and kitchen, the cookies were baked and frozen -- to prevent the spouse from snitchin'!

Last week, when I shared my Orange Chocolate Chippers, I mentioned that I had tried another new cookie recipe this year.  I'll admit, I snitched one of these before I packed them away in the freezer.  Well, after all, a girl has to make sure they are edible before sharing them with the family, right?


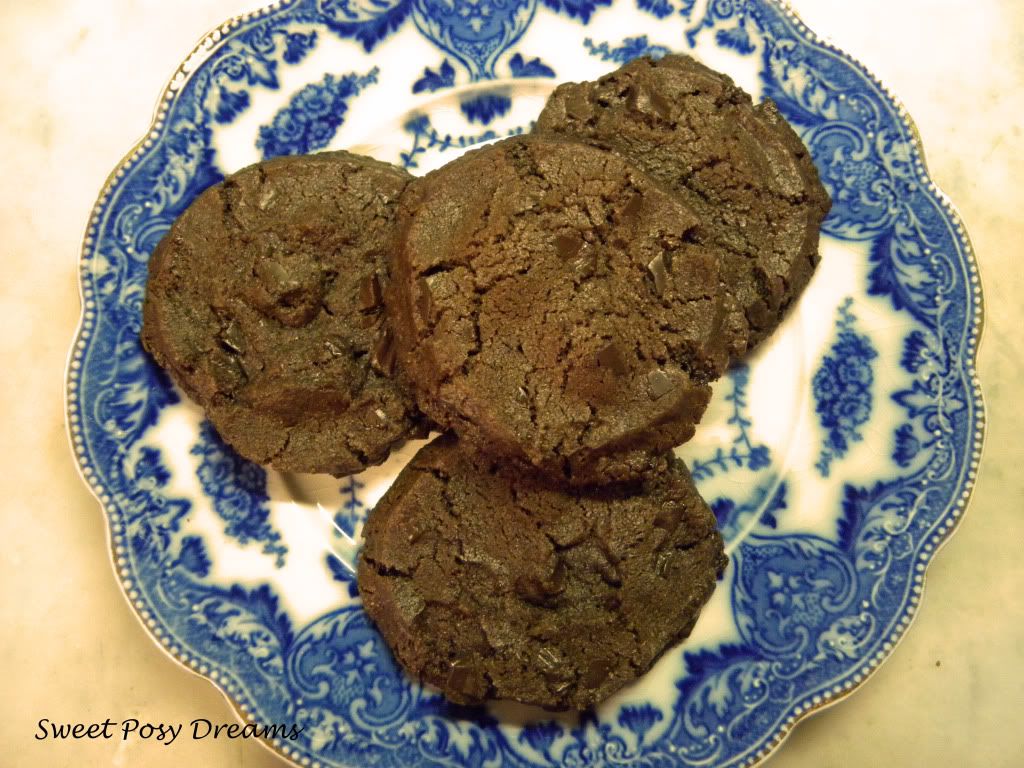
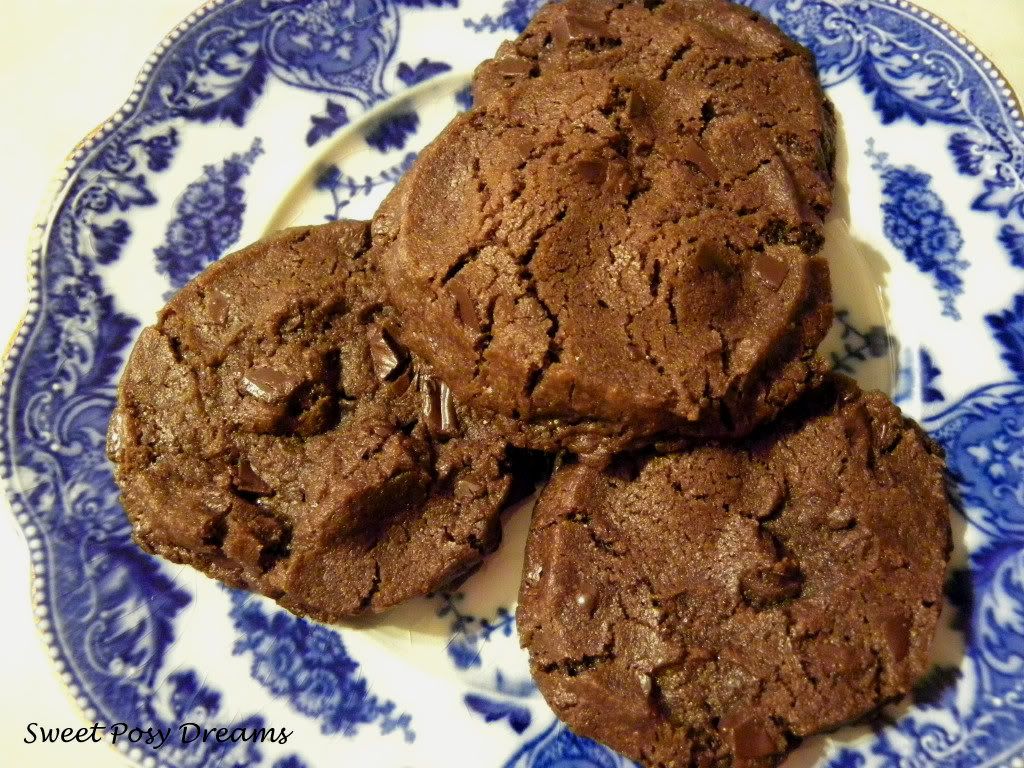
I clipped the recipe for Dorie's Dark and Stormies from a Chicago Tribune 2008 cookie contest article, but I never tried them before.  Now I kick myself for waiting so long.  Easy to make and so chocolaty scrumptious.  The recipe is available online on page two of this article from the Tribune archives.  The recipe says it makes three dozen cookies, but somehow I only got two dozen.  I did not use Dutch process cocoa, I used regular Hershey's.  For the chocolate bits, I chopped up five ounces of Ghirardelli 60% cacao bittersweet chocolate.

You know you want one.

Friday, December 14, 2012

Orange You Glad I Made Cookies?

Remember that old knock-knock joke?  Orange you glad I didn't say banana?  Well, I made a new Christmas cookie that's no joke -- Orange Chocolate Chippers.

Christmas cookies are a big thing at our house.  There are some traditional favorites that I make every year, like the Italian Wedding Cookies, Candy Cane Cookies, and Butter Cookies that I shared with you last year.  I also like to add in something new.  Last year it was Martha Stewart's Cream Cheese Walnut Cookies, which became a favorite of the husband's, so they made it back onto this year's hit parade.

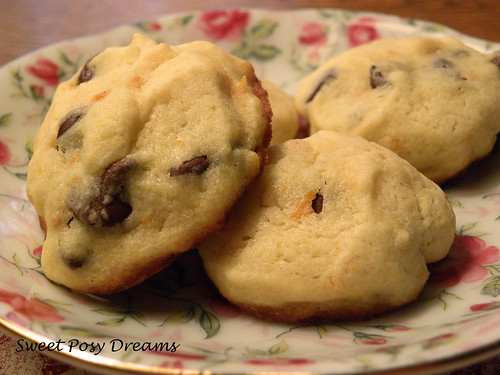
Orange chocolate chippers

This year, I added two cookies to the repertoire.  Today I'll share the first one, Orange Chocolate Chippers.  I found a recipe in an old-ish cookbook from my husband's uncle's collection.  The book has an insanely long title: Senior Pilgrim Fellowship, United Church of Christ, Beacon Falls, Connecticut.  If there was another title, it didn't leap out at me.  This is one of those great cookbooks where all the ladies contributed their favorite recipes to raise money for their organization.  I like this kind of cookbook because the recipes are not trendy or "foodie;" they are tasty, do-able recipes that regular women made for their families and bridge clubs.  

When I saw the recipe for an orange and chocolate cookie, I knew I had to try it.  I changed the original recipe a little bit to include orange juice and baking powder.  I used orange peel and juice from some fruit my father-in-law had sent from Florida.  I don't know what variety they were, but they were not navel oranges; they were much more flavorful.  In looking at the website of the grower where he shops, I think they might have been Robinson tangerines, which is a cross of 3/4 tangerine and 1/4 grapefruit.  With navel oranges, I don't think you'd get the same strong citrusy pop that my cookies have, so I recommend tangerines or tangelos to really get that citrus flavor.


Orange Chocolate Chippers
Adapted from Audrey Gendron’s recipe in Senior Pilgrim Fellowship,
United Church of Christ, Beacon Falls, Connecticut cookbook, 1982

Orange chocolate chippers closeup
1 cup shortening
1 cup sugar
3 oz. cream cheese, softened
2 eggs
2 tablespoons grated orange/tangerine peel
1 teaspoon vanilla
1 teaspoon fresh orange/tangerine juice
2 cups flour
1 teaspoon salt
1/4 teaspoon baking powder
1 cup semisweet chocolate chips

Preheat oven to 350 degrees F.

Sift together flour, salt, and baking powder; set aside. 

Cream shortening, sugar, and cream cheese.  Add eggs, orange peel, vanilla, and orange juice.  Beat well.  Add flour mixture to creamed mixture.  Mix well.  Stir in chocolate chips.  Drop by rounded teaspoonfuls onto greased cookie sheet.  Bake about 7 minutes at 350 degrees F.  Cool on wire racks.

Makes approximately 56 cookies.


Printable recipe


Tuesday, November 27, 2012

Frosty Times Call for a Frosty Dessert

Winter is almost here, at least in most parts of the U.S., so why am I writing about ice cream?  This year on Thanksgiving, I served ice cream in addition to pumpkin pie.  Not pumpkin pie a la mode, after all, whipped cream is the proper topping for pumpkin pie.  (In the husband's case, lots and lots of whipped cream.)  In our family of four, there are only two pumpkin pie eaters -- the husband and our daughter.  Daughter likes it so much she has even been known to request a pumpkin pie for her month of May birthday!  Our son and I, however, are not pumpkin pie fans.  So when I asked him what he wanted for his Thanksgiving dessert, he asked for "that ice cream dessert."


I got the recipe for "that ice cream dessert" when we lived in the little town of Harvard, Illinois.  Harvard is the end of the train line, so when we were ready to move out of our Chicago condo and into a single family house, that's where we wound up.  We just kept going out until we found something decent we could afford and, before we knew it, we were at the end of the line in Harvard.

Harvard is a really small town.  When we lived there, the population was around 6,000 people.  It has increased since then to more than 9,000.  At one time, Harvard was the center point of an area with the greatest milk production in the nation.  Thus, the big event in Harvard each year is Milk Days, complete with a parade, a carnival, a Milk Queen, bed races, and big wheel races.  Our daughter was in preschool when we lived there, so the big wheel race was important. She competed and lost.  Our neighbor, whose daughter was the same age, put his child in training for the big wheel race.  I am not making this up.  He took his four-year-old daughter to an empty parking lot several times before the race for training.  She won her age category.  In a couple of years, she was entered in the Milk Days Princess competition and eventually was crowned Milk Queen.  So I suppose that early training paid off.

The logo my husband designed.
I belonged to a women's group named Women for Harvard.  It was a good group of women, mostly young. We raised money to stock a little store that was set up one weekend in December for Shopping with Santa.  Children could come in, visit with Santa Claus, have their picture taken, and be taken into a secret store -- no parents allowed -- to shop.  Gifts cost no more than a couple of dollars.  There was a sample of each item and the rest were wrapped, so the child could surprise a family member on Christmas morning.  That was such a wonderful event.  Sadly, I don't think they have the store anymore.  What they do have is the same group logo that my husband designed for them twenty years ago.  It features Harmilda, the town mascot.  I really can't believe they are still using a cow logo for a women's group!  Anyway, we always had dessert at our monthly meetings, which rotated among the members' homes. One meeting, Julie, that month's hostess, brought out this yummy ice cream dessert.  All the women, including me, raved!  We had to have the recipe.  Julie kind of laughed about that.  It's the easiest thing in the world, and you can change up the flavors any way you like.  I have made this with mint ice cream, pecans, any combination would be good.  For Thanksgiving, I made the original version, Peanut Bar Ice Cream Dessert, one we might call the Buster Bar Dessert if "Buster" wasn't trademarked by Dairy Queen.


Peanut Bar Ice Cream Dessert


40 Oreo cookies, crushed into crumbs
1/4 cup melted butter
1/2 gallon softened vanilla ice cream
15 oz. hot fudge topping
2-3 tablespoons chocolate syrup
8 oz. Cool Whip
1 cup peanuts

Reserve about 2-3 tablespoons of cookie crumbs.  Combine remaining cookie crumbs and melted butter in small bowl.  Press crumb/butter mixture in bottom of a 9x13 inch baking pan and refrigerate for about 15 minutes.

Layer remaining ingredients as follows, spreading each layer as evenly as possible:
Cookie crumbs, ice cream, fudge sauce (fill in bare areas with a little chocolate syrup), nuts, Cool Whip, reserved cookie crumbs (these should not fully cover the Cool Whip)

Freeze several hours until firm.

Note:  You can use any flavor of ice cream you wish and change the nuts as well.  Chopped pecans make a nice change.


Friday, October 12, 2012

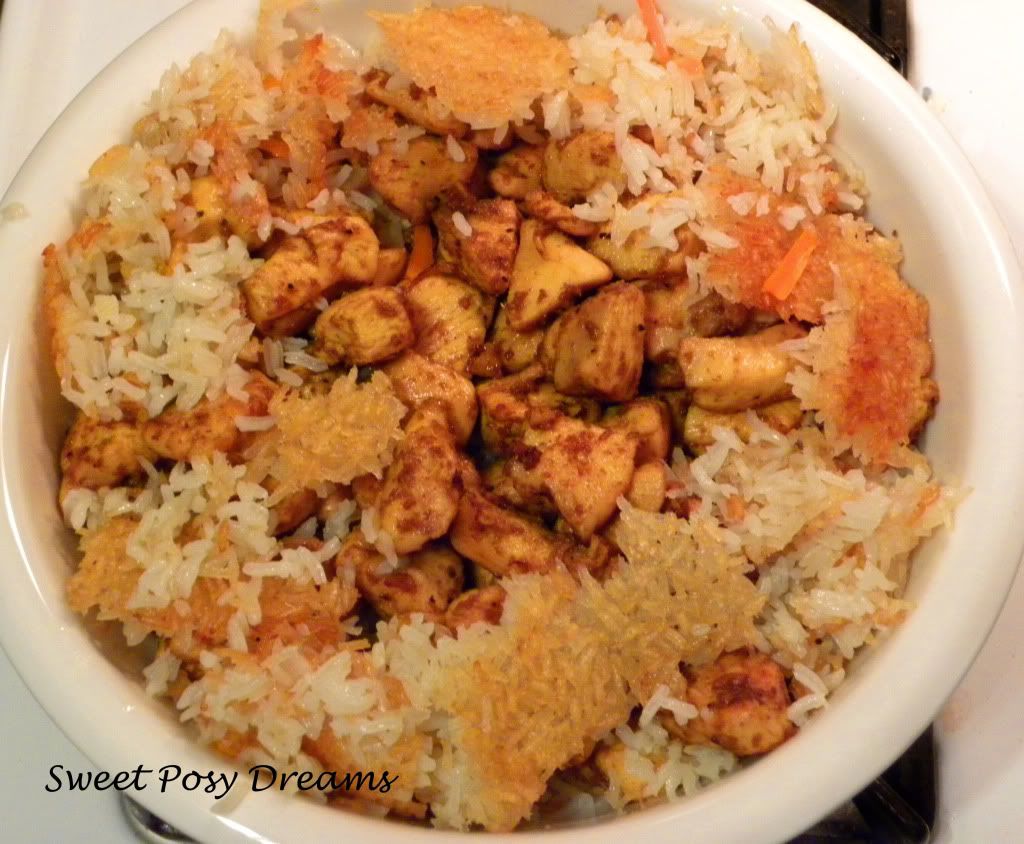
Chicken Palaw to Fill a Bare Table

"Beware the barrenness of a busy life."  When Socrates said this, I doubt he was talking about my dinner table, but he might as well have been.  When I get too busy with work or home projects or whatever fills my days, sometimes the dinner table takes on a barren, forlorn look, as though nothing of value will appear there -- a mere baked potato, pasta with sauce from a jar, or take-out.  I can only take so much of this, however, before I crave "real" food.

Recently I've been busy moving furniture, painting, patching, ripping out carpet, and more painting.  After a while, though, a girl needs a good meal to keep her going.  So the other day I got the urge for Chicken Palaw, a recipe I copied out of Country Living magazine many years ago.  (Maybe I was inspired to cook this by those viewings of The Best Exotic Marigold Hotel, who knows?) As you can tell from the name, it's Indian influenced, but not really authentic Indian fare.  Still, it's quite flavorful and a change of pace for a weeknight dinner.


Chicken Palaw

From Country Living magazine


1 1/4 cups basmati rice 
1 1/2 teaspoons salt
1/4 cup butter
3 tablespoons olive oil
2 large carrots, cut in 1/8-inch julienne strips
2 whole boneless chicken breasts, cut in 2-inch chunks
1/4 cup apple juice
1 tablespoon curry powder
1/4 teaspoon ground coriander
1/4 teaspoon ground cumin
2 tablespoons raisins
2 tablespoons pistachios
2 tablespoons sliced almonds

In heavy 5-quart stock pot, heat 2 quarts water to boiling over high heat.  Stir in rice and 1 teaspoon salt.  Return to boiling and cook, uncovered, 10 minutes.  Drain rice.

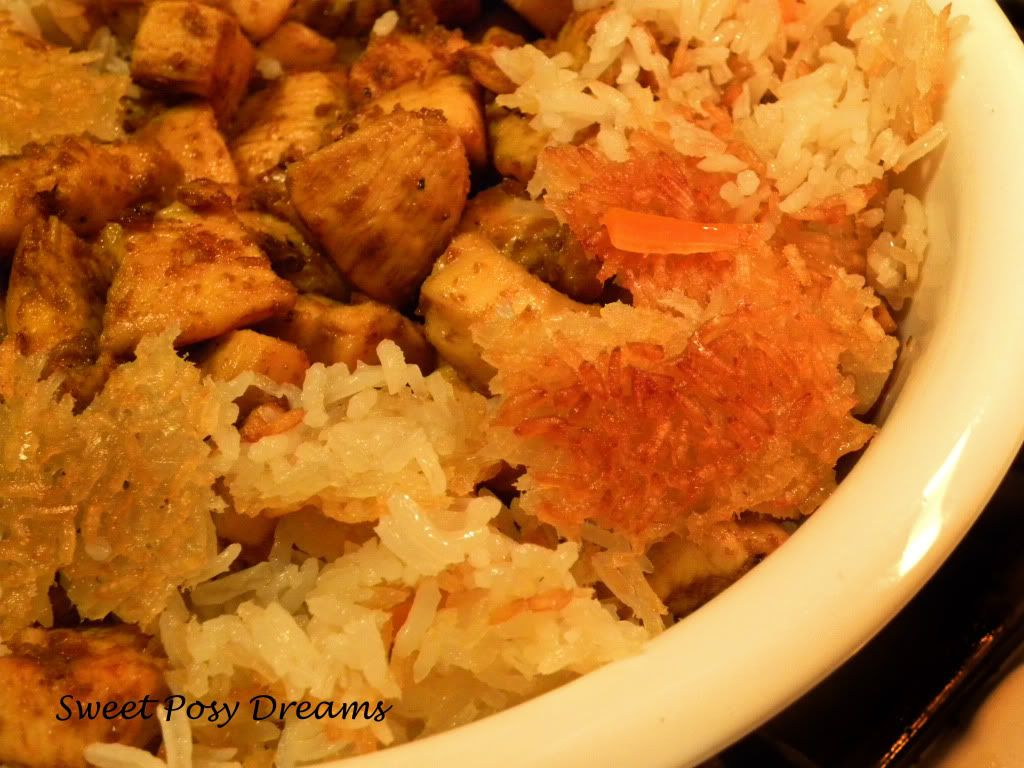
In same pan, melt butter with 2 tablespoons olive oil over low heat.  Spoon half of the rice into pan and press down with back of spoon to make a firm layer that covers the bottom of the pan.  Spoon remaining rice loosely on top, then top this with carrot strips.  Cover top of pan with linen towel and a tight lid.  Cook 35-40 minutes or until bottom layer forms a crisp, golden crust.

Meanwhile, in large skillet, sauté chicken in remaining 1 tablespoon olive oil over medium heat until golden on all sides.  Add apple juice, spices, and ½ teaspoon salt.  Stir until chicken is coated with spices.  Cook, stirring frequently, until chicken is cooked through and liquid is evaporated, about 5 minutes.

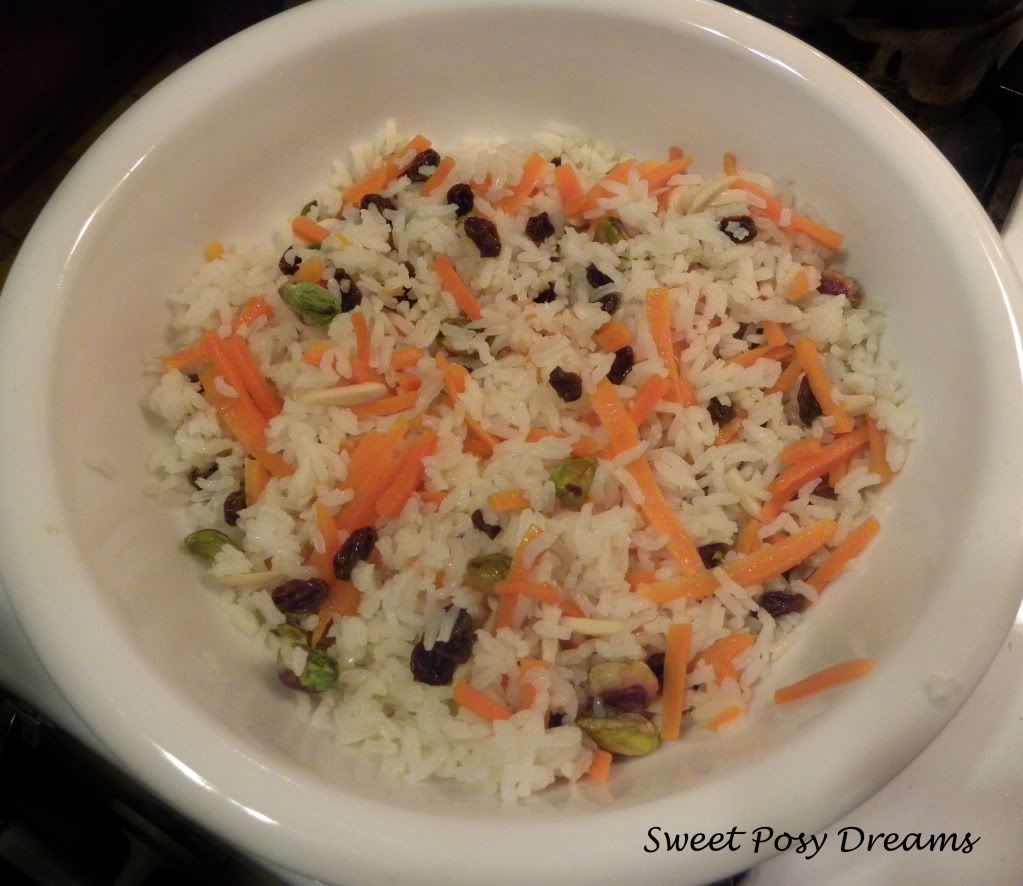
To serve, in large bowl, combine steamed part of rice/carrots with raisins and nuts and toss to blend.  Top with chicken mixture.  Break bottom rice crust into pieces and place around the edge.

The rice base before adding the chicken -- rice and carrots tossed with pistachios, slivered almonds, and raisins.