Pages

Saturday, October 29, 2011

No Sleeping Dogs Allowed


I spent much of yesterday in a hospital waiting room as a family member had surgery.  (Everything went fine.)  Periodically the desk staff would call a family name for someone to go up and take a call from the OR with an update on their patient.  There was a young woman in the waiting room who fell sound asleep, sitting up with her feet up and head slumped down.  A hospital staffer tried to wake her for several minutes and finally got her roused enough to take a call.  Soon, the girl was back asleep.  An hour or so later, a staffer tried again to wake her.  I've never seen anyone sleep this soundly.  The general feeling was that either she was drugged or something was wrong.  This second staffer tried for about five minutes to wake the girl.  Finally we heard "Code Blue, main lobby."  Doctors, residents, nurses, and technicians came rushing into the lobby from all sides.  A gurney was brought in.  It was a little like a TV show.  About that time, the staff roused the girl.  The hospital staff left the lobby rather sheepishly, and the young woman apparently heard the news about her patient and then walked outside for some fresh air.  My party left for lunch, returned, and saw the girl again slumped over in a dead sleep.  She did not move for at least an hour.  Eventually she woke of her own accord, just in time to go pick up her patient.  It was a kind of fascinating tableau.  Was she on drugs?  Was she really exhausted from being up with a sick person for days?  Some people snickered the first time she would not wake up.  Others were concerned.  It was one of those cases when you imagine different possibilities, but never know the truth.  I just hope she and her patient made it home safely and are both recovering from whatever ailed them.

Monday, October 24, 2011

Mickey's Magical Diner

We were in St. Paul last weekend.  My husband couldn’t get enough of the potatoes at Mickey’s Dining Car.  If you saw the movie A Prairie Home Companion, you know Mickey’s Diner.  The movie opened and closed at Mickey’s.  Mickey’s is great.  It’s everything you expect of a city diner – it’s small and crowded, has a harried wait staff, the regulars at the counter, and greasy food.  There’s a quotation on their web site from a review by Neal Kaplan for The New York Times that pretty well sums up the place: “Malts so thick you could eat them with a fork, hamburgers so juicy you can use a spoon, and waitresses so ornery you better know exactly what you want by the time they reach you.” 

The truth is, the staff isn’t ornery exactly; they just don’t suffer fools.  At all.  We ate breakfast at the counter.  It’s tight.  A man sitting next to my husband was trying to work a crossword puzzle.  He asked the waitress if he could move down the counter when some seats opened up.  She grudgingly agreed.  He hadn’t gotten his food yet or opened up his napkin-wrapped silverware.  He got up, taking his newspaper and coffee cup, and sat down at the other end of the counter.  “Take your water and silverware with you!” the waitress snapped.  You shouldn’t mess with the staff in a place that has clear-cut rules posted above the counter.  You must have two people and a $3 order minimum to use a booth, no tips can be put on credit cards, and you must vacate your seat in 30 minutes.  Other rules: no smoking, no checks, no take-out.  Follow the rules, and no one gets hurt.


Being mild-mannered rule followers, we just loved everything about Mickey’s.  The art deco dining car is on the National Register of Historic Places.  It was built in 1937 and has been open about 70 years – 365 days a year, 24 hours a day.  That’s a lot of hash browns, folks!  And the breakfast is fantastic!  Check your cholesterol concerns at the door, though, because you can’t eat healthy at Mickey’s.  Just forget about that and enjoy!  My husband had a Denver omelet and hash browns.  I had a bacon and monterey jack omelet (cheese costs extra! ) that was unbelievable.  The eggs were the lightest I’ve ever eaten and the bacon was super crispy. 

The breakfast set us up for a full day of sightseeing in St. Paul and Minneapolis.  The big breakfast, however, threw us into a late lunch, so by the time we were hungry for dinner, it was 10 p.m.  We left the Fitzgerald Theater and wondered, what’s open at 10 p.m. in downtown St. Paul?  We knew the answer: Mickey’s!  We managed to snag one of the four booths and eventually one of the regulars alerted the busy waitress that we were there.  My husband, remembering those hash browns, ordered potatoes O’Brien, which he loved.  For me, fantastic fries and a burger topped with lots of cold, fresh lettuce and tomato.  Absolute bliss.

If you're in St. Paul, don't miss Mickey's Dining Car!  A true classic.


Saturday, October 22, 2011

Mousehouse


We were passing through central Wisconsin today and couldn't resist stopping at the Mousehouse in Windsor for a little cheese.  Notice the floodlights all around the rooftop mouse.  I wonder how cool, yet creepy, this guy looks at night, holding his illuminated cheese?  I like the button detailing on his overalls and the way his tail curls around his leg. Two more giant fiberglass rodents greet visitors in the vestibule.  

We picked up a little assortment bag of cheese cubes and sausage bites to eat on the ride home.  So tasty!  Great cheese, great sausage, great mice.  What's not to love?


Wednesday, October 19, 2011

Super Easy Fall Decorating

If you know me, even from my blog, you've probably figured out that I'm a fan of easy and, better yet, easy and inexpensive.  That's why I love decorating my window boxes in the fall.  A bale of straw -- less than $2 -- and a few pumpkins, and I'm done.  Easy and way cheaper than buying potting soil and annuals!  This lasts until Thanksgiving.  Then I pull out the straw and use it to mulch the garden.  In December, I fill the window boxes with evergreen branches, which I leave in until February.

Monday, October 17, 2011

Almond Poppy Seed Bread

It's a gorgeous cool day here in the Midwest.  A great day for baking.  I wanted to make a treat for a friend who is cleaning out her garage today (that deserves a treat!), so this recipe was perfect because it makes two mini loaves. One to give and one to keep!

Time for a new whisk!
This is such an easy recipe; you don't even need to use a mixer.  I got this recipe from a woman I met at Esther's Place Fiber Arts Studio in Big Rock, Illinois a couple of years ago.  That day, I was there learning to make felted slippers.  (I love my felted slippers -- they are pink and orange, one of my favorite color combinations -- but I can't wear them in our house because they would get covered in Alfie hair.  So I pack them whenever I go to visit my parents.  They have bamboo floors in their condo, and the slippers are fabulous for sliding!  Every time I slide through the dining room to the kitchen door, my dad asks me when I'm going to grow up.  "Never" is the obvious answer to that one!)  Anyway, another woman was at Esther's Place that day working on a project, and she had brought in one of these yummy almond poppy seed breads.  She kindly e-mailed the recipe to me the next day.  I don't know the origin of the recipe.  Because I can't leave well enough alone, I have altered it just a bit from the one she sent me.  I reduced the salt, oil and sugar a little and increased the poppy seeds by 1/2 tablespoon.

These are all the ingredients you need


Almond Poppy Seed Bread
(Makes two loaves)

Preheat oven to 350 degrees.  Grease and flour two mini loaf pans (9x5x3).

Sift together:
3 cups flour
1 teaspoon salt
1 ½ teaspoon baking powder

Mix in with spoon:
2 cups sugar
2 ½ tablespoons poppy seeds

In separate, large bowl, mix together:
3 beaten eggs
1 ½ cups milk
1 cup plus 2 tablespoons oil
1 tablespoon vanilla
1 ½ teaspoon almond flavoring


Add dry ingredients to wet in thirds (approximate).  Mix well after each addition with mixer or whisk.
Pour into prepared pans and bake 50-55 minutes, or until golden brown on top.  (Check during the last 5 or 10 minutes so as not to overcook.)  Remove from pans and let cool on racks.  Is also good warm!


Friday, October 14, 2011

Shortbread

abbey ruins at Holyrood Palace

When our family discovered fresh shortbread in a cafe at Holyrood Palace in Edinburgh several years ago, we were all hooked.  It was heavenly.  And it was baked for mere tourists, not for her majesty.  What is it like when the queen is in residence?  I have read that Queen Elizabeth stays there only one week a year, early each summer.  I would stay the whole summer just for the shortbread, but I suppose she has good cooks down in London, too.

When we returned home, I knew I had to make shortbread in my own kitchen.  Store-bought shortbread is not remotely in the same league as fresh.  I soon realized that I already had a very good shortbread recipe on my cookbook shelf in The Frugal Gourmet on Our Immigrant Ancestors: Recipes You Should Have Gotten from Your Grandmother by Jeff Smith. There are only four ingredients. I love the simplicity of this cookie. It is so easy to mix up, bake, and devour.  We eat them warm, we eat them cool, we eat them with ice cream, we eat them plain.  I just love this cookie!

This is my reworded version of the recipe found in The Frugal Gourmet on Our Immigrant Ancestors.  The quality of the butter really makes a difference in this cookie, as there are so few ingredients.  When I want to splurge, I use Kerrygold.


Shortbread

1/2 pound butter, softened
2 cups all-purpose flour
1 heaping tablespoon cornstarch
1/2 cup sugar
about 1/2 teaspoon of extra fine baker's sugar (optional)

Preheat oven to 325 degrees.

Sift the flour and cornstarch together into a mixing bowl.  Blend in the sugar with a spoon.  Cut the butter into 1/2" slices or cubes and add to the flour mixture.  Use a heavy-duty mixer to blend in the butter.

Turn the dough out onto a very lightly floured board and knead gently five or six times.  Line a baking sheet with parchment paper.  Place the dough on the baking sheet and form into a circle or rectangle a little less than 1/2" thick.  I use a lightly floured rolling pin to get a smooth surface.  Gently prick all over the surface of the dough with a fork.  If desired, lightly sprinkle the baker's sugar over the top (just a very small amount).

Bake at 325 for 30 minutes (I always check after 25 minutes) until the edges turn light brown.  Transfer on the parchment paper to a cooling rack.  Cut into wedges or squares before it is completely cool.

Fit for a queen!

Thursday, October 13, 2011

Naked Burrito Knock-off


I really like Qdoba’s naked queso burritos.  The last time I was at Qdoba I realized how easy it would be to recreate this dish at home.  This is a fast and easy meal, and I think it turned out really tasty!  Here’s my recipe.   You can alter it to suit ingredients you have on hand.  I just happened to have leftover chipotle peppers in the freezer and some jalapenos still in the garden.  I used dried herbs because that’s what I had available.  This makes enough for about four big servings.

For the “filling”:
1 3/4 pound lean ground chuck
salt and black pepper to taste
1 tablespoon chopped chipotle peppers in adobo sauce
1 tablespoon tomato paste
1 can reduced sodium black beans
1/2 can garbanzo beans
4 cups cooked rice (to make it really easy, use Minute Rice)

For the salsa:
2 cups diced tomato (I used roma)
3/4 cup diced bell pepper
1/3 cup diced onion
1 heaping tablespoon minced jalapeno pepper, seeds removed
3 teaspoons dried cilantro
1/2 teaspoon dried oregano

Toppings:
store-bought queso sauce, warmed in microwave
sour cream

Season the ground chuck with salt and pepper and brown in a non-stick skillet.  After it begins to brown, add the chopped chipotle peppers and tomato paste.  After the meat is well browned, reduce heat and allow to simmer (it will be somewhat dry if the meat is lean), stirring occasionally.  Heat the beans in microwave or a pan.

While the meat is browning, chop all the vegetables and combine in a medium-sized bowl for the salsa. 

To serve, layer in following order: rice, meat, beans, salsa, queso, sour cream.  I like to let everyone serve him/herself, putting the proportions of each ingredient desired.

Voila! Fast food Mexican at home!


Wednesday, October 12, 2011

Urban Farmer

I grew up in the country outside Nashville.  My folks had a large garden where we grew corn, potatoes, green beans, October beans, lima beans, squash, zucchini, onions, tomatoes, bell peppers, cucumbers and, some years, watermelons.  It was a large garden.  It was hard work, mostly for my parents who both had full-time jobs, but my brother and I had to help out.
 
We moved to that property when I was ten years old.  My parents had bought eleven acres from my Great Aunt Josie years before.  When my father retired from the army, they cleared out the old rundown farmhouse and landscaping and built a sprawling ranch house, planted trees, rhododendrons, and flowers, and started a big, wonderful garden.  In the early years of the garden, my brother and I were sent out with coffee cans to pick up rocks that turned up, endlessly it seemed, in the tilling.  We were put on weed pulling duty, too.  Johnson grass was our nemesis.  We also helped with the picking and “putting up.”  Which means we strung and broke up green beans, husked corn, and shelled lima beans until our thumbs were sore.  There was one job I could never do, though, and that was to pull the hornworms off the tomato plants.  Ewww!

My dad and daughter in the garden in early summer 1993
Growing up, I didn’t realize what a treasure it was to have a bountiful garden and really fresh produce.  Lots of people we knew had big gardens.  In late summer, for example, my aunt’s glasses would be speckled with corn “milk” from cutting corn off the cob in preparation for freezing.  For years now, ever since my parents moved into a senior condo, I’ve missed that garden.  The home canned tomatoes, the corn frozen on the day it was picked.  I try in my little yard to recreate what I can of that life.  I grow a few pots of tomatoes and herbs.  But, of course, it’s not at all the same.

The one thing I do have which is just like “home,” is walnuts.  Lots and lots of black walnuts.  My parents’ yard had an enormous, perfectly shaped, fabulous old walnut tree down by the road.  Kids would stop and rest under it as they walked back from the little market up the way.  In December, people would surreptitiously knock out the mistletoe that grew high up the branches.  It produced lots of walnuts.  My dad says he remembers one year hauling seven heaping wheelbarrows of walnuts down to the woods to dump.  We did mostly just dump our walnuts in the woods.  But some years, my brother and I would get a hammer, crack open some nuts and pry out the meat with a nail.

One of our walnut trees
Here at our house, we have five walnut trees around our yard.  Which is why I can’t really grow anything else, and have to grow my tomatoes in pots.  This year we have a bumper crop of walnuts, so I decided to harvest some.  Last time the daughter was home, we donned latex medical gloves and started husking.  (When we finished, we realized that the gloves leaked.  We now had badly stained fingertips and nails.  Not attractive.  And virtually impossible to remove.  After sugar scrubs, salt scrubs, orange goop, fingernail polish remover, hydrogen peroxide and a pumice stone, I still have some discoloration ten days later.)

Next we washed the nuts off a few times and set the pan out in the sun.  I covered the pan with a window screen to keep the squirrels from stealing our bounty.  That evening, I brought the pan in and left it on our enclosed back porch for nine days.  I should probably have waited longer, but I am not always a good waiter.  


Yesterday I got cracking.  After literally hours of cracking and picking out, I had four cups of nutmeats.  I felt like a real hunter/gatherer.  Well, at least a gatherer.  The nuts are so fragrant!  I plan to make a black walnut cake.  I’ll let you know if it turns out.


Sunday, October 9, 2011

Dirty Dog Prairie Fun


Can you tell he's been running?
It was an atypically warm October day here today – in the high 70s – so we went for a prairie walk.  Alfie loves nothing better than to run free in the prairie (although he actually stays mostly on the mown path).  There was no one else on the path, only one other car, and it was parked on the far side of the park, so Alfie was allowed off leash to be a “real dog,” a running, sniffing, exploring nature dog.  When we are able to let Alf loose at the prairie, he runs ahead and doubles back numerous times in the time it takes us to walk 50 yards.  All this with plenty of stops to sniff, to let other dogs know he’s passed by (if you know what I mean), and to poke his head into the tall prairie grass because, well, you just don’t know what intriguing things might be in there.

We have a usual circuit we walk that takes us around a good chunk of the 240 acres of the preserve.  Alfie knows the way, and never gets too far ahead.  A little more than halfway around our circuit, we cross a raised walkway over the wetland and walk up a slope to follow the path around a large pond.  Alfie often noses down to the pond but comes back up when we call.  Not today.  Maybe he was thirsty, or maybe he was really feeling the call of the wild, but he ran out into the shallow muck of the pond for a little drink. 


And, wow! Alfie says, there are FROGS in this pond!  Frogs that hop away and splash and are really fun to jump at and chase!  Cool!  And the mud!  What a bonus!  And then you can come out halfway down the pond and run through the tall, dry grass where seeds can stick in your wet fur!  People?  Why haven’t I done this fun stuff before???

When we got home, we sprayed him down with the hose and left him outside to drip dry for a while, then brought him in for a bath.  I wish I’d gotten a photo of him in the tub; he looked so pathetic, like he couldn’t believe a human would do such a thing to a noble nature dog as cover him with scented puppy shampoo!  The indignity!  After a good toweling off, he rolled around on the rugs in order to cover them with damp dog hair and then fell asleep on his bed, clean and tired, where he’s remained most of the day.  Ah! To lead a dog’s life!

Thursday, October 6, 2011

Maybe Not Such An Old Dog

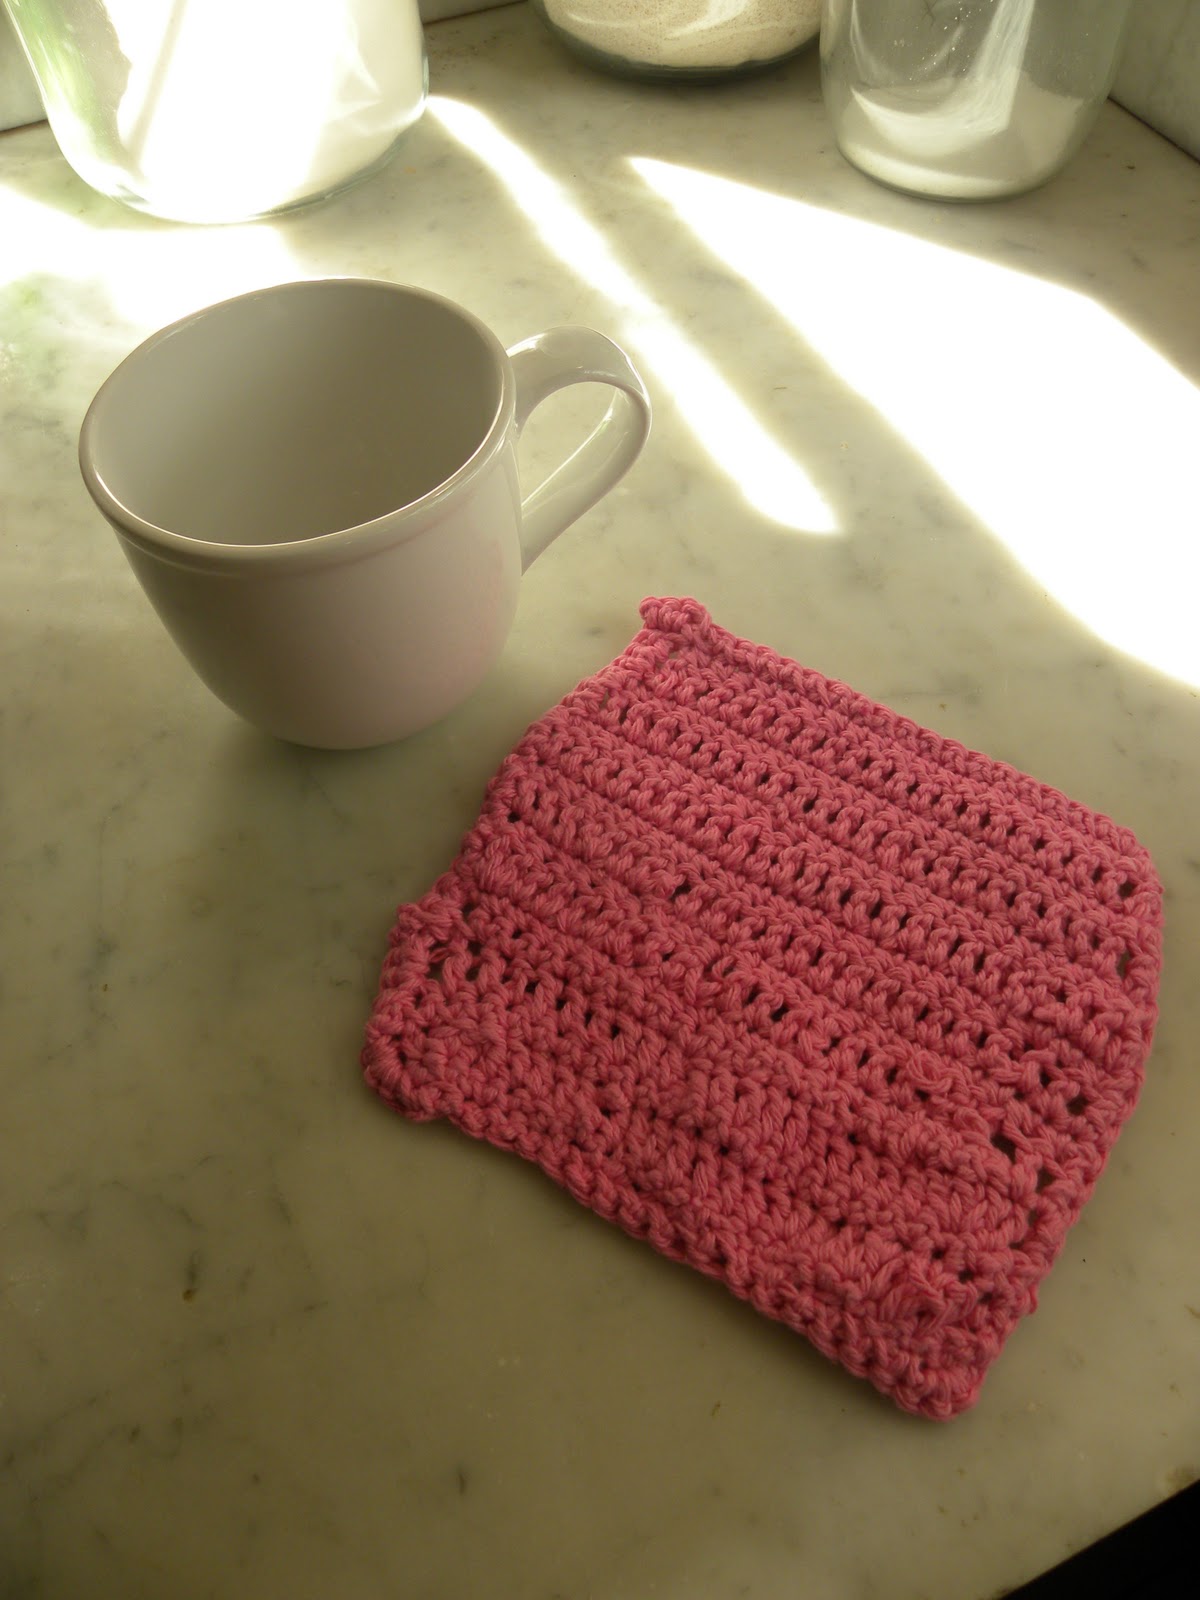
Who says you can't teach an old dog new tricks?  I completed my second crochet class last night.  All the ladies agreed that the second class seemed to go by much faster than the first – less frustration!  Nice people, good conversation, good uninterrupted crocheting time.  I finished my beginner-project dish cloth in class.  All I needed to do was the edging.  (If you think the edges are wonky now, you should have seen it before I single crocheted all around the edge!)  It's not very good, in fact it's pretty darn bad, but you can see the improvement as I progressed.  No unexpected holes or unattached loops hanging out in the second half.


It seemed like many of my classmates frogged their projects during the week and started over to eliminate the early mistakes.  Not me!  I kind of like seeing my improvement, and I was eager to move on to the flower project, which teaches crocheting in a circle.  Loved making the flower!  Came home last night and continued working on it until 11 p.m.  


Next week is the final class; we will start making baby/mini afghans.  Can't wait!  This old dog is pulling at the leash.


Wednesday, October 5, 2011

Chunky Hat

After making the Mackinaw hat (http://sweetposydreams.blogspot.com/2011/09/finished-object.html) a few weeks ago (which, by the way, is too big for my son and which my daughter said looks like cocker spaniel ears, nice!), I thought a scarf of the loop stitch I had just learned would be fun.  So I bought some super bulky wool blend gray yarn.  I played around with different variations of a loop stitch scarf, some of which were pretty cute, but ultimately decided it wasn't working for me.


So I frogged that and found a pattern for super bulky yarn on Ravelry, http://www.ravelry.com/patterns/library/big-button-hat, and made yet another hat.  How many hats does a girl need?  The only snag I ran into was finding size 11 double pointed needles.  I like the result, but I still have a skein and a third of super bulky gray yarn to use up.  Gift hat? Hmmm.

Monday, October 3, 2011

Feeling Cheesy


Our daughter was home this morning, so I made her favorite cheese muffins for breakfast.  These are good warm from the oven, either plain or split open and slathered with butter.  (I opt for butter!)  The recipe is slightly adapted from The Joy of Cooking, 1975 edition.  I usually get 10 muffins from this recipe.

Cheese Muffins

1 ¾ cup flour
3 teaspoons baking powder
1 tablespoon sugar
¼ teaspoon salt
½-1 cup shredded cheese (cheddar or colby is good)
1 egg, beaten
1 cup milk
3 tablespoons oil

Preheat oven to 350 degrees.  Grease muffin pan.  (Do not use cupcake papers as the muffins will stick to these.)

Sift together dry ingredients.  Stir in cheese, making sure all particles of cheese are pretty well separated.

Combine egg, milk and oil; beat well.

Pour liquid mixture into flour mixture; stir until all flour is incorporated, but do not overmix.  

Fill muffin cups ¾ full.  Bake about 20 minutes.


Printable recipe

Thursday, September 29, 2011

Feeling Groovy


I’m learning to crochet!  Why did I wait until now?  My mother crocheted.  She made doilies, afghans, those granny square vests from the 1970s.  Oh yeah, I was groovin' those vests in junior high school.  They were quite the rage with a pair of hip huggers and a wide belt.  I had two lovely purple and lilac ones.  (Hmmm, wonder if they're in the attic.)

But for me, as a (mediocre) knitter, crochet has always seemed so baffling.  There is only one hook!  How can that possibly work?

When the local community college advertised a beginners crochet workshop for this fall, I jumped on it.  We had the first class last night.  There were eleven of us, all women, mostly over 40, there to learn.  Several of the women had taken an earlier class, so they had some familiarity, but even they struggled.  I'm telling you, it's hard!  The lady across the table from me must have been in her 70s.  She said people had been trying to teach her to crochet for years.  I could tell she felt like she was the only female of her generation who couldn't crochet.  What did her children do in the 1970s?  Who made their granny square vests?  It doesn't bear thinking about.

Our little class, though, is not jumping right into crocheted clothing.  As our instructor, Diane (who is also a published mystery book author!! this is so exciting in so many ways), said, you have to walk before you can triple crochet.  (What?)  After finding out I didn't know how to make a slip knot and feeling like I was 99% thumbs, I finally made a chain.  Then Diane said we had to rip that out and start over in order to make a dish cloth.  Because a dish cloth doesn't have to fit and doesn't even have to be square in order to work!  Diane kept us going through all the missteps by promising that next we'll get to make a carnation.  (I'm so glad I chose pink yarn.) How cool that we'll get into some hippie flower power vibe next!  So I remade my chain and managed to get two more rows crocheted.

Yeah, it's a little wonky.  My chain was too tight, so the whole piece is curved.  (You'll notice there is no close-up photo of my work; this is deliberate.)  But here's the thing: This is the result of a two-hour class!  It took two hours to make that little rectangle!  As I walked out of the room, I realized that my vision had blurred from looking so long and so hard at my crochet.  When I drove home, I was literally seeing double of all the car lights and traffic lights.  Which made for a groovy 1970s pyschedelic ride.  If only I'd had my granny square vest on!


Photo of the Rib Ticklers is from a 1971 Coats and Clark pamphlet found on Ravelry; there is also a free pattern http://www.ravelry.com/patterns/library/granny-square-motif-, but you do have to join Ravelry.

Tuesday, September 27, 2011

Easy Peasy Pesto. Presto!

My basil plant has been giving me the evil eye for a couple of weeks.  We've had a dry September, and I've only remembered to water the basil and parsley intermittently.  For the last two days, though, the skies have opened up.  We've had two days of rain and cool temperatures.  The basil plumped up, full of yummy basil aroma and flavor.  And with October right around the corner, a killing frost can't be far away.

Time to do a little basil harvesting.  And that means an easy peasy pesto dinner.

My pesto recipe is adapted from Nikki and David Goldbeck's American Wholefoods Cuisine.

Pesto

1 cup Parmesan cheese, grated
1/2 cup slivered almonds
3 3/4 cups lightly packed basil leaves
1/4 cup parsley
1/2 teaspoon salt
2 cloves garlic
1/2 cup olive oil

Toast the almonds in a medium pan until fragrant and golden.  Put the grated cheese and toasted nuts in the bowl of a food processor; grind finely.  Add basil, parsley, salt, and garlic and puree to a thick paste.  (Add the herbs a bit at a time.)  With food processor running, gradually oil until the sauce is smooth.


So easy, so yummy!

Saturday, September 24, 2011

What Can You Make from Two Banana Skins?


A pair of slippers!

No, I don't have a cool banana skin craft for you, but wouldn't banana slippers be great?  After thinking about banana slippers, I found these on the web (designed by Kobi Levi).  They are crazy and fun, but I'd be more inclined toward soft and cozy myself.  Something for slipping around the house.  I may have to try to knit some.


Instead of shoes, I offer food.  We had some sad bananas on the counter this morning, so there was only one thing to do -- banana bread!  When I make banana bread, the son always says, "Why do you make banana bread when carrot cake is so much better?"  Well, the answer, of course, is "Sad bananas."  This is a simple, quick recipe and a great way to use up three over-ripe bananas.  I especially like this recipe because it is also chock full o' nuts.


Banana Bread

1/2 cup butter, softened
1 cup sugar
3 large, ripe bananas, mashed
2 whole beaten eggs
1 teaspoon baking soda
2 cups flour
1 cup chopped nuts

Preheat oven to 300 degrees.  Grease and flour a 9x5x3 loaf pan.

Cream butter and sugar.  Add eggs and bananas.  Mix well.  Sift flour and soda together and add to butter mixture.  Mix well.  Stir in nuts.

Bake at 300 degrees for about 1 hour, 10 minutes.


Printable recipe

To see more Kobi Levi footwear, go to his blog, http://kobilevidesign.blogspot.com.

Thursday, September 22, 2011

My Adventures in Shrinky Dink: A Cautionary Tale

A year or so ago, I saw an article in Country Living about making a bracelet from Shrinky Dinks.  (I saw it in the print version of the magazine, but the online version is at http://www.countryliving.com/crafts/projects/how-to-make-a-shriky-dink-bracelet. Yep, they misspelled shrinky in their url.)   Wow, I thought, this looks like fun!  I could make a bracelet for the daughter out of photos we took on our ramble in Ireland a while back.  

She did a study abroad semester at University of Limerick her junior year.  She went over about two weeks early and let me tag along.  We rented a car and drove up and down the west coast of Ireland, narrowly dodging cows, sheep, rock walls, roundabouts and, once, a crowd of knackers.  Not to mention the “Hey, look at that!” stops.  We stayed in bed and breakfasts where we dutifully admired grandkids and dancing awards, we saw an inordinate number of cemeteries and abbeys, and we enjoyed lots of seafood chowder.  It was fabulous.  Really fabulous.

So what better idea than to commemorate the trip with a fun Shrinky Dink bracelet?  I should mention that I didn’t grow up with Shrinky Dinks.  While, according to Wikipedia, they were invented in 1973, they didn’t become really popular until the 1980s. I was very busy in the 1980s being “A Student.”  Those were the grad school years, when English and American literature seemed very important and there were deep meanings to find and pontificate on – finitude, patriarchy, and the impact of empire.  Was I really that stuffy?  Yes, I was too busy for Shrinky Dinks.  But now that I’ve outgrown my stuffiness and embraced my inner free spirit, I was ready to learn about Shrinky Dinks.  I have to admit, though, that I was afraid of Shrinky Dinks.  I bought the package of inkjet Dinks probably eight or nine months ago and hid it in a drawer.  So many worries.  How do I lighten the pictures?  (Eventually got PhotoShop Elements to handle that worry.)  How do I put multiple pictures on a page?  Most important: What if I goof it up???  Finally I realized, it’s a $2.00 sheet of plastic.  It’s okay if I goof up.  And as you’ll see, I did.

I picked out the photos I wanted to use and lightened them waaaay up in PhotoShop.  The green grass of the Emerald Isle turned a kind of sick chartreuse.  That’s okay, it’s supposed to darken up when it shrinks.  (Not back to grass green, boyo.)  Copied the photos into a Word doc (not ideal) and eventually printed it onto the Shrinky plastic.  I say “eventually” because I didn’t notice that the plastic sheets are 8”x10”, not 8 ½”x11”.  I had set the printer to print on transparencies and shortened the dry time, etc., all good, but my printer kept giving me a paper mismatch error message.  Aaaah!  Technology makes me crazy!  Oh, wait, I need to take out the 8 ½” by 11” paper underneath and reset the guide in the printer tray?  Oh, that was easy!

Then I cut out the images and punched holes with a 1/8” hole punch as per instructions from both Country Living and Shrinky Dinks.  I also used a rubber stamp to ink a cool Celtic knot on the back of each piece.  


Before and during shrinkage
So tiny!

Put them in the oven and presto!  That part was super fun and amazing for a first-time shrinker.  Loved that.  Got so excited that I didn’t get them all pressed flat, so a couple of images warped, but no big deal.  After they cooled, I sprayed them with 25-year-old lacquer I found in the basement.  Mistake.  Should have sprung for a more recent vintage.  They dried kind of funky and the ink stamp on the back ran.  Did I give up?  Not yet.  


No longer a ring . . . 

Got out my trusty little 4 mm jump rings and twisted the heck out of those babies trying to force them through the holes.  No camel going through the eye of that needle!  So I read around on the internet and found that many people recommend a ¼” standard size hole punch, even for Shrinky jewelry.  I wasn’t happy with the photo quality or the finish quality anyway, so take two!

The second time, I lightened the photos, but not nearly so much.  I even bumped up the color saturation on a few images.  Then I pasted them all into a PageMaker document.  (I had forgotten I still had a copy of it.)  Wow, that was much easier.  Love PageMaker.  Cut the pieces out, rounded the edges, and used the ¼” punch.  
I omitted the Celtic knot stamp – why risk the bleeding ink?  Baked, flattened, cooled, and sprayed (with new, 21st century clear acrylic sealer).  Oh and a heads up, don’t use Diet Coke boxes to line your cookie sheet.  Recycling, so smart?  In this case, not really; some kind of glue cooked off and gooped up my pan.  


The only real snag the second time around came with the jump rings.  Some of the holes were maybe a little more than ¼” from the edge of the original, unshrunk image, which made the rings pretty tight.  Plus, those 4 mm jump rings are small!  Still, it all came together after a fashion.  You may see in the close-up that my jump rings are not as securely closed as they should be, but, hey, in real life, no one will be looking through magnification!

All in all, it was a fun project.  I’ll try Shrinky Dinks again.  In terms of quality, there’s nowhere to go but up!

Finished!