Pages

Showing posts with label recipe. Show all posts

Sunday, April 19, 2015

Trying Some New Recipes

In my ongoing quest to shake up the menus around here, I recently tried a couple of new recipes.  One is a soup that appeared in the March 2015 issue of Country Living.  It's a lemony chicken orzo soup.  Since I love Panera Bread's version, I figured it was well worth a try.


It's light, yet filling.  The fresh dill adds a nice touch.  You can find the recipe on the Country Living site here.

An even better success was a scrumptious mini chocolate chip Bundt cake.  It was a big hit with me and our son.  I found this recipe in one of those compilation fundraiser cookbooks -- love those.

My cake stuck to the pan a little bit, as you can see in the photo below.  The topping is put in the pan first, and is maybe a little too buttery.  Tastes great, but leaves the fingers a little greasy if eating out of hand.

Nutty on top!

Imminently snackable
Toll House Bundt Cake
from A Cookbook by Sunset House Auxiliary Toledo Ohio (1991)


2 3/4 cup flour
2 teaspoons baking soda
1 teaspoon salt
1 Tablespoon vinegar
1 cup less 1 Tablespoon milk
1 cup butter, softened
1 cup firmly packed brown sugar
1 Tablespoon vanilla
4 eggs
1/2 cup semi-sweet mini chocolate chips

Nut Topping:
1/2 cup butter, softened
4 Tablespoons granulated sugar
1 1/3 cup chopped nuts

For topping, combine butter, sugar and nuts; mix until crumbly.  Spoon into well-greased and floured 12-inch Bundt (or tube) pan.  Chill in refrigerator while you prepare cake batter.

Preheat oven to 375 degrees F.

In small bowl, combine flour, baking soda, and salt.  Set aside.  Place vinegar in 1 cup measure, fill with milk to 1 cup line; set aside.

In large mixing bowl, combine butter, brown sugar and vanilla; beat at medium speed until light and fluffy.  Add eggs, one at a time, beating well after each addition.  Turn mixer to low.  Gradually add flour mixture, 1/3 at a time, alternating with milk.

Gently fold in chocolate mini chips with a rubber spatula.  Pour into prepared pan.  Bake at 375 degrees F for 50 minutes.  Loosen edges of cake with spatula.  Immediately invert on cooking rack.


Printable recipe

Monday, August 25, 2014

Got Parsley?

It's late summer and the herb pot is full and luxurious.  There's a lot of parsley out there needing to be eaten.  What to do?  Make tabouli!

Tabouli (also spelled tabbouleh) is one of my favorite salads -- so fresh, yet hearty.  Late summer is the perfect time to make it, with lots of parsley and garden fresh tomatoes available.  Making tabouli requires a fair bit of chopping.  You can use a food processor if you wish, but I like to chop everything by hand, so that I get the sizes exactly the way I want them.  I enjoy it.  Plus, after chopping all that parsley and mint, my kitchen smells divine.  So, turn on some fun music and get chopping!

This particular salad was made to strains of The Supremes and Sly and the Family Stone.
"Everybody is a Star," especially you when you serve this yummy salad to friends and family.


Tabouli

Adapted from Nikki & David Goldbeck’s American Wholefoods Cuisine

1/2 cup cracked or bulgur wheat
1 1/2 cups hot water
1 cup finely chopped parsley
1/2 cup finely chopped mint leaves
1 cucumber, peeled and diced (about 2 cups)
1 large tomato, diced (about 1 cup)
3 scallions, sliced thin
3 tablespoons lemon juice
3 tablespoons olive oil
1/4 teaspoon salt


Soak the wheat in hot water for about 15 minutes.  Drain well, squeezing out all water.  Toss all ingredients together, stirring to mix well.  Chill or serve immediately at room temperature.

Friday, April 4, 2014

Tax Time Pick-Me-Up

A very good friend is an accountant.  When tax season rolls around, she and her partner and their staff are always swamped with work.  They barely can come up for air.  When I stopped by recently to turn in my signed e-forms, I also dropped off a little pick-me-up snack to keep them going through the afternoon.

Sausage cheese balls: tax free but not guilt free
Sausage cheese balls are a staple at parties and breakfasts in the South.  They are definitely not a health food, but -- yum!

Sausage cheese balls have been a favorite of mine for many years.  I don't make them very often because of health concerns, but they are popular at our house around the holidays or other times people want a treat.  Our son, for example, recently requested them as part of his birthday breakfast.  A dear friend of mine from my Tennessee teenage years also now lives in northern Illinois.  She always makes sausage cheese balls for parties.  I remember her mother-in-law once sniffing, "You Southern girls certainly like your sausage cheese balls."  Why, yes, Mrs. Irish Chicago, we certainly do!  And you better not get in between us and our sausage balls or we might knock you over!  While I don't actually advocate violence, I do advocate these savory snacks.

They are a little bit of work to make, but worth it.  The recipe I use comes from Tennessee Pride, which is the only kind of bulk sausage I buy, but you can use any brand.  Sharp or extra sharp cheddar cheese is also a must.  The mixing takes time, especially depending how much biscuit mix you try to work in.  My daughter uses two cups when she makes these, but I think it is worth the trouble to mix in three full cups, but it does involve using your hands and pulling the meat and cheese mix apart to get more dry ingredients to adhere.  Here you can see the sausage/cheese combination before and after the biscuit mix is incorporated.


After baking, your sausage balls should be golden and crispy, round bite-sized balls like this:


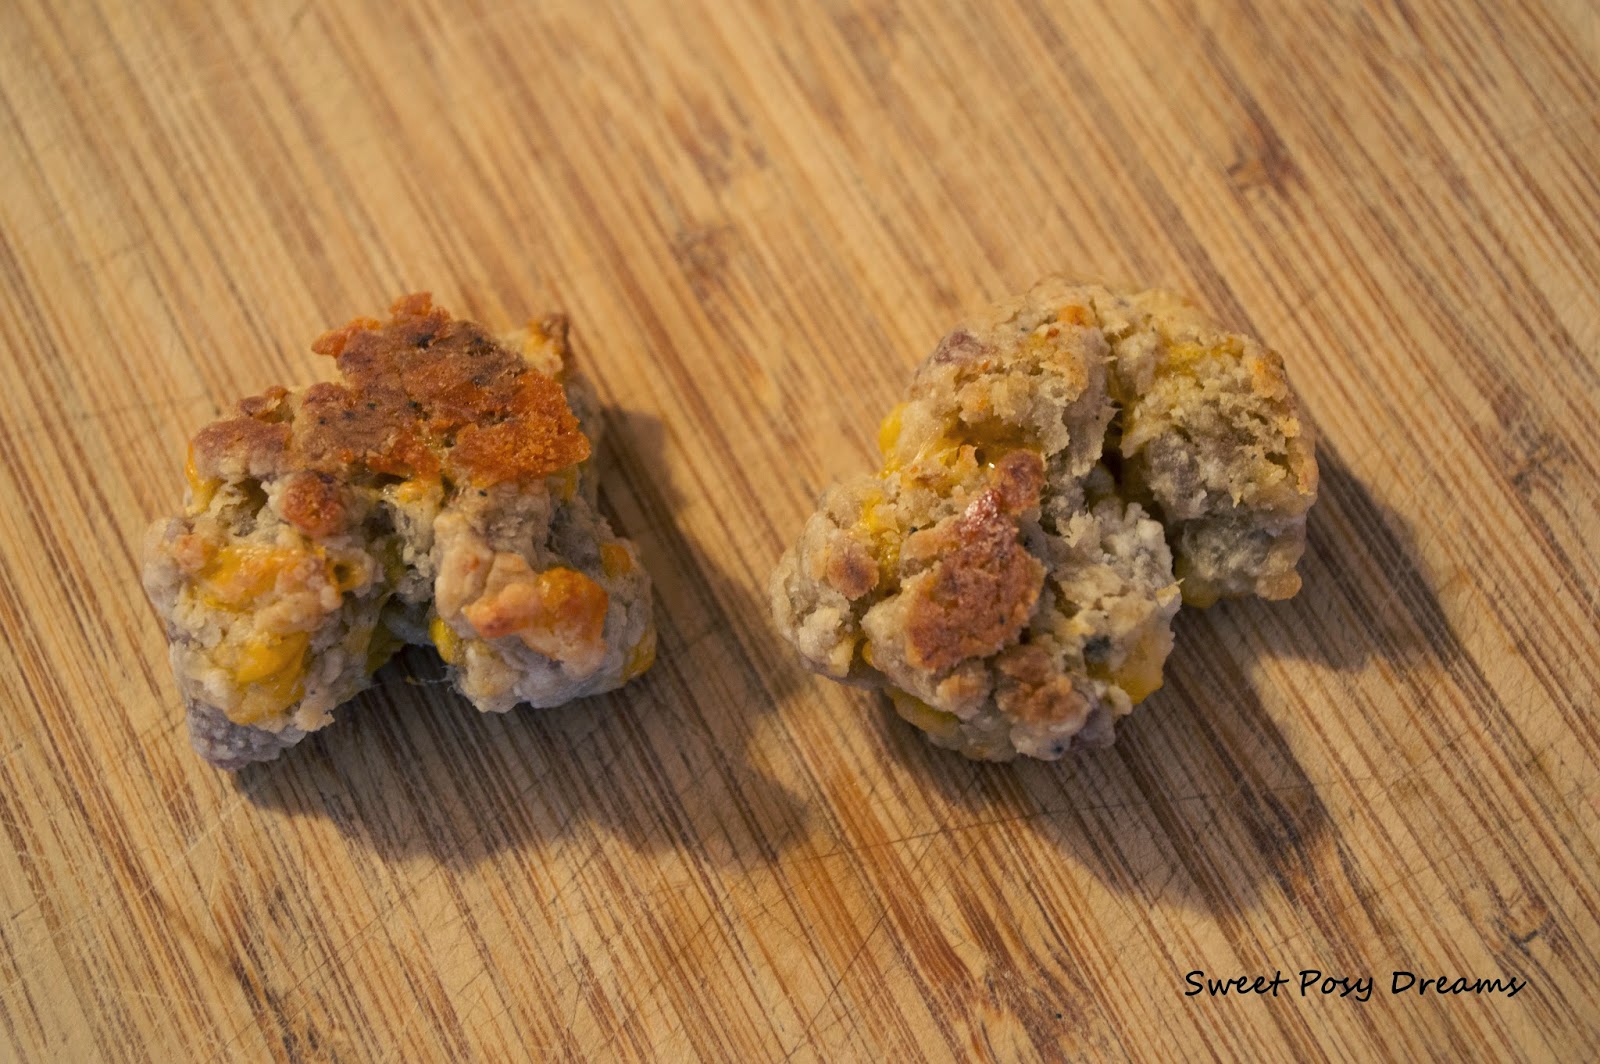
But if they turn out like this,


flat or misshapen blobs, don't worry.  Eat them anyway, they'll taste just as good!


Sausage Cheese Balls

1 pound bulk (or roll) sausage, mild or hot
2 cups shredded sharp or extra sharp cheddar cheese
2-3 cups biscuit mix (like Bisquick)

Preheat oven to 375 degrees F.  Using fork or hands, combine sausage and cheese in large mixing bowl .  Blend in biscuit mix a little bit at a time, using hands, until well mixed.  Roll into 1-inch balls and place on lightly greased cookie sheet.  Bake 10-15 minutes or until golden brown.  You can flip the balls over halfway through baking if desired.  Serve warm or at room temperature.


Makes approximately 75.

Printable recipe


Thursday, February 7, 2013

Souped Up Meatballs

We've finally been getting our winter snow here in northern Illinois.  It's been beautiful.

Mourning dove taken from my office window.

Snow, however, calls for hearty, warming dinners.  As I walked through the grocery store the other morning, I thought about the oniony meatballs my mother used to make.  A package of ground chuck and a stroll through the soup aisle, and I was good to go.  This makes a very easy and flavorful change of pace for ground beef.

I served them over egg noodles, but they are also very good with mashed potatoes.

Souped Up Onion Meatballs

1 pound ground chuck
3/4 cup (approx.) fresh bread crumbs
1 egg
Salt and pepper
2 teaspoons vegetable oil
1 10.5 oz. can of French onion soup (I use Campbell’s)
1/2 cup water

Mix meat, bread crumbs, and egg together.  Season with cracked pepper and very lightly with salt (the soup will add extra salt).   Shape into 1 to 1-1/2 inch meatballs.

Heat oil in non-stick skillet over high heat.  Add meatballs and reduce heat to medium high.  Brown the meatballs, turning frequently.  Add the soup and water.  Cover and reduce heat to low.  Simmer over low heat for 30 minutes, stirring occasionally.

Remove lid and cook over low to medium low heat for 15 minutes to reduce liquid.

Makes approximately 30 meatballs.


Friday, December 14, 2012

Orange You Glad I Made Cookies?

Remember that old knock-knock joke?  Orange you glad I didn't say banana?  Well, I made a new Christmas cookie that's no joke -- Orange Chocolate Chippers.

Christmas cookies are a big thing at our house.  There are some traditional favorites that I make every year, like the Italian Wedding Cookies, Candy Cane Cookies, and Butter Cookies that I shared with you last year.  I also like to add in something new.  Last year it was Martha Stewart's Cream Cheese Walnut Cookies, which became a favorite of the husband's, so they made it back onto this year's hit parade.

Orange chocolate chippers

This year, I added two cookies to the repertoire.  Today I'll share the first one, Orange Chocolate Chippers.  I found a recipe in an old-ish cookbook from my husband's uncle's collection.  The book has an insanely long title: Senior Pilgrim Fellowship, United Church of Christ, Beacon Falls, Connecticut.  If there was another title, it didn't leap out at me.  This is one of those great cookbooks where all the ladies contributed their favorite recipes to raise money for their organization.  I like this kind of cookbook because the recipes are not trendy or "foodie;" they are tasty, do-able recipes that regular women made for their families and bridge clubs.  

When I saw the recipe for an orange and chocolate cookie, I knew I had to try it.  I changed the original recipe a little bit to include orange juice and baking powder.  I used orange peel and juice from some fruit my father-in-law had sent from Florida.  I don't know what variety they were, but they were not navel oranges; they were much more flavorful.  In looking at the website of the grower where he shops, I think they might have been Robinson tangerines, which is a cross of 3/4 tangerine and 1/4 grapefruit.  With navel oranges, I don't think you'd get the same strong citrusy pop that my cookies have, so I recommend tangerines or tangelos to really get that citrus flavor.


Orange Chocolate Chippers
Adapted from Audrey Gendron’s recipe in Senior Pilgrim Fellowship,
United Church of Christ, Beacon Falls, Connecticut cookbook, 1982

Orange chocolate chippers closeup
1 cup shortening
1 cup sugar
3 oz. cream cheese, softened
2 eggs
2 tablespoons grated orange/tangerine peel
1 teaspoon vanilla
1 teaspoon fresh orange/tangerine juice
2 cups flour
1 teaspoon salt
1/4 teaspoon baking powder
1 cup semisweet chocolate chips

Preheat oven to 350 degrees F.

Sift together flour, salt, and baking powder; set aside. 

Cream shortening, sugar, and cream cheese.  Add eggs, orange peel, vanilla, and orange juice.  Beat well.  Add flour mixture to creamed mixture.  Mix well.  Stir in chocolate chips.  Drop by rounded teaspoonfuls onto greased cookie sheet.  Bake about 7 minutes at 350 degrees F.  Cool on wire racks.

Makes approximately 56 cookies.


Printable recipe


Tuesday, November 27, 2012

Frosty Times Call for a Frosty Dessert

Winter is almost here, at least in most parts of the U.S., so why am I writing about ice cream?  This year on Thanksgiving, I served ice cream in addition to pumpkin pie.  Not pumpkin pie a la mode, after all, whipped cream is the proper topping for pumpkin pie.  (In the husband's case, lots and lots of whipped cream.)  In our family of four, there are only two pumpkin pie eaters -- the husband and our daughter.  Daughter likes it so much she has even been known to request a pumpkin pie for her month of May birthday!  Our son and I, however, are not pumpkin pie fans.  So when I asked him what he wanted for his Thanksgiving dessert, he asked for "that ice cream dessert."


I got the recipe for "that ice cream dessert" when we lived in the little town of Harvard, Illinois.  Harvard is the end of the train line, so when we were ready to move out of our Chicago condo and into a single family house, that's where we wound up.  We just kept going out until we found something decent we could afford and, before we knew it, we were at the end of the line in Harvard.

Harvard is a really small town.  When we lived there, the population was around 6,000 people.  It has increased since then to more than 9,000.  At one time, Harvard was the center point of an area with the greatest milk production in the nation.  Thus, the big event in Harvard each year is Milk Days, complete with a parade, a carnival, a Milk Queen, bed races, and big wheel races.  Our daughter was in preschool when we lived there, so the big wheel race was important. She competed and lost.  Our neighbor, whose daughter was the same age, put his child in training for the big wheel race.  I am not making this up.  He took his four-year-old daughter to an empty parking lot several times before the race for training.  She won her age category.  In a couple of years, she was entered in the Milk Days Princess competition and eventually was crowned Milk Queen.  So I suppose that early training paid off.

The logo my husband designed.
I belonged to a women's group named Women for Harvard.  It was a good group of women, mostly young. We raised money to stock a little store that was set up one weekend in December for Shopping with Santa.  Children could come in, visit with Santa Claus, have their picture taken, and be taken into a secret store -- no parents allowed -- to shop.  Gifts cost no more than a couple of dollars.  There was a sample of each item and the rest were wrapped, so the child could surprise a family member on Christmas morning.  That was such a wonderful event.  Sadly, I don't think they have the store anymore.  What they do have is the same group logo that my husband designed for them twenty years ago.  It features Harmilda, the town mascot.  I really can't believe they are still using a cow logo for a women's group!  Anyway, we always had dessert at our monthly meetings, which rotated among the members' homes. One meeting, Julie, that month's hostess, brought out this yummy ice cream dessert.  All the women, including me, raved!  We had to have the recipe.  Julie kind of laughed about that.  It's the easiest thing in the world, and you can change up the flavors any way you like.  I have made this with mint ice cream, pecans, any combination would be good.  For Thanksgiving, I made the original version, Peanut Bar Ice Cream Dessert, one we might call the Buster Bar Dessert if "Buster" wasn't trademarked by Dairy Queen.


Peanut Bar Ice Cream Dessert


40 Oreo cookies, crushed into crumbs
1/4 cup melted butter
1/2 gallon softened vanilla ice cream
15 oz. hot fudge topping
2-3 tablespoons chocolate syrup
8 oz. Cool Whip
1 cup peanuts

Reserve about 2-3 tablespoons of cookie crumbs.  Combine remaining cookie crumbs and melted butter in small bowl.  Press crumb/butter mixture in bottom of a 9x13 inch baking pan and refrigerate for about 15 minutes.

Layer remaining ingredients as follows, spreading each layer as evenly as possible:
Cookie crumbs, ice cream, fudge sauce (fill in bare areas with a little chocolate syrup), nuts, Cool Whip, reserved cookie crumbs (these should not fully cover the Cool Whip)

Freeze several hours until firm.

Note:  You can use any flavor of ice cream you wish and change the nuts as well.  Chopped pecans make a nice change.


Friday, October 12, 2012

Chicken Palaw to Fill a Bare Table

"Beware the barrenness of a busy life."  When Socrates said this, I doubt he was talking about my dinner table, but he might as well have been.  When I get too busy with work or home projects or whatever fills my days, sometimes the dinner table takes on a barren, forlorn look, as though nothing of value will appear there -- a mere baked potato, pasta with sauce from a jar, or take-out.  I can only take so much of this, however, before I crave "real" food.

Recently I've been busy moving furniture, painting, patching, ripping out carpet, and more painting.  After a while, though, a girl needs a good meal to keep her going.  So the other day I got the urge for Chicken Palaw, a recipe I copied out of Country Living magazine many years ago.  (Maybe I was inspired to cook this by those viewings of The Best Exotic Marigold Hotel, who knows?) As you can tell from the name, it's Indian influenced, but not really authentic Indian fare.  Still, it's quite flavorful and a change of pace for a weeknight dinner.


Chicken Palaw

From Country Living magazine


1 1/4 cups basmati rice 
1 1/2 teaspoons salt
1/4 cup butter
3 tablespoons olive oil
2 large carrots, cut in 1/8-inch julienne strips
2 whole boneless chicken breasts, cut in 2-inch chunks
1/4 cup apple juice
1 tablespoon curry powder
1/4 teaspoon ground coriander
1/4 teaspoon ground cumin
2 tablespoons raisins
2 tablespoons pistachios
2 tablespoons sliced almonds

In heavy 5-quart stock pot, heat 2 quarts water to boiling over high heat.  Stir in rice and 1 teaspoon salt.  Return to boiling and cook, uncovered, 10 minutes.  Drain rice.

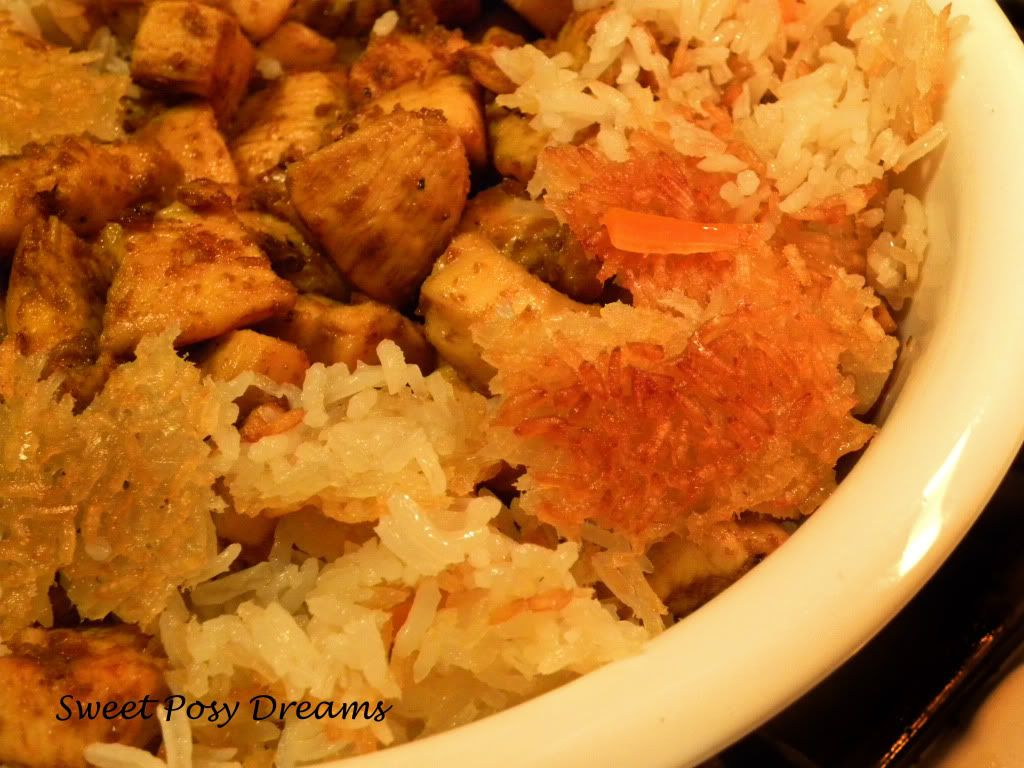
In same pan, melt butter with 2 tablespoons olive oil over low heat.  Spoon half of the rice into pan and press down with back of spoon to make a firm layer that covers the bottom of the pan.  Spoon remaining rice loosely on top, then top this with carrot strips.  Cover top of pan with linen towel and a tight lid.  Cook 35-40 minutes or until bottom layer forms a crisp, golden crust.

Meanwhile, in large skillet, sauté chicken in remaining 1 tablespoon olive oil over medium heat until golden on all sides.  Add apple juice, spices, and ½ teaspoon salt.  Stir until chicken is coated with spices.  Cook, stirring frequently, until chicken is cooked through and liquid is evaporated, about 5 minutes.

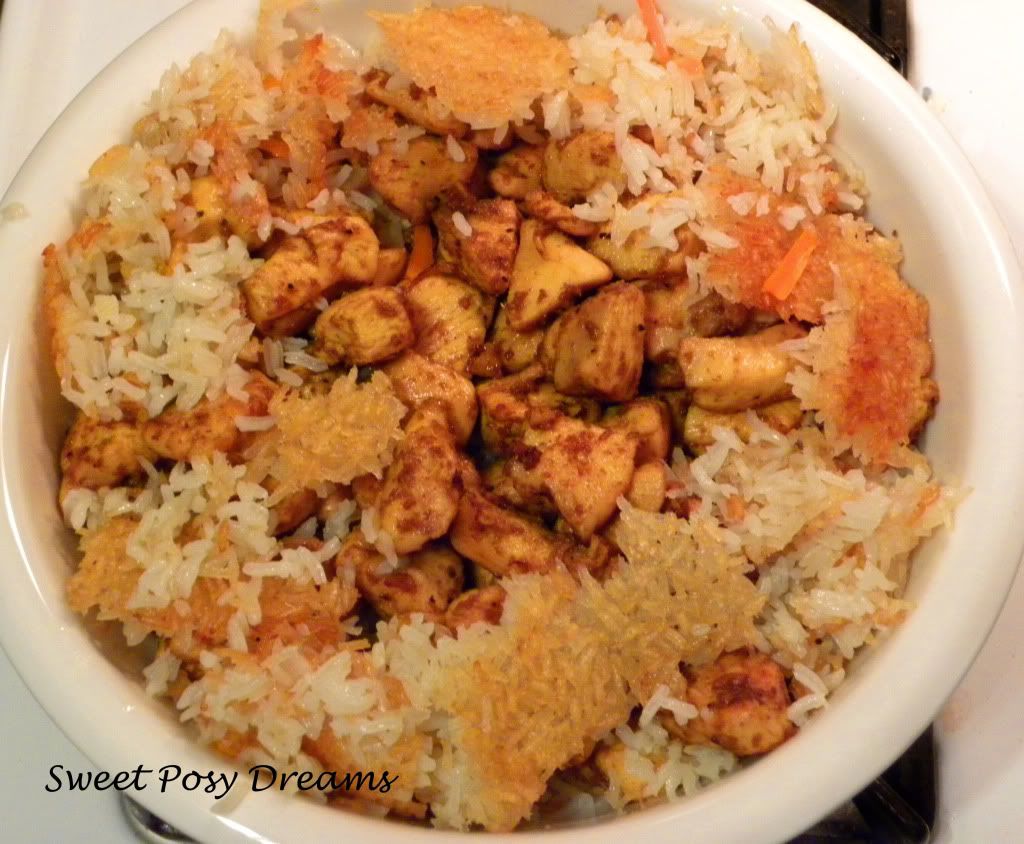
To serve, in large bowl, combine steamed part of rice/carrots with raisins and nuts and toss to blend.  Top with chicken mixture.  Break bottom rice crust into pieces and place around the edge.

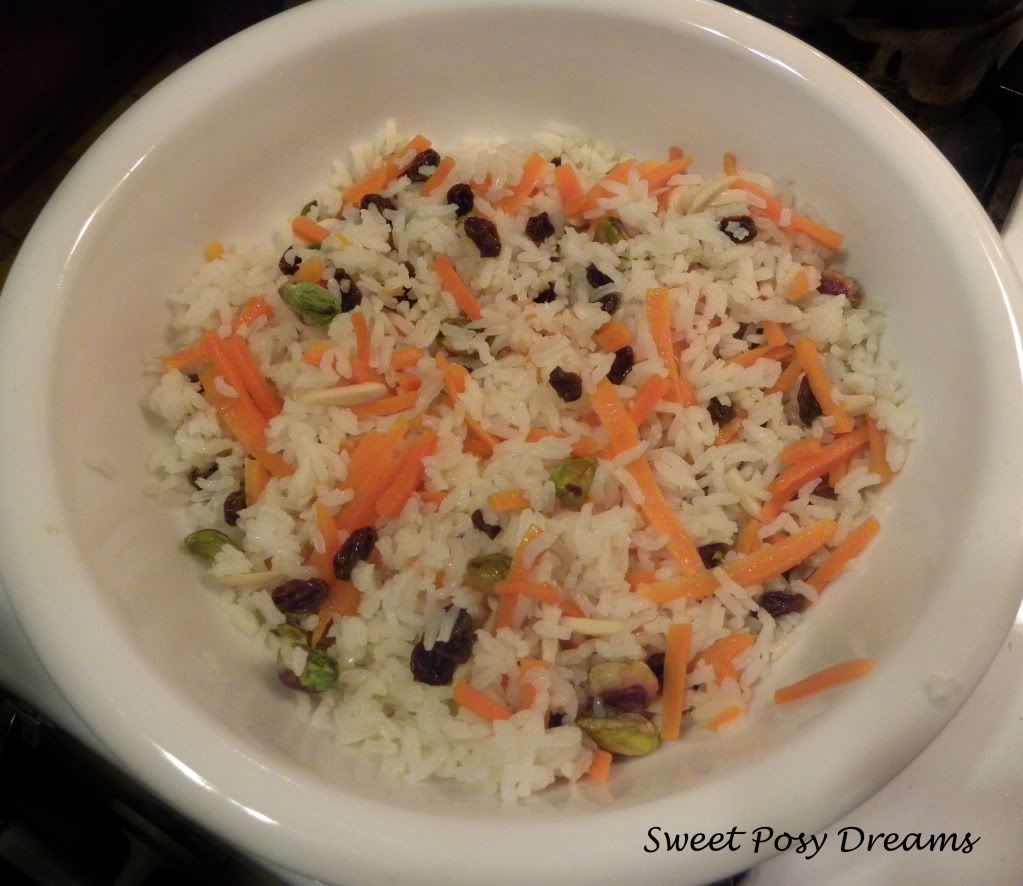
The rice base before adding the chicken -- rice and carrots tossed with pistachios, slivered almonds, and raisins.


Friday, October 5, 2012

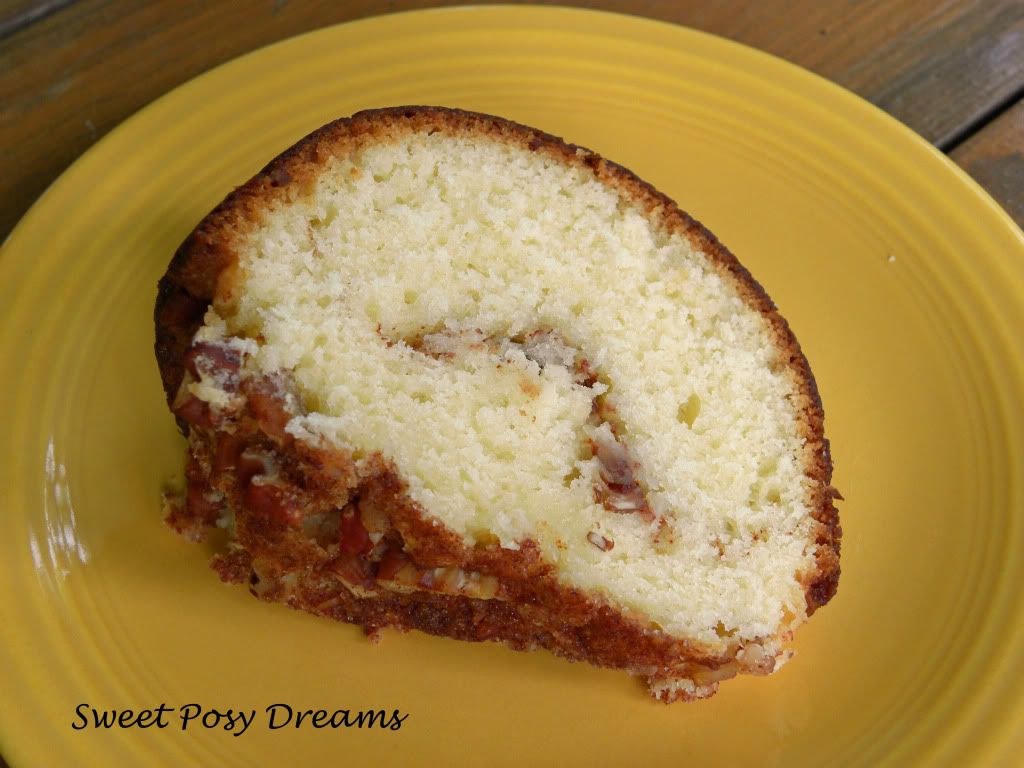
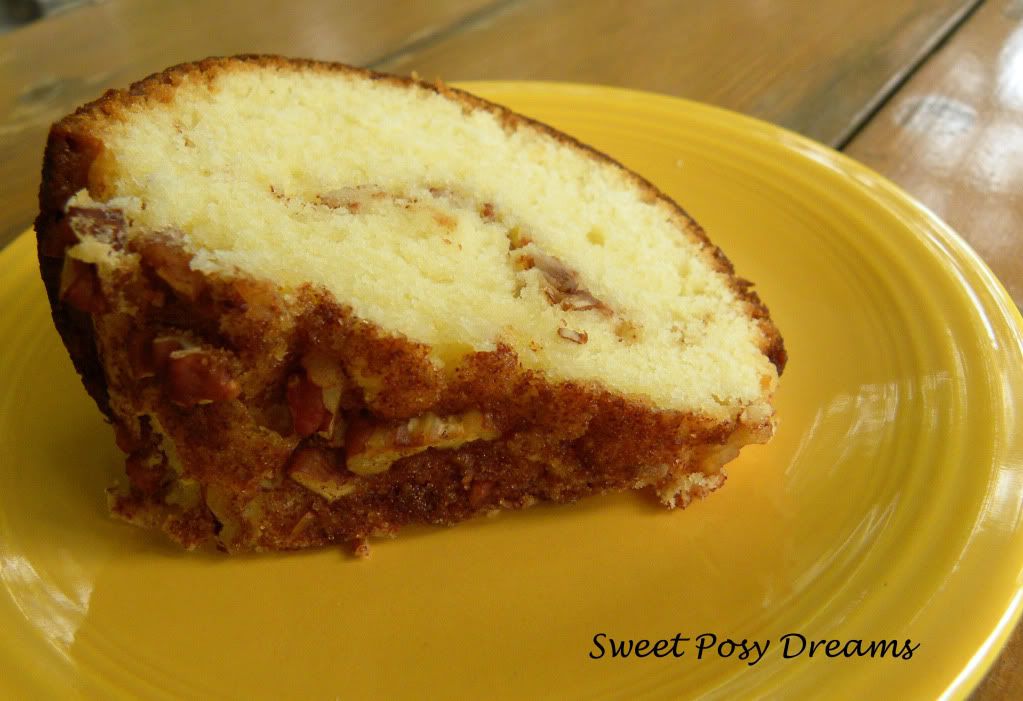
Mrs. Haggard's Divine Coffee Cake


In the fall of 1981, Mrs. Haggard made the best coffee cake I had ever tasted.  I was in my first year of graduate school. Mrs. Haggard (did the woman have a first name?) was the wife of the department chairman.  The Haggards invited all the first years over to their home one evening early in the year to mingle with the faculty.  I was kind of nervous, and I don't think I actually talked to any faculty, but I did discover the most amazing coffee cake.  At the end of the evening, another student (Tracy) and I begged Mrs. Haggard for the recipe.  She very kindly sent it along with her husband the following week.  I have been making that cake ever since.  I expect Tracy, who was from South Dakota, probably still makes it too.  These days, my daughter is in grad school, and she bakes this cake for her friends.  It is always a big hit, and not just with starving graduate students.


Sour Cream Coffee Cake

1 cup margarine or butter
2 cups sugar
2 eggs
1/2 teaspoon vanilla
1 cup sour cream
2 cups flour
1 teaspoon baking powder
1/4 teaspoon salt

Topping:
1/2 cup chopped pecans
1/2 teaspoon cinnamon
2 tablespoons brown sugar

Preheat oven to 350 degrees F.  Cream margarine/butter and sugar together.  Add eggs and vanilla.  Mix well. 

Sift together dry ingredients and add them, together with sour cream, to butter mixture.  Beat well.

Spoon half of batter into a greased Bundt pan.  (If you do not have a Bundt pan, a tube pan will work.)  Add half of topping.  Then remainder of batter.  Sprinkle on remaining topping.

Bake at 350 degrees F. for 50-60 minutes.  Turn upside down immediately.


Tuesday, August 21, 2012

Put away that hoe! Grilled zucchini boats

"The first zucchini I ever saw, I killed it with a hoe."  -- columnist John Gould in Monstrous Depravity: A jeremiad and a lamentation [about things to eat], 1963
Zucchini can take over a garden, and maybe some gardeners feel like taking a hoe to them on occasion.  When I was growing up, if a zucchini hid under the leaves and got too big to suit my mother (and by too big I mean anything over five or six inches long), she would pull it off and chuck it aside to let it rot in the garden.  Let's face it, zucchini are so prolific that gardeners can get pretty cavalier with them.  

We don't have enough space or sun to grow zucchini at our house, so I cherish zukes when I get good ones.  Last week I showed you the zucchini I got at the farmer's market.  Today I'll show you what I did with them.  My sister-in-law sent me this great grilled zucchini boat recipe.  If you have a zucchini-filled garden, it'll have you saying "whoa" to the hoe!  

This was cooked directly on the grill for great grill marks.

This recipe could be changed up almost any way you like.  You could make it spicy, add garlic or olives.  I've even seen similar recipes with bacon or sausage.  We liked it just like this, as a side dish.  It makes a beautiful presentation.

Grilled Zucchini Boats

2 medium zucchini (6-7 inches long), ends trimmed
3/4 cup finely shredded Parmesan cheese
2 plum or large cherry tomatoes, seeded and chopped
1/2 cup loosely packed fresh basil leaves, chopped
3-4 green onions, thinly sliced
2 tablespoons bread Italian crumbs
1/2 teaspoon (or several grinds with pepper mill) black pepper
Olive oil
2 tablespoons chopped fresh parsley

Heat grill to medium-high heat.  Cut zucchini in half lengthwise.  Scoop out centers to for a 1/2-inch- thick shell.


For filling:  Chop the zucchini center flesh.  Combine with 1/2 cup Parmesan cheese, tomatoes, basil, onions, bread crumbs and black pepper. 

Brush cut side of zucchini lightly with olive oil.  You can salt them lightly if desired.  Place zucchini, cut side down, on grill either directly or in a grill basket.  Grill, covered, for 6-8 minutes until tender crisp.  Check occasionally to prevent burning.

Turn zucchini over and fill the wells evenly with the filling.  Sprinkle on remaining ¼ cup Parmesan cheese and parsley.  

Filled and ready to go back to the grill.


Return to grill and cook, covered, for additional 4-5 minutes or until cheese is melted and filling is heated through.   Remove from grill.  If not using a basket, remove carefully using a large spatula.


Wednesday, August 8, 2012

Orange Glow: Yummy Carrot Muffins

One summer day when our daughter was about three years old, we were at the city pool where we met a little girl the same age.  Her mother, Mary, was an editor, like me, and we became fast friends.  The girls played together and trick or treated together even though we lived across town from each other.  Mary introduced me to a natural foods buying group, and we traded recipes and brainstormed ways to get the kids to eat healthy.  Sadly, Mary and I eventually lost touch after my family moved away from that little town.  But I have never lost touch with her carrot muffin recipe.  These muffins have been a hit with my family these twenty years.  They always tasted great, but sometimes turned out a little sad and droopy looking, not the tall, gorgeous muffins that look pretty in addition to tasting great.  I've tweaked the recipe in various ways over the years to reduce the fat and so on, and recently, I finally got it right.  Yessireebob, the muffins still taste wonderful, but now turn out pretty, too.

Muffins, milk, and the newspaper equals one good breakfast, topped with walnuts or plain.  Either way is tasty!


Carrot Muffins

1 1/2 cups flour (1/2 cup of this can be whole wheat flour)
1/2 teaspoon salt
1 teaspoon baking soda
1/4 teaspoon baking powder
1 teaspoon cinnamon
1 cup brown sugar
2 eggs (beaten)
3/4 cup vegetable oil
1/2 cup chopped walnuts or pecans
1 3/4 cup finely shredded carrots

In large bowl, sift together flour, salt, baking soda, baking powder, and cinnamon.  Mix in brown sugar.  Add eggs.  While mixing, slowly add oil.  Beat until smooth.  Mix in nuts and carrots.  If desired, reserve some nuts to sprinkle on top of muffins.

Bake at 350 degrees F. for 20-30 minutes.


Thursday, June 21, 2012

Light and Crunchy for Summer

Summer is in full swing here in Illinois.  We've been sweltering in the mid to upper 90s for about a week.  I know that is routine in many parts of the U.S., but here in northern Illinois, it's above average for June.

One nice thing about the coming of summer is that it's time for lighter foods. One of our favorites is Chinese chicken salad.  The name is no doubt completely erroneous -- the Chinese probably would deny all knowledge of this dish -- but it does have a little bit of an Asian flair.


This salad is easy to make, especially once the chicken is cooked and shredded.  If you want to make life really easy (after all, it is summer), you could make the dish with rotisserie chicken from the grocery store, but I have never tried that.  I stick with chicken breasts that I braise in a little water and shred as soon as they are cool enough to handle.

I prefer this salad as a combination of cool and warm ingredients.  When I assemble the salad, the cabbage is cold, the chicken is usually about room temperature, and the noodles and almonds are still quite warm.  You can have everything chilled if you prefer or if you want to prepare all the ingredients in advance.  It is important not to dress the salad until immediately before serving, however, or the noodles will lose their crunch.


Chinese Chicken Salad


4 cups (approximate) chicken breast, cooked, shredded
1/2 medium/large head cabbage, chopped
10 green onions, chopped
1/2 cup butter
2 packages Ramen noodles, crushed
1/4-1/2 cup slivered almonds

Dressing (whisk all together):
1/2 cup vegetable oil
1 teaspoon sesame oil
1/3 cup rice vinegar
1 tablespoon soy sauce
1/2 cup sugar

Mix chicken, cabbage, and green onions together in a large bowl. 

Melt butter in non-stick skillet.  Add crushed noodles and almonds.  Cook, stirring frequently, until nicely browned.

Add noodles to chicken/cabbage mixture.  Toss to mix.  Add dressing.  Toss to mix.  Serve immediately.


Saturday, June 9, 2012

Pistachio Chocolate Curry Cookies?

Crispy version

Our son went to a residential high school about thirty-five miles from home.  The parents association hosted a dinner one Friday a month to give the students -- particularly those who didn't get to go home too often -- a break from cafeteria food.  Each month was a different theme.

One month was Indian cuisine, a chance for the many Indian families at the school to showcase their favorite dishes.  Knowing I couldn't compete with real Indian cooks, I scoured the internet for a dessert which would complement the theme that I could also make in bulk.

I found a recipe on Epicurious for Pistachio Dark Chocolate Crisps.  The crisps generated a lot of interest that night as people tried to figure out exactly what they were.  What they were was, in a word, unique.  A not-too-sweet combination of colorful nuts and bittersweet chocolate with a surprising touch of curry powder.

Cookie version
Recently, I made the crisps again and adjusted the flavorings to make them a little zippier.  I also worked up a less crispy, more cookie-like version.  I find it hard to spread the batter evenly with the crisp version because, let's face it, 1/8 inch is really thin.  That's why the edges of the crisps are so dark in my first photo.  The edges overcooked.  The crisp version is nice and crunchy, so I don't discourage you from trying it.  Just be sure not to get your batter too thin along the edges.

The flavor combination of chocolate and curry is intriguing.  I used 1/2 teaspoon of curry because we like the flavor.  If you are less adventurous, you might want to go with 1/4 teaspoon.  (The original recipe calls for only 1/8 teaspoon.)

For the original recipe, please click here to go to Epicurious.


Pistachio Chocolate Crisps
Adapted from Gourmet Paul Grimes, Gourmet  on Epicurious.com

Crispy version, see how thin they are?
1/4 cup salted butter, softened
1/2 cup packed light brown sugar
6 tablespoons flour
1/2 teaspoon vanilla extract
1/4 - 1/2 teaspoon curry powder, depending on spiciness desired
1 large egg white
2 ounces bittersweet chocolate, chopped
1/2 cup shelled, roasted pistachios, chopped

Preheat oven to 350 degrees F.  Line a large baking sheet with parchment paper.

Blend butter, brown sugar, flour, vanilla, curry powder, and egg white until smooth.  Spread batter evenly on parchment paper into a 12- by 10-inch rectangle (1/8” thick).  Scatter chocolate and nuts evenly over batter, then bake until golden brown, 15-18 minutes.  Transfer, still on parchment paper, to rack to cool completely.  Remove from paper, break into pieces. 

For a softer, more cookie-like version:

Cookie version, much thicker
1/2 cup salted butter, softened
1 cup packed light brown sugar
1/4 cup plus 2 tablespoons flour
1 teaspoon vanilla extract
1/2 - 3/4 teaspoon curry powder, depending on spiciness desired
1 large whole egg
2 ounces bittersweet chocolate, chopped
1/2 cup shelled, roasted pistachios, chopped

Follow preparation and baking instructions as for crisps.  Cut into rectangles while still slightly warm.


Monday, May 28, 2012

1960s Working Mom Dinner

Mom in her working days
When I was growing up, my mother worked full time.  This was not quite as common in the 1960s as it is today.  We didn't suffer at all, however, by having a working mother.  When my brother and I were small, we had what today might be called a live-out nanny -- ladies who came to our house and stayed all day to take care of us.  When we were in school, the "nanny" was sort of a cross between a babysitter and a maid, as she had time during school hours to do some cleaning.

I don't remember our first sitter.  She came when my mother returned to work when I was a year old.  We lived in Germany then (my father was military), and her name was Krista, but everyone in our family called her Dee-da because that is how I pronounced her name.  All I really know about Krista was that a bow and arrow accident had left her with a glass eye.

The second sitter was Miss Murphy.  She took care of us for about five years,  during the time we lived in Clarksville, Tennessee.  Miss Murphy was the sweetest lady ever.  She was in her early-mid sixties.  She had never married and lived with her two brothers.  One brother was named Horace, and for many, many years I honestly thought his name was Horse.  Her other brother was Charlie.  He had a real sweet tooth and would mix sugar and water when there was no other dessert at their house.  Miss Murphy would let me sit in her lap during thunderstorms, and sometimes she would let me skip kindergarten if the other kids had been teasing me and I cried before school.  (This sometimes was the result of wearing a hooded raincoat and being called Little Red Riding Hood.) Miss Murphy was very protective of us.  In the summer, she would sit outside in a lawn chair, holding an umbrella for shade, while we "swam" in our little tiny wading pool.  I clearly remember her telling me, "You can drown in a teaspoonful of water."

When we moved to Georgia, Nelly became our maid.  She really was the one most like a maid.  After all, by then I was in third grade and my brother was in fifth.  She wore a white uniform.  Nelly, unlike Miss Murphy, could drive, so she would take us to music and swimming lessons.  She also taught us to play cards -- Fish and a game called Pat, which I can no longer remember.  She was a good cook and would often start supper by putting a roast in the oven.

Despite having this household help, my mother still had to prepare dinner most of the time after she came home.  In those days, a can of Campbell's soup was an easy way to make a sauce for dinner, and there were no foodie blogs or cable TV shows to make working and stay-at-home mothers feel guilty for taking this shortcut.  One of my mother's easy weekday meals was hamburger pie, a one-course meal that -- with a glass of milk -- covered all the bases for a balanced meal for the kids.


Hamburger pie is kind of a variant of shepherd's pie.  My mother always baked it in the oven and served it over mashed potatoes.  I am more flexible (and lazier).  I cook the whole thing in a non-stick skillet and serve it over rice or egg noodles when I am too rushed to make mashed potatoes.

Hamburger pie is not fancy; it won't impress your foodie friends.  In fact, I would never serve it to guests,  but I do make it occasionally when I want something easy and hearty, and I'll tell you a secret -- my family loves it.


Hamburger Pie


1 1/2 pounds ground chuck
1 medium onion, chopped
Salt and pepper to taste
2 cans (10 1/4 ounce) tomato soup
2 cans (14 1/2 ounce) cut green beans, drained

Break up ground chuck in non-stick skillet.  Season to taste with salt and pepper.  Add chopped onion.  Brown meat and onion together until thoroughly cooked (no pink in the meat).

Spoon out as much fat as possible from the pan.  (If desired, you can remove the meat with a slotted spoon to another bowl and pour out the fat, then return the meat to the pan.)  Add soup and beans.  Combine and heat over medium heat for about 15 minutes or until bubbly hot.

Serve over mashed potatoes, rice, or egg noodles.


Wednesday, May 23, 2012

Buttermilk on the Cusp Equals Divine

I had a full half gallon of buttermilk that had reached its sell-by date.  A cup went into breakfast biscuits, but that left a whole lotta buttermilk still to use.  I went searching through my recipe book, but then decided to just check the web. I'm so glad I did.  I found a wonderful recipe for a lemon buttermilk pound cake on Baking Bites.


This is a yummy pound cake with a very tender crumb.  I made only a few small changes to the recipe, like substituting lemon juice for lemon zest and using salted butter and less loose salt.  I also opted to omit the lemon glaze to reduce the sugar level and make it perfect for a breakfast on the front porch this morning.  We initially tried the cake hot from the oven, and it was absolutely divine served warm.


Lemon Buttermilk Pound Cake
slightly adapted from Bakingbites.com

3 cups flour
2 teaspoons baking powder
1/4 teaspoon salt
1 1/2 cups sugar
1/2 cup salted butter, softened
2 teaspoons lemon juice
3 large eggs
2 teaspoons vanilla extract
1 1/4 cups buttermilk
1/2 cup vegetable oil

Preheat oven to 350 degrees F. Grease (or spray with non-stick spray if using a non-stick pan) a 10-inch Bundt or tube pan.

In a medium bowl, sift together flour, baking powder, and salt.

In a large bowl, cream together butter and sugar until light and fluffy. Beat in lemon juice, then beat in eggs, one at a time, until combined.

Combine vanilla extract, buttermilk, and oil.

Add one third of the flour mixture to the butter mixture and beat gently until just combined. Then add half of the buttermilk mixture, beating until just combined. Repeat, ending with the flour mixture. Beat until just combined and no streaks of flour remain.

Pour into the prepared pan and bake in the center of the oven for 45-50 minutes until a toothpick inserted in the middle of the cake comes out clean. 

Cool in the pan on a wire rack for 10 minutes, then invert the cake onto wire rack to cool completely.  Top with lemon glaze if desired.


Saturday, May 12, 2012

Confetti Kedgeree

Here's another great meatless (though not vegan) recipe from Nikki and David Goldbeck's American Wholefoods Cuisine.  This recipe is a great use for leftover beans but, if you need to, you can use canned beans in a pinch.  If you have leftover rice, you can have this dish made in a flash!


This is a very inexpensive meal, and good when your larder is getting low as it uses pantry staples.  On this occasion, I did use canned beans, which I drained and lightly rinsed.  I combined kidney beans and navy beans for contrast in color and taste.  You can use any beans you prefer -- pinto beans and black beans are also good choices.  It reheats well for leftovers, too.


Kedgeree

from Nikki & David Goldbeck’s 
American Wholefoods Cuisine

2 tablespoons oil
1/4 cup chopped scallion or onion
1 tablespoon curry powder
3 cups cooked brown rice
2 cups cooked beans, drained (or 2 cans if using canned beans)
1 tablespoon lemon juice
2 tablespoons chopped pimiento
Dash soy sauce
Salt (omit if rice and beans are salted)
2 hard-cooked eggs, separated

Heat oil in a 15-inch skillet or wok.  Saute scallion for 2-3 minutes to soften, add curry powder, and cook for 1 minute.

Add rice, beans, lemon juice, soy sauce and dash of salt if needed to pan and heat through, stirring to prevent sticking.

Chop and mix in the egg whites.  When hot, top with crumbled egg yolk, remove from heat, and serve.


Monday, May 7, 2012

Heaven in Velvet

That would be Red Velvet. Red velvet chocolate pudding cake to be precise. I recently got another of my serious chocolate cravings and was too busy to shop or do much in the way of baking, so I scrounged around in the cupboards and came up with this easy red velvet pudding cake.

You can alter the ingredients in various ways to suit your tastes or pantry. My mother, for example, always bakes with mini chocolate chips because she doesn't like to bite into a big chip of chocolate. I, on the other hand, would be happy with double-size chocolate chips.  To each her own. I used devil's food pudding and red velvet cake simply because that was what I had on hand and, luckily, it worked.

I baked my cake in a Bundt pan.  If you use another type of pan, you will probably have to adjust the baking time.  It is important not to over bake the cake as you want to be sure it stays moist and just a little gooey around the chips.  Heaven!


Shortcut Red Velvet Pudding Cake

1 package (18.25 oz.) red velvet cake mix (not the kind with pudding in the mix)
1 package (3.8 oz.) instant devil’s food pudding mix
3 eggs
1 1/4 cups milk
1 cup sour cream
2 cups dark chocolate chips (can substitute milk chocolate)

Preheat oven to 350 degrees F.  Grease Bundt pan.

Combine all ingredients except chips in bowl of electric mixer.  Beat on low speed about 30 seconds to combine.  Beat at medium speed until smooth, about 2 minutes.  Fold in chocolate chips.

Pour into Bundt pan and bake 45-55 minutes until toothpick comes out clean or cake feels done when lightly touched.  Do not overcook.

Cool in pan for 5 minutes, then cool on wire rack.


Monday, April 30, 2012

And That's Why, Thanks to Phila, We Have Cake Every Morning

image from barnesandnoble.com


My apologies to Maurice Sendak for the title of this post. Because, of course, in In the Night Kitchen, it's thanks to Mickey we have cake in the morning.  We read that book countless times to our kids when they were little.  That Mickey, what a scamp!

This post, however, is not about Maurice Sendak, or Mickey, or night kitchens.  It's about the classic breakfast cake -- pancakes.

Even when I am in a cooking funk, I can be counted on to rustle up a batch of pancakes for weekend breakfasts.  We have two competing pancake recipes at our house.  Our son much prefers buttermilk pancakes -- he is even a little militant about it -- so when he is home and there is a call for pancakes, that's what I usually make.  Our daughter prefers a recipe called Fluffy Hot Cakes, but she seldom gets to have them.  This past weekend, though, she was the only child around, so I made her preferred cakes.


This recipe is an older one.  My aunt gave me a cookbook when I was in college called Kitchen Kollege Recipes by Phila Rawlings Hach.  Phila Rawlings grew up in the same community north of Nashville as my mother and her siblings.   She became quite a well-known cook and caterer in Tennessee.  The Kitchen Kollege book was initially published in 1954 when Rawlings Hach (Miss Rawlings at that time) was hosting a local TV cooking show of the same name in Nashville.  The book was reprinted in 1975. It's a very basic cookbook which includes no photographs but which does include an assumption of a certain amount of knowledge on the part of the cook.  For example, in the section "Foods from the Wild," she will just tell the reader, "Clean turtle.  Cut up."  I don't know about you, but I would need a lot more info before I knew how to clean a turtle.

You don't need any special, secret knowledge to prepare Rawlings Hach's Fluffy Hot Cakes recipe.  It is easy to follow and easy to eat!  At our house, we call these pancakes "Phila's Fluffies." I often throw in a tablespoon of sesame seeds to add a little body to the pancakes.

On the griddle: Look at all those bubbles!  That's the fluffy!

Fluffy Hot Cakes
Slightly adapted from Kitchen Kollege Recipes by Phila Rawlings Hach

1 cup flour, sifted
1/2 teaspoon salt
2 tablespoons baking powder
2 tablespoons sugar
1 egg
3/4 cup plus 2 tablespoons milk
2 tablespoons vegetable oil
1 tablespoon sesame seeds (can omit)

Sift dry ingredients together.  Beat egg , milk and oil together and add to dry ingredients.  Mix with wire whisk until smooth.  Add sesame seeds and mix well.

Bake on electric griddle at 375 degrees F. until fluffy and brown.  Turn only once.