Pages

Showing posts with label baking. Show all posts

Sunday, April 19, 2015

Trying Some New Recipes

In my ongoing quest to shake up the menus around here, I recently tried a couple of new recipes.  One is a soup that appeared in the March 2015 issue of Country Living.  It's a lemony chicken orzo soup.  Since I love Panera Bread's version, I figured it was well worth a try.


It's light, yet filling.  The fresh dill adds a nice touch.  You can find the recipe on the Country Living site here.

An even better success was a scrumptious mini chocolate chip Bundt cake.  It was a big hit with me and our son.  I found this recipe in one of those compilation fundraiser cookbooks -- love those.

My cake stuck to the pan a little bit, as you can see in the photo below.  The topping is put in the pan first, and is maybe a little too buttery.  Tastes great, but leaves the fingers a little greasy if eating out of hand.

Nutty on top!

Imminently snackable
Toll House Bundt Cake
from A Cookbook by Sunset House Auxiliary Toledo Ohio (1991)


2 3/4 cup flour
2 teaspoons baking soda
1 teaspoon salt
1 Tablespoon vinegar
1 cup less 1 Tablespoon milk
1 cup butter, softened
1 cup firmly packed brown sugar
1 Tablespoon vanilla
4 eggs
1/2 cup semi-sweet mini chocolate chips

Nut Topping:
1/2 cup butter, softened
4 Tablespoons granulated sugar
1 1/3 cup chopped nuts

For topping, combine butter, sugar and nuts; mix until crumbly.  Spoon into well-greased and floured 12-inch Bundt (or tube) pan.  Chill in refrigerator while you prepare cake batter.

Preheat oven to 375 degrees F.

In small bowl, combine flour, baking soda, and salt.  Set aside.  Place vinegar in 1 cup measure, fill with milk to 1 cup line; set aside.

In large mixing bowl, combine butter, brown sugar and vanilla; beat at medium speed until light and fluffy.  Add eggs, one at a time, beating well after each addition.  Turn mixer to low.  Gradually add flour mixture, 1/3 at a time, alternating with milk.

Gently fold in chocolate mini chips with a rubber spatula.  Pour into prepared pan.  Bake at 375 degrees F for 50 minutes.  Loosen edges of cake with spatula.  Immediately invert on cooking rack.


Printable recipe

Monday, March 25, 2013

A Not Too Sweet Chocolate Treat


Starbucks.  I have to admit, I don't get it.  Not being a coffee drinker, I have no real way to understand the whole phenomenon.  Not that I begrudge people their addictions.  I have a well established problem with Diet Coke.  It started in the early 1980s with Tab and progressed from there.  The difference is: on a car trip, I am perfectly happy with a $1.00 medium Diet Coke from McDonald's.  I don't need to find a Starbucks and invest in a grande dolce latte whatever.  


On a recent trip to Tennessee, I stopped to pick up my daughter from her apartment about three hours south of where I live.  Like many young people, she discovered coffee drinks in high school and college.  "Can we stop for coffee and breakfast?" she asked.  My bowl of Honey Bunches of Oats with almonds was wearing off by then, so I said sure.  She directed me to the Starbucks around the corner.  Since I had no idea what kind of breakfast I would find there, we had to go in.  She knew exactly what she wanted -- a slice of banana bread and some drink name that made no sense to me.  I couldn't decide what to get.  The lemon cake looked good -- except for the icing.  The chocolate bread looked good -- except for the cinnamon.  I finally chose a cookie, which was okay, but not something that would induce me to return.  The look of that chocolate bread, though, stuck with me.

When I got home last week, I must have still had the vision of Starbucks' chocolate bread lingering in my brain because when I looked in the pantry at the cookbooks, my hand went to the Hershey's 1934 Cookbook (which is actually a 1993 updated and expanded version of the cookbook), where I found a recipe for Chocolate Tea Bread.  It's a simple recipe that results in a nice chocolate loaf that is nutty, a little chewy, and not very sweet.  Mmmm.  I'm not sure how well my cake would go with a caramel macchiato, since Starbucks' chocolate cinnamon bread has 40 grams of sugar in a single slice whereas mine has about 134 grams in the whole loaf and no cinnamon, but it goes perfectly with milk or even Diet Coke!


Chocolate Tea Bread
slightly adapted from Hershey's 1934 Cookbook

1/4 cup unsalted butter, softened
2/3 cup sugar
1 egg
1 1/2 cups all-purpose flour
1 teaspoon baking soda
1/4 teaspoon salt
1/3 cup cocoa
1 cup buttermilk
1/2 cup sour cream
3/4 cup chopped walnuts


Preheat oven to 350 degrees F.  Grease and lightly flour an 8 x 4 x 2 inch loaf pan.

In large mixing bowl, beat butter until creamy.  Gradually add sugar, beating until well blended.  Add egg; beat well.  Sift together flour, baking soda and salt; add cocoa to dry ingredients and whisk together.  Add flour mixture to butter mixture in three parts, alternately with buttermilk.  Stir in sour cream.  Add nuts and mix just until blended.  Pour batter into prepared pan.
Bake approximately 1 hour and 15-20 minutes or until wooden pick comes out clean.  Cool 10 minutes in pan and then remove to wire rack.


Monday, January 28, 2013

A Savory Muffin to Ward Off the Gloomies

Yesterday was a dreary day filled with gray skies and freezing rain.  Fortunately, I had planned for such a day and had all the ingredients to make a big pot of comforting vegetable beef soup (recipe here) and savory Parmesan muffins.


I don't know where I got the recipe for these muffins.  I have had it several years and I had jotted it down on a scrap of paper, so I imagine I pulled it from a magazine in the dentist's waiting room.  The muffins are pretty homely and ordinary to look at, but they make a great accompaniment to soup or even steak.  It's easy to halve the recipe, which is what I did yesterday since there were only the two of us.  Serve them hot!


Savory Parmesan Muffins

2 eggs
3/4 cup milk
1/2 cup olive oil
1 cup grated fresh Parmesan cheese, divided
1 1/2 cups flour
2 tablespoons sugar
1/4 teaspoon baking powder
1/4 teaspoon baking soda
1 teaspoon powdered or crushed dried rosemary
1/2 teaspoon salt
1/2 teaspoon black pepper
1 teaspoon fresh garlic, finely chopped
  

Preheat oven to 350 degrees F.  Grease a muffin pan.

In small bowl, whisk together eggs, milk and olive oil.  In separate, large bowl, whisk together flour, sugar, baking powder, soda, rosemary, salt, pepper, and garlic.  Add 3/4 cup of the Parmesan cheese, mixing until cheese is well distributed.  Add wet ingredients and mix until combined.
Spoon into well-greased muffin tins.  Sprinkle remaining cheese on tops.  Bake about 20 minutes.  Serve hot.

Makes 12 1/2-cup muffins.


The other bright spot in a gray few days is this bunch of sunny daffodils the husband picked up at the grocery store. They were tight buds when he brought them home, but every one has opened into a happy little harbinger of spring to come.


Wednesday, December 19, 2012

A Dark and Stormy Christmas Cookie

Twas the week before Christmas and all through the house and kitchen, the cookies were baked and frozen -- to prevent the spouse from snitchin'!

Last week, when I shared my Orange Chocolate Chippers, I mentioned that I had tried another new cookie recipe this year.  I'll admit, I snitched one of these before I packed them away in the freezer.  Well, after all, a girl has to make sure they are edible before sharing them with the family, right?


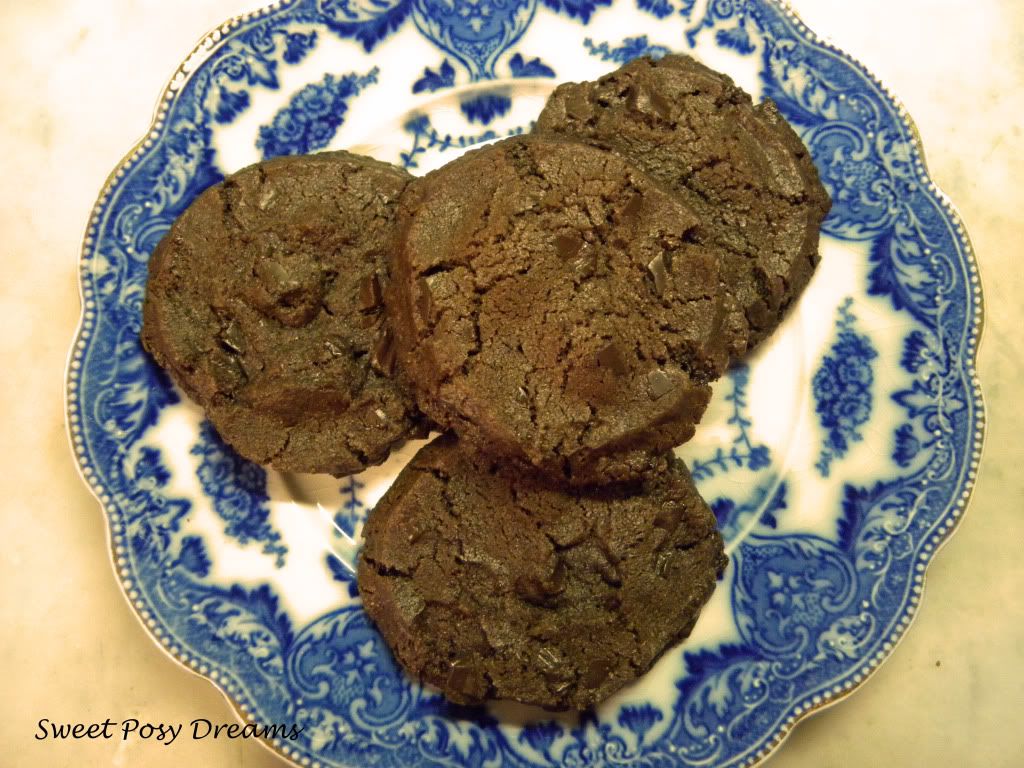
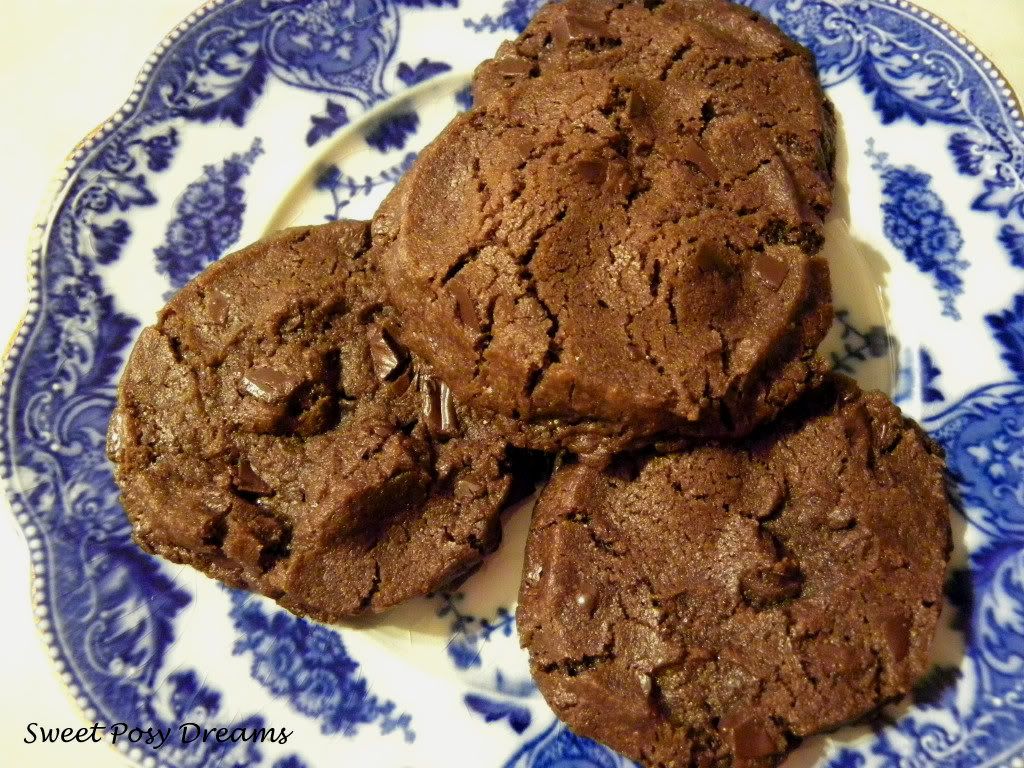
I clipped the recipe for Dorie's Dark and Stormies from a Chicago Tribune 2008 cookie contest article, but I never tried them before.  Now I kick myself for waiting so long.  Easy to make and so chocolaty scrumptious.  The recipe is available online on page two of this article from the Tribune archives.  The recipe says it makes three dozen cookies, but somehow I only got two dozen.  I did not use Dutch process cocoa, I used regular Hershey's.  For the chocolate bits, I chopped up five ounces of Ghirardelli 60% cacao bittersweet chocolate.

You know you want one.

Friday, December 14, 2012

Orange You Glad I Made Cookies?

Remember that old knock-knock joke?  Orange you glad I didn't say banana?  Well, I made a new Christmas cookie that's no joke -- Orange Chocolate Chippers.

Christmas cookies are a big thing at our house.  There are some traditional favorites that I make every year, like the Italian Wedding Cookies, Candy Cane Cookies, and Butter Cookies that I shared with you last year.  I also like to add in something new.  Last year it was Martha Stewart's Cream Cheese Walnut Cookies, which became a favorite of the husband's, so they made it back onto this year's hit parade.

Orange chocolate chippers

This year, I added two cookies to the repertoire.  Today I'll share the first one, Orange Chocolate Chippers.  I found a recipe in an old-ish cookbook from my husband's uncle's collection.  The book has an insanely long title: Senior Pilgrim Fellowship, United Church of Christ, Beacon Falls, Connecticut.  If there was another title, it didn't leap out at me.  This is one of those great cookbooks where all the ladies contributed their favorite recipes to raise money for their organization.  I like this kind of cookbook because the recipes are not trendy or "foodie;" they are tasty, do-able recipes that regular women made for their families and bridge clubs.  

When I saw the recipe for an orange and chocolate cookie, I knew I had to try it.  I changed the original recipe a little bit to include orange juice and baking powder.  I used orange peel and juice from some fruit my father-in-law had sent from Florida.  I don't know what variety they were, but they were not navel oranges; they were much more flavorful.  In looking at the website of the grower where he shops, I think they might have been Robinson tangerines, which is a cross of 3/4 tangerine and 1/4 grapefruit.  With navel oranges, I don't think you'd get the same strong citrusy pop that my cookies have, so I recommend tangerines or tangelos to really get that citrus flavor.


Orange Chocolate Chippers
Adapted from Audrey Gendron’s recipe in Senior Pilgrim Fellowship,
United Church of Christ, Beacon Falls, Connecticut cookbook, 1982

Orange chocolate chippers closeup
1 cup shortening
1 cup sugar
3 oz. cream cheese, softened
2 eggs
2 tablespoons grated orange/tangerine peel
1 teaspoon vanilla
1 teaspoon fresh orange/tangerine juice
2 cups flour
1 teaspoon salt
1/4 teaspoon baking powder
1 cup semisweet chocolate chips

Preheat oven to 350 degrees F.

Sift together flour, salt, and baking powder; set aside. 

Cream shortening, sugar, and cream cheese.  Add eggs, orange peel, vanilla, and orange juice.  Beat well.  Add flour mixture to creamed mixture.  Mix well.  Stir in chocolate chips.  Drop by rounded teaspoonfuls onto greased cookie sheet.  Bake about 7 minutes at 350 degrees F.  Cool on wire racks.

Makes approximately 56 cookies.


Printable recipe


Friday, October 5, 2012

Mrs. Haggard's Divine Coffee Cake


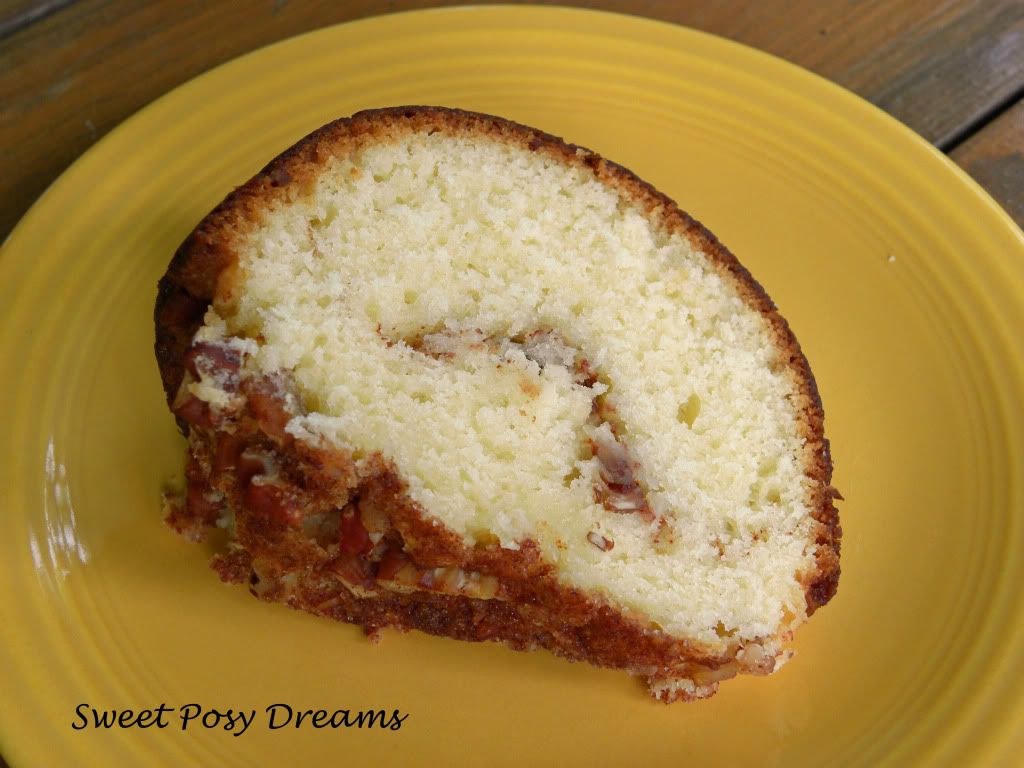
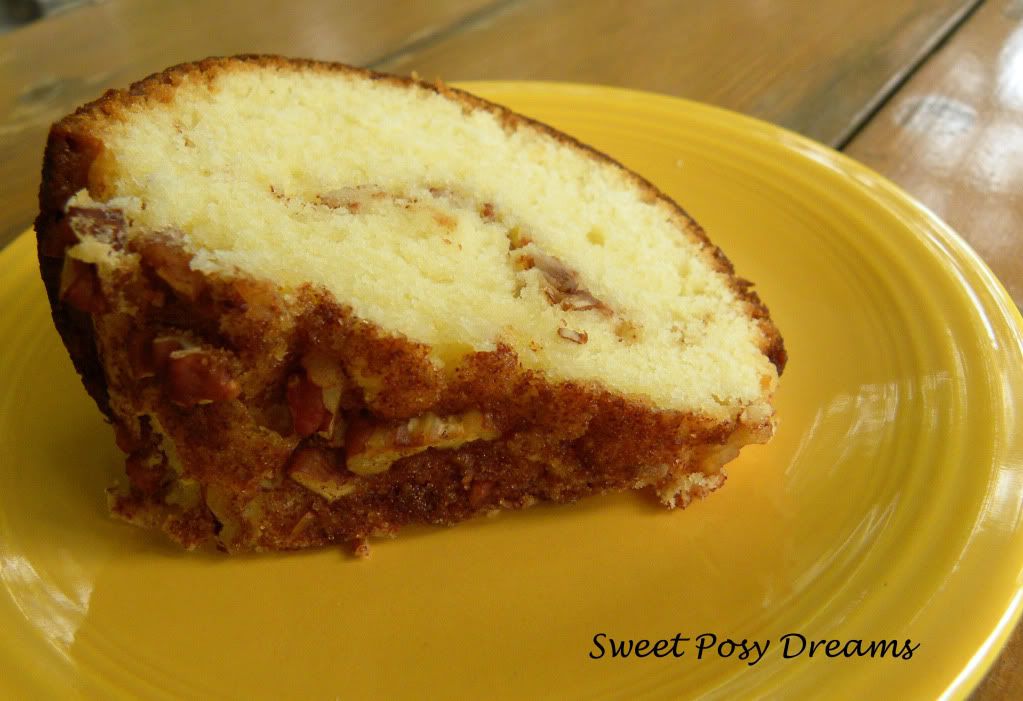
In the fall of 1981, Mrs. Haggard made the best coffee cake I had ever tasted.  I was in my first year of graduate school. Mrs. Haggard (did the woman have a first name?) was the wife of the department chairman.  The Haggards invited all the first years over to their home one evening early in the year to mingle with the faculty.  I was kind of nervous, and I don't think I actually talked to any faculty, but I did discover the most amazing coffee cake.  At the end of the evening, another student (Tracy) and I begged Mrs. Haggard for the recipe.  She very kindly sent it along with her husband the following week.  I have been making that cake ever since.  I expect Tracy, who was from South Dakota, probably still makes it too.  These days, my daughter is in grad school, and she bakes this cake for her friends.  It is always a big hit, and not just with starving graduate students.


Sour Cream Coffee Cake

1 cup margarine or butter
2 cups sugar
2 eggs
1/2 teaspoon vanilla
1 cup sour cream
2 cups flour
1 teaspoon baking powder
1/4 teaspoon salt

Topping:
1/2 cup chopped pecans
1/2 teaspoon cinnamon
2 tablespoons brown sugar

Preheat oven to 350 degrees F.  Cream margarine/butter and sugar together.  Add eggs and vanilla.  Mix well. 

Sift together dry ingredients and add them, together with sour cream, to butter mixture.  Beat well.

Spoon half of batter into a greased Bundt pan.  (If you do not have a Bundt pan, a tube pan will work.)  Add half of topping.  Then remainder of batter.  Sprinkle on remaining topping.

Bake at 350 degrees F. for 50-60 minutes.  Turn upside down immediately.


Wednesday, August 8, 2012

Orange Glow: Yummy Carrot Muffins

One summer day when our daughter was about three years old, we were at the city pool where we met a little girl the same age.  Her mother, Mary, was an editor, like me, and we became fast friends.  The girls played together and trick or treated together even though we lived across town from each other.  Mary introduced me to a natural foods buying group, and we traded recipes and brainstormed ways to get the kids to eat healthy.  Sadly, Mary and I eventually lost touch after my family moved away from that little town.  But I have never lost touch with her carrot muffin recipe.  These muffins have been a hit with my family these twenty years.  They always tasted great, but sometimes turned out a little sad and droopy looking, not the tall, gorgeous muffins that look pretty in addition to tasting great.  I've tweaked the recipe in various ways over the years to reduce the fat and so on, and recently, I finally got it right.  Yessireebob, the muffins still taste wonderful, but now turn out pretty, too.

Muffins, milk, and the newspaper equals one good breakfast, topped with walnuts or plain.  Either way is tasty!


Carrot Muffins

1 1/2 cups flour (1/2 cup of this can be whole wheat flour)
1/2 teaspoon salt
1 teaspoon baking soda
1/4 teaspoon baking powder
1 teaspoon cinnamon
1 cup brown sugar
2 eggs (beaten)
3/4 cup vegetable oil
1/2 cup chopped walnuts or pecans
1 3/4 cup finely shredded carrots

In large bowl, sift together flour, salt, baking soda, baking powder, and cinnamon.  Mix in brown sugar.  Add eggs.  While mixing, slowly add oil.  Beat until smooth.  Mix in nuts and carrots.  If desired, reserve some nuts to sprinkle on top of muffins.

Bake at 350 degrees F. for 20-30 minutes.


Saturday, June 9, 2012

Pistachio Chocolate Curry Cookies?

Crispy version

Our son went to a residential high school about thirty-five miles from home.  The parents association hosted a dinner one Friday a month to give the students -- particularly those who didn't get to go home too often -- a break from cafeteria food.  Each month was a different theme.

One month was Indian cuisine, a chance for the many Indian families at the school to showcase their favorite dishes.  Knowing I couldn't compete with real Indian cooks, I scoured the internet for a dessert which would complement the theme that I could also make in bulk.

I found a recipe on Epicurious for Pistachio Dark Chocolate Crisps.  The crisps generated a lot of interest that night as people tried to figure out exactly what they were.  What they were was, in a word, unique.  A not-too-sweet combination of colorful nuts and bittersweet chocolate with a surprising touch of curry powder.

Cookie version
Recently, I made the crisps again and adjusted the flavorings to make them a little zippier.  I also worked up a less crispy, more cookie-like version.  I find it hard to spread the batter evenly with the crisp version because, let's face it, 1/8 inch is really thin.  That's why the edges of the crisps are so dark in my first photo.  The edges overcooked.  The crisp version is nice and crunchy, so I don't discourage you from trying it.  Just be sure not to get your batter too thin along the edges.

The flavor combination of chocolate and curry is intriguing.  I used 1/2 teaspoon of curry because we like the flavor.  If you are less adventurous, you might want to go with 1/4 teaspoon.  (The original recipe calls for only 1/8 teaspoon.)

For the original recipe, please click here to go to Epicurious.


Pistachio Chocolate Crisps
Adapted from Gourmet Paul Grimes, Gourmet  on Epicurious.com

Crispy version, see how thin they are?
1/4 cup salted butter, softened
1/2 cup packed light brown sugar
6 tablespoons flour
1/2 teaspoon vanilla extract
1/4 - 1/2 teaspoon curry powder, depending on spiciness desired
1 large egg white
2 ounces bittersweet chocolate, chopped
1/2 cup shelled, roasted pistachios, chopped

Preheat oven to 350 degrees F.  Line a large baking sheet with parchment paper.

Blend butter, brown sugar, flour, vanilla, curry powder, and egg white until smooth.  Spread batter evenly on parchment paper into a 12- by 10-inch rectangle (1/8” thick).  Scatter chocolate and nuts evenly over batter, then bake until golden brown, 15-18 minutes.  Transfer, still on parchment paper, to rack to cool completely.  Remove from paper, break into pieces. 

For a softer, more cookie-like version:

Cookie version, much thicker
1/2 cup salted butter, softened
1 cup packed light brown sugar
1/4 cup plus 2 tablespoons flour
1 teaspoon vanilla extract
1/2 - 3/4 teaspoon curry powder, depending on spiciness desired
1 large whole egg
2 ounces bittersweet chocolate, chopped
1/2 cup shelled, roasted pistachios, chopped

Follow preparation and baking instructions as for crisps.  Cut into rectangles while still slightly warm.


Wednesday, May 23, 2012

Buttermilk on the Cusp Equals Divine

I had a full half gallon of buttermilk that had reached its sell-by date.  A cup went into breakfast biscuits, but that left a whole lotta buttermilk still to use.  I went searching through my recipe book, but then decided to just check the web. I'm so glad I did.  I found a wonderful recipe for a lemon buttermilk pound cake on Baking Bites.


This is a yummy pound cake with a very tender crumb.  I made only a few small changes to the recipe, like substituting lemon juice for lemon zest and using salted butter and less loose salt.  I also opted to omit the lemon glaze to reduce the sugar level and make it perfect for a breakfast on the front porch this morning.  We initially tried the cake hot from the oven, and it was absolutely divine served warm.


Lemon Buttermilk Pound Cake
slightly adapted from Bakingbites.com

3 cups flour
2 teaspoons baking powder
1/4 teaspoon salt
1 1/2 cups sugar
1/2 cup salted butter, softened
2 teaspoons lemon juice
3 large eggs
2 teaspoons vanilla extract
1 1/4 cups buttermilk
1/2 cup vegetable oil

Preheat oven to 350 degrees F. Grease (or spray with non-stick spray if using a non-stick pan) a 10-inch Bundt or tube pan.

In a medium bowl, sift together flour, baking powder, and salt.

In a large bowl, cream together butter and sugar until light and fluffy. Beat in lemon juice, then beat in eggs, one at a time, until combined.

Combine vanilla extract, buttermilk, and oil.

Add one third of the flour mixture to the butter mixture and beat gently until just combined. Then add half of the buttermilk mixture, beating until just combined. Repeat, ending with the flour mixture. Beat until just combined and no streaks of flour remain.

Pour into the prepared pan and bake in the center of the oven for 45-50 minutes until a toothpick inserted in the middle of the cake comes out clean. 

Cool in the pan on a wire rack for 10 minutes, then invert the cake onto wire rack to cool completely.  Top with lemon glaze if desired.


Monday, May 7, 2012

Heaven in Velvet

That would be Red Velvet. Red velvet chocolate pudding cake to be precise. I recently got another of my serious chocolate cravings and was too busy to shop or do much in the way of baking, so I scrounged around in the cupboards and came up with this easy red velvet pudding cake.

You can alter the ingredients in various ways to suit your tastes or pantry. My mother, for example, always bakes with mini chocolate chips because she doesn't like to bite into a big chip of chocolate. I, on the other hand, would be happy with double-size chocolate chips.  To each her own. I used devil's food pudding and red velvet cake simply because that was what I had on hand and, luckily, it worked.

I baked my cake in a Bundt pan.  If you use another type of pan, you will probably have to adjust the baking time.  It is important not to over bake the cake as you want to be sure it stays moist and just a little gooey around the chips.  Heaven!


Shortcut Red Velvet Pudding Cake

1 package (18.25 oz.) red velvet cake mix (not the kind with pudding in the mix)
1 package (3.8 oz.) instant devil’s food pudding mix
3 eggs
1 1/4 cups milk
1 cup sour cream
2 cups dark chocolate chips (can substitute milk chocolate)

Preheat oven to 350 degrees F.  Grease Bundt pan.

Combine all ingredients except chips in bowl of electric mixer.  Beat on low speed about 30 seconds to combine.  Beat at medium speed until smooth, about 2 minutes.  Fold in chocolate chips.

Pour into Bundt pan and bake 45-55 minutes until toothpick comes out clean or cake feels done when lightly touched.  Do not overcook.

Cool in pan for 5 minutes, then cool on wire rack.


Friday, April 27, 2012

Eat 'em Sesame

I've been in kind of a cooking funk lately.  As in, I just don't want to cook.  The husband has actually had to resort to cooking a few dinners to avoid starvation.  I was feeling a little guilty about it, so the other night I whipped up a batch of the sesame seed cookies he likes as a little gesture.  (They're easy to make, so it really was a pretty small gesture.) Still, he was pleased and gulped down four cookies to show his appreciation.


These cookies are for real sesame seed lovers.  At the first bite, you think, "Wow, these are really seedy and different. I don't know . . . ."  Then you finish the cookie and think, "I want another one."  At least that was how I felt the first time I made the cookies.

Look at all those seeds!


I found the recipe on About.com where it was posted by Diana Rattray.


Tuesday, April 24, 2012

A Roundabout History of My Biscuit Recipe


As many of you know, I grew up in Tennessee, in an unincorporated community in Davidson County just north of Nashville.  Joelton ran along the top of a ridge of hills called Paradise Ridge.  In the winter, it could be tough for people to get home from Nashville on the icy hills.  But the local men always seemed to head to the hill to help out.  On at least one evening after work, my mother had to have her car pulled up Germantown Hill by someone with a truck. 

Our high school, part of the Nashville school district, was quite small.  There were just under 100 students in my graduating class.  Even though it was called a high school, it actually housed students from grades 7-12.  On the first day of school each year, everyone went to the gym.  Each grade level had its own section.  There were never any signs to indicate this, everyone just seemed to know, even the seventh graders on their very first day.  The seventh and eighth graders sat in the smaller, visitor bleachers.  It made you feel important on the first day of ninth grade when you got to move over to the home side.  The teachers read out the names of their home rooms, and kids would leave. one classroom at a time. 

The school had a long history.  My mother graduated from the same high school in 1949 although it was a wooden building in those days.  The main hallway was lined with group portraits of each graduating class.  I’m not sure how far back, certainly from the 1930s, maybe even the ‘20s.  The main secretary was Miss Pauline.  She started working at the school in 1948, so she knew you, your siblings, and most likely one or both of your parents. 

school days

When I was in school – and this is completely politically incorrect – in eighth grade all the boys took shop and all the girls took home ec.  This was required.  You could finagle your way out of PE, but not shop and home ec.  Looking back, I wish they had required shop and home ec of both genders.  I think I’d be less leery of power tools today if I’d taken shop in junior high. 

Mr. Hall was one of the shop teachers.  He always wore bow ties so his tie wouldn’t get caught in the equipment.  He also taught math, and I had math one year in the shop room.  We sat on high stools at the big square workbenches surrounded by a cement floor.  Bookends and lamps the boys were working on would be distributed around the room in various stages of completion.  My brother also made a chess board one time, maybe as a choose-your-own project.

While the boys were in shop, we girls were up on the second floor in home ec.  One semester of sewing and one of cooking.  In sewing, we made a pillow out of a terrycloth bath towel.  We drew one-inch squares on the “wrong” side and created a complicated gathered surface.  I wish I had a photo to show you my bright orange towel pillow.  

Cooking was much more fun.  My home ec teacher for both semesters was Mrs. Durham.  She was a nice lady, but she had her hands full with us.  I didn’t give her any trouble in sewing, but cooking was another matter.  Even then, I couldn’t resist tweaking some of the recipes.  We made sugar cookies one day, and our group added quite a bit of extra sugar because we just didn’t believe they would be sweet enough.  Poor Mrs. Durham tried to explain that it wasn’t a good idea to change the recipes, but our cookies had turned out delicious, so we weren’t buying.


Hands down the best recipe I learned in home ec was for baking powder biscuits.  It is still my go-to biscuit recipe, and I haven't changed it a bit.  A couple of readers requested that I post my biscuit recipe after my steak and biscuits post, so here it is.  Straight from eighth grade home ec to your table.


Baking Powder Biscuits

2 cups sifted flour
3 teaspoons baking powder
¾ teaspoon salt
1 tablespoon sugar
5 tablespoons shortening
1 cup milk

Sift dry ingredients together.  Cut in shortening.  Add milk.  Dough will be soft.  Pat out on floured board.  Lightly knead 5 or 6 times.  Pat out dough to ½ inch thickness.  Cut out biscuits.

Bake on greased cookie sheet at 450 degrees F. for about 12 minutes.


Tuesday, April 10, 2012

Do You Fondue?

One of the first cookbooks I ever owned was The Good Housekeeping Illustrated Cookbook by Zoe Coulson.  It was published in 1980, and I was living in a student apartment in Knoxville, Tennessee.  My father bought the cookbook for me so I wouldn't starve.  He especially liked the fact that it is illustrated throughout and has color photos of all the dishes in a handy index in the front.  While some of those jello molds and noodle ring dishes look a little dated today, it is still a good all-purpose cookbook.

When our daughter moved into her own student apartment, I passed the cookbook on to her.  I didn't think I would miss it, but I did.  Every now and then, I'd think, if only I still had the recipe for this or that.  Then last year, I was helping clean out my husband's uncle's house and, lo and behold, there was the same cookbook buried in a drawer.  I quickly put it in the keep pile.

So this time, when that "if only" thought hit me, I had the recipe.  And this time it was fondue bread that crept into my brain.  I hadn't made it in years.  In fact, I don't think my kids had ever had it, but over Easter weekend, I had a yen for fondue bread.  I made it for a late breakfast along with free-range fried eggs and fresh fruit.


This is a very hearty and cheesy bread.  I reduced the amount of cheese from the original recipe.  The original calls for two pounds of cheese!  I used about one and three-quarter pounds, but you could reduce it to one and a half and still have plenty of cheese.  The cookbook classifies this bread an entree; you might think of it as a baked cheese sandwich.

This is also a fairly easy bread for people who are not experienced with yeast breads.  It doesn't have to rise; it only "rests" a couple of times.  If you are using yeast for the first time, be warned -- the temperature of the liquids is important.  Use a thermometer to make sure you do not overheat your liquid ingredients.  Overly hot liquid will kill the yeast.

Fondue has had a resurgence of popularity in recent years.  Maybe it's time for fondue bread to make a comeback, too!

Printable recipe


Monday, April 9, 2012

Spring and Summer Strawberry Cake

Nothing says warm weather to me quite like fresh strawberries.  I know they are available year round, but I really like strawberries when the weather is nice.  I like them plain, with cream, or mixed into a fruit salad.  So back in July of 2004, when Country Living featured a strawberry cake on the cover, I was intrigued.  I tried it, and it became a popular summer choice at our house.  This year, I celebrated spring by making strawberry cake for Easter weekend.  To make it extra festive, I tinted the whipped cream pink.


I apologize for the quality of the picture.  It was late evening by the time we whipped up the cream and assembled the cake, and our dining room is notorious for bad lighting in night-time pictures.

The neat thing about this recipe is that it makes two layers, but you serve it as a single layer, so you can freeze the other layer for another time.  The recipe is available on Country Living's website, even though it appeared in print eight years ago.  I see that it didn't get great reviews there, but we've always liked it.  Frankly, whipped cream makes even an ordinary cake extraordinary, and pink whipped cream -- well, it just doesn't get more special!

Monday, April 2, 2012

What's Wacky About This Cake?

We grow up with so many foods, it's impossible to remember the first time we ate them.  Meatloaf, green beans, mashed potatoes -- who can remember the first time?  Foods we first try in adulthood are different.  We can often remember the exact circumstances when we ate something new.

Oddly enough, wacky cake is one such food for me.  Even though it has been around since probably the 1930s, wacky cake first came into my life when I was pregnant with our first child.  We had gone to visit my in-laws in Ohio.  I think it was probably a Saturday night, and I wanted chocolate cake.  The husband and I were watching a little TV in the family room, and I mentioned that I had a real craving for chocolate cake.  (Maybe I mentioned it more than once; I can be kind of needy when chocolate is involved.)

Join me on the porch for wacky cake topped with whipped cream.

My wonderful mother-in-law never said a word, but she got busy in the kitchen and in no time at all, she brought me a square of delicious homemade chocolate cake, still warm and topped with melting chocolate icing.  Can you imagine a better mother-in-law than that?  She made me feel special and loved; how could I forget that day?  Wacky cake has been kind of near to my heart ever since.  True, it's not fancy or impressive, after all, it was developed in the Depression as an inexpensive cake that didn't require eggs, but as my mother-in-law said, you always have the ingredients on hand.  I've made this cake many times over the years, sometimes with icing or sometimes topped simply with ice cream or whipped cream.  I enjoyed it as a first-time pregnant woman, and I still enjoy it today.


The lady who introduced me to wacky cake
and the child who caused the craving.

Wacky Cake

1 1/2 cups flour
1 cup sugar
1/4 cup cocoa
1 teaspoon baking soda
1 teaspoon vanilla
1 teaspoon apple cider vinegar
6 tablespoons margarine, melted
1 cup water

Preheat oven to 350 degrees F.  Lightly grease an 8-inch square pan.

In large bowl, sift together flour, sugar, cocoa and baking soda.  Make 3 wells in flour mixture.  Put vanilla in first well, vinegar in the second, and melted margarine in the third.  Pour water over mixture.  Mix well with fork.

Pour into greased pan and bake for 25-30 minutes.  Serve warm with ice cream or whipped cream, or allow to cool and frost with chocolate icing.


Wednesday, March 28, 2012

Light as Air Banana Muffins

Banana bread is a classic way to use overripe bananas.  I've always enjoyed my mother's classic banana bread recipe. As a change of pace though, sometimes I like to make banana walnut muffins.  These are an especially good option if you have trouble getting your banana bread cooked thoroughly.  Some people like that little gooey center at the top of banana bread but, frankly, I find it kind of disconcerting.  Muffins solve that problem beautifully.  This recipe makes a light muffin that is soft without being gooey.


Banana Walnut Muffins


2 cups flour
1 tablespoon baking powder
1/4 teaspoon salt
1/2 cup butter or margarine, softened
3/4 cup brown sugar, packed
2 eggs
1 1/2 teaspoons vanilla
1 1/2 cups mashed bananas (I use three bananas)
3/4 cup chopped toasted walnuts


Preheat oven to 350 degrees F.  Line a muffin tin with paper liners.

Sift together flour, baking powder, and salt.  Set aside.

In large bowl, cream together butter, sugar, and vanilla until smooth.  Beat in eggs, one at a time.  Add mashed bananas and beat until well combined.

Lightly stir dry ingredients into butter mixture, just until flour disappears.  Lightly stir in nuts.

Spoon batter into muffin cups to the top.  Bake 20-25 minutes.  Makes 12 muffins.


The real key to this recipe is to be very light when you stir in the flour and nuts.  Do NOT beat it in.  A light touch will assure a lighter muffin.  As a side note, you can use pecans in this recipe instead of walnuts if you prefer.


Monday, March 12, 2012

A Different Brownie

I have a project up my sleeve involving baby food jars.  My "baby" just turned twenty years old last week, so I really don't have a use for baby food.  I looked into buying empty jars on Etsy, but the cost with shipping was about twice what I could pay for full jars at the big box discount store here in town.  I'm pretty frugal, so I knew it would be foolish to pay double, but I also grew up with parents who do not believe in waste.  I can't just pour out all that baby food.  I solved my dilemma by buying baby applesauce and making chocolate applesauce brownies.  (To be truthful, though, they are better with regular, non-baby applesauce.  Baby food applesauce is so finely processed that it is almost a liquid.) These brownies are a favorite of mine from childhood.  They are moist and dense, and the applesauce adds a different taste. Over the years, I updated the recipe to reduce the original amounts of sugar and salt.  Give them a try for a change of pace.  I'm going to be eating a lot of them in order to empty my baby food jars!


Chocolate Applesauce Brownies

2 ounces unsweetened chocolate
1/2 cup butter
1 cup flour
1/2 teaspoon baking powder
1/8 teaspoon salt
2 large eggs
3/4 cup sugar
1 cup applesauce (or two baby food jars)
1 cup chopped walnuts
1 1/2 teaspoons vanilla

Spray a 9x13 pan with vegetable spray; set aside.

In microwave-safe bowl, melt chocolate and butter together in microwave; stir to combine.  While chocolate and butter are melting, sift together flour, baking powder and salt in small bowl.

In a large bowl, beat or whisk eggs until light.  Gradually add sugar and continue to whisk.    Stir in chocolate/butter mixture.  Whisk for 30 seconds or until fully incorporated.  Add flour mixture and whisk until smooth.  Stir in applesauce, nuts, and vanilla. 

Pour into 9x13 pan.  Tap pan gently to release air bubbles.  Bake at 350 degrees F. for about 30 minutes (check for doneness after 25 minutes).    Let cool and cut into squares.


Monday, March 5, 2012

Frosting: The Tunic Top of the Cake World

A tunic top may not be the height of fashionable clothing, but it can serve as camouflage for figure flaws.  Baked goods, unfortunately, don't have the luxury of clothing to hide their flaws.  That's what frosting is for!

Chocolate cake with whipped cream frosting is a popular birthday cake choice at our house.  Our son chose it this year to celebrate leaving his teenage years behind.  Wouldn't you know it, for the first time, the cake stuck to the pan.  It was not a full-blown disaster stuck to the pan, but both layers stuck on the sides a little bit.


My son, bless him, said it didn't matter.  He was right, of course.  I just made extra frosting and filled the damage with whipped cream.  Works for me!


The recipe comes from the May 2005 issue of Country Living magazine.  The issue featured cakes from a reader recipe contest.  I have changed the recipe only slightly.  This moist and delicious cake is not overly sweet, and the whipped cream frosting means you can omit ice cream and not miss it at all.  The recipe for another of our favorite birthday cakes, Praline Turtle Cake, comes from the same issue of Country Living.


Chocolate Whipped Cream Cake
Adapted from Country Living May 2005

Cake:
1 3/4 cups flour
3/4 cup cocoa powder
1 teaspoon salt
1 1/2 teaspoons baking powder
1 1/2 teaspoons baking soda
2 cups sugar
12 cup vegetable oil
1 cup milk
2 large eggs
2 teaspoons vanilla
1 cup boiling water

Frosting:
1 1/2 cups heavy cream
1/2 teaspoons confectioners’ sugar
1/4 plus 2 tablespoons granulated sugar
1 1/2 tablespoons cocoa powder
1/3 cup mini chocolate chips

Preheat oven to 350 degrees F.  Grease two 9-inch round cake pans.  Line bottoms with parchment paper.  Grease the paper as well and dust with flour.  Set pan of water or kettle on to boil.

Sift together flour, cocoa, baking powder and baking soda in large bowl.  Whisk in sugar.  Beat in oil, milk, eggs and vanilla using a mixer set on medium speed for 2 minutes.  Reduce speed to low and add 1 cup boiling water.  Batter will be very thin.

Pour batter into pans and tap to remove air bubbles.  Bake until pick inserted in each cake comes out clean, about 30-35 minutes.  Cool pans on wire racks for 10 minutes.  Remove from pans and cool completely.

Frosting:
Beat cream and confectioners’ sugar until soft peaks form.  Gently fold in granulated sugar and cocoa (add cocoa through sieve to prevent clumps).  Mix gently until combined.

Place about 1/3 of the frosting and ½ of the mini chocolate chips between the layers.  Frost top and sides of cake and decorate the top with the remaining mini chips.  Store in the refrigerator.


Friday, February 24, 2012

Poppy Seed Pound Cake

Poppies.  Poppy flowers are so beautiful, so fragile looking with their papery petals.  Yet they are also a little intimidating with their hairy stems and spiky leaves.  Perhaps that's why poppies have so much symbolism attached to them -- remembrance, sleep, and death.

For many of us, our first memory of poppies may be from The Wizard of Oz where Dorothy, Toto, and the Lion fall asleep in a magical poppy field.  In Greek and Roman mythology, poppies were used as offerings to the dead and possibly as symbols of resurrection.  Poppies are sometimes carved on tombstones for the same reasons.

illustration by W. W. Denslow from The Wizard of Oz and poppies on a tombstone in Illinois

Luckily, this lovely cake will not put you to sleep (or worse).  I believe the recipe came from The Nashville Tennessean newspaper years ago.  I seem to remember that it was supposed to be Emmy Lou Harris' recipe.  I have changed it only slightly from the original version.


Lemon Poppy Seed Pound Cake


2 cups sugar
1 cup margarine, softened (can use butter)
3 cups flour (can replace 1/2 cup with whole wheat flour)
1/2 teaspoon baking powder
1/2 teaspoon baking soda
1/2 teaspoon salt
1/4 cup poppy seeds
1 cup buttermilk
1 teaspoon lemon zest
1 teaspoon lemon juice
½ teaspoon vanilla

Heat oven to 325 degrees F.  Grease and flour a 10” tube pan.  (Do not use vegetable spray; I tried this and the cake stuck.) 

Cream margarine (or butter) and sugar together.  Sift together dry ingredients.  Add dry ingredients and all remaining ingredients to creamed mixture.  Beat on low speed until moistened.  Beat on medium speed for 2-3 minutes or until mixture lightens and is relatively smooth (there will still be bits of margarine/butter).

Pour in tube pan and bake 45-50 minutes, until golden on top.  Cool in pan 10 minutes.  If desired, top with glaze.  (I always omit the glaze.)

Glaze:
1 cup confectioner’s sugar
2-3 tablespoons lemon juice


Did you know that there are more than 120 species of poppies and that culinary poppy seeds come from the opium poppy?  Poppy seeds contain both morphine and codeine.  (Hmmm, can this be why I love poppy seed cakes and muffins so much?)  I have read that anywhere from two to four poppy seed bagels are enough to cause a positive drug test.  So you might not want to eat this scrumptious poppy-filled cake if you are subject to a drug test within seventy-two hours. Fair warning.


Printable recipe