Pages

Showing posts with label cookie recipe. Show all posts

Friday, December 14, 2012

Orange You Glad I Made Cookies?

Remember that old knock-knock joke?  Orange you glad I didn't say banana?  Well, I made a new Christmas cookie that's no joke -- Orange Chocolate Chippers.

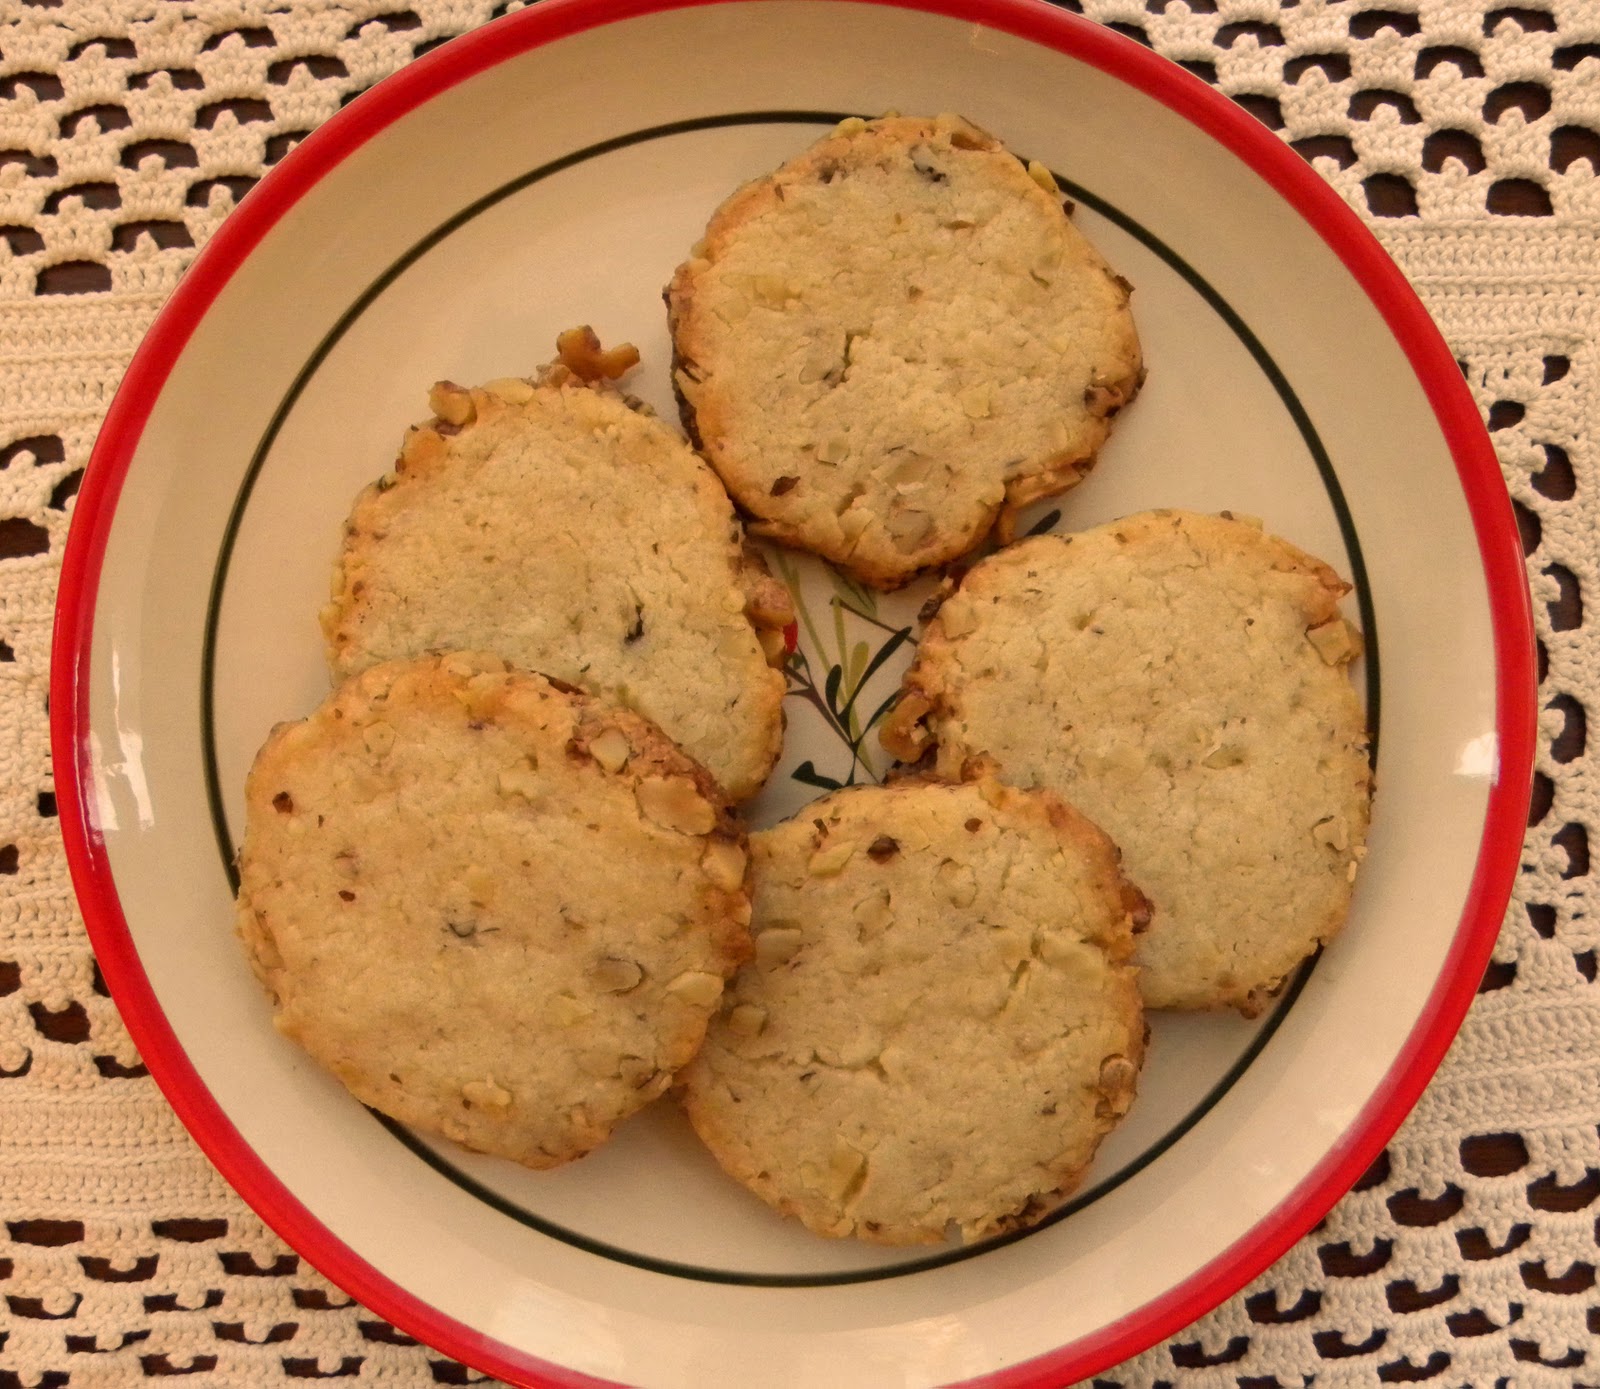
Christmas cookies are a big thing at our house.  There are some traditional favorites that I make every year, like the Italian Wedding Cookies, Candy Cane Cookies, and Butter Cookies that I shared with you last year.  I also like to add in something new.  Last year it was Martha Stewart's Cream Cheese Walnut Cookies, which became a favorite of the husband's, so they made it back onto this year's hit parade.

Orange chocolate chippers

This year, I added two cookies to the repertoire.  Today I'll share the first one, Orange Chocolate Chippers.  I found a recipe in an old-ish cookbook from my husband's uncle's collection.  The book has an insanely long title: Senior Pilgrim Fellowship, United Church of Christ, Beacon Falls, Connecticut.  If there was another title, it didn't leap out at me.  This is one of those great cookbooks where all the ladies contributed their favorite recipes to raise money for their organization.  I like this kind of cookbook because the recipes are not trendy or "foodie;" they are tasty, do-able recipes that regular women made for their families and bridge clubs.  

When I saw the recipe for an orange and chocolate cookie, I knew I had to try it.  I changed the original recipe a little bit to include orange juice and baking powder.  I used orange peel and juice from some fruit my father-in-law had sent from Florida.  I don't know what variety they were, but they were not navel oranges; they were much more flavorful.  In looking at the website of the grower where he shops, I think they might have been Robinson tangerines, which is a cross of 3/4 tangerine and 1/4 grapefruit.  With navel oranges, I don't think you'd get the same strong citrusy pop that my cookies have, so I recommend tangerines or tangelos to really get that citrus flavor.


Orange Chocolate Chippers
Adapted from Audrey Gendron’s recipe in Senior Pilgrim Fellowship,
United Church of Christ, Beacon Falls, Connecticut cookbook, 1982

Orange chocolate chippers closeup
1 cup shortening
1 cup sugar
3 oz. cream cheese, softened
2 eggs
2 tablespoons grated orange/tangerine peel
1 teaspoon vanilla
1 teaspoon fresh orange/tangerine juice
2 cups flour
1 teaspoon salt
1/4 teaspoon baking powder
1 cup semisweet chocolate chips

Preheat oven to 350 degrees F.

Sift together flour, salt, and baking powder; set aside. 

Cream shortening, sugar, and cream cheese.  Add eggs, orange peel, vanilla, and orange juice.  Beat well.  Add flour mixture to creamed mixture.  Mix well.  Stir in chocolate chips.  Drop by rounded teaspoonfuls onto greased cookie sheet.  Bake about 7 minutes at 350 degrees F.  Cool on wire racks.

Makes approximately 56 cookies.


Printable recipe


Saturday, June 9, 2012

Pistachio Chocolate Curry Cookies?

Crispy version

Our son went to a residential high school about thirty-five miles from home.  The parents association hosted a dinner one Friday a month to give the students -- particularly those who didn't get to go home too often -- a break from cafeteria food.  Each month was a different theme.

One month was Indian cuisine, a chance for the many Indian families at the school to showcase their favorite dishes.  Knowing I couldn't compete with real Indian cooks, I scoured the internet for a dessert which would complement the theme that I could also make in bulk.

I found a recipe on Epicurious for Pistachio Dark Chocolate Crisps.  The crisps generated a lot of interest that night as people tried to figure out exactly what they were.  What they were was, in a word, unique.  A not-too-sweet combination of colorful nuts and bittersweet chocolate with a surprising touch of curry powder.

Cookie version
Recently, I made the crisps again and adjusted the flavorings to make them a little zippier.  I also worked up a less crispy, more cookie-like version.  I find it hard to spread the batter evenly with the crisp version because, let's face it, 1/8 inch is really thin.  That's why the edges of the crisps are so dark in my first photo.  The edges overcooked.  The crisp version is nice and crunchy, so I don't discourage you from trying it.  Just be sure not to get your batter too thin along the edges.

The flavor combination of chocolate and curry is intriguing.  I used 1/2 teaspoon of curry because we like the flavor.  If you are less adventurous, you might want to go with 1/4 teaspoon.  (The original recipe calls for only 1/8 teaspoon.)

For the original recipe, please click here to go to Epicurious.


Pistachio Chocolate Crisps
Adapted from Gourmet Paul Grimes, Gourmet  on Epicurious.com

Crispy version, see how thin they are?
1/4 cup salted butter, softened
1/2 cup packed light brown sugar
6 tablespoons flour
1/2 teaspoon vanilla extract
1/4 - 1/2 teaspoon curry powder, depending on spiciness desired
1 large egg white
2 ounces bittersweet chocolate, chopped
1/2 cup shelled, roasted pistachios, chopped

Preheat oven to 350 degrees F.  Line a large baking sheet with parchment paper.

Blend butter, brown sugar, flour, vanilla, curry powder, and egg white until smooth.  Spread batter evenly on parchment paper into a 12- by 10-inch rectangle (1/8” thick).  Scatter chocolate and nuts evenly over batter, then bake until golden brown, 15-18 minutes.  Transfer, still on parchment paper, to rack to cool completely.  Remove from paper, break into pieces. 

For a softer, more cookie-like version:

Cookie version, much thicker
1/2 cup salted butter, softened
1 cup packed light brown sugar
1/4 cup plus 2 tablespoons flour
1 teaspoon vanilla extract
1/2 - 3/4 teaspoon curry powder, depending on spiciness desired
1 large whole egg
2 ounces bittersweet chocolate, chopped
1/2 cup shelled, roasted pistachios, chopped

Follow preparation and baking instructions as for crisps.  Cut into rectangles while still slightly warm.


Sunday, December 18, 2011

Christmas Cookies - Fourth Batch

Butter cookies -- you can't beat 'em.  These butter cookies are classics for Christmas, but are also good year round cut into other shapes.  When I make them during other times of the year, I don't decorate with any sugar or sprinkles, and I add 2 tablespoons of poppy seeds to the dough.  This recipe is so simple and so yummy.  I like to roll my dough pretty thick and pull the cookies out of the oven before they brown on the edges, but I'm notorious for my uneven dough, so some of the cookies always get more browned than I prefer.  No matter, they're still tasty!


This recipe comes from the Joy of Cooking.


Rich Roll Cookies

The Joy of Cooking (1975)
by Irma S. Rombauer and Marion Rombauer Becker

1 cup butter
2/3 cup sugar
1 egg
1 teaspoon vanilla
2 ½ cups sifted flour
½ teaspoon salt

Cream together butter and sugar.  Beat in egg and vanilla.  Sift together flour and salt and add to the butter mixture.

Chill dough 3 to 4 hours before rolling.  Preheat oven to 350 degrees.  Roll out dough to about ¼ inch thick on a floured board (use as little flour as possible, but do not let the dough stick).  Cut into shapes.  Bake on a greased cookie sheet 7-8 minutes or until slightly colored.


Saturday, December 17, 2011

Christmas Cookies - Third Batch


My husband requested these cream cheese-walnut cookies when he saw them pictured in a Martha Stewart Holiday Cookie magazine.  I had never made them before.  They are quite good, but do have a distinct cream cheese flavor.  We like the taste, so it works for us.  In fact, my husband liked them so much, he ate three before I could get them in the freezer!

I halved the recipe, which made 22 cookies.  I had trouble getting the walnuts to stick to the dough log after removing it from the freezer.  I only left it in the freezer for 30 minutes.  If you freeze it longer, you may need to let it warm up before rolling in walnuts.


Cream Cheese-Walnut Cookies

From Holiday Cookies by Martha Stewart


4 cups flour
1 teaspoon salt
2 cups butter, softened
6 ounces cream cheese, room temperature
1 ¼ cups sugar
2 tablespoons plus ½ teaspoon vanilla
2 ½ cups walnuts (1 ½ cups should be coarsely chopped and 1 cup should be finely chopped)


Sift together flour and salt; set aside.

Cream butter and cream cheese at medium speed until pale and fluffy, about 2 minutes.  Mix in sugar and vanilla.  Reduce speed to low.  Add flour and mix until just combined.  Mix in walnuts.

Transfer dough to work surface.  Divide in half; shape each half into a log about 2 inches in diameter.  Wrap each log in parchment paper and freeze about 30 minutes, or up to two weeks.

Preheat oven to 350 degrees.   Roll each log in ½ cup chopped walnuts.  Slice into ¼-inch thick rounds.  Space 1 inch apart on baking sheets lined with parchment paper.

Bake cookies, rotating halfway through, until golden around the edges, about 18-20 minutes.  Let cool on wire racks.


Printable recipe
(Thanks to Angie of http://godsgrowinggarden.blogspot.com, for telling me how to link a printable recipe!)

Friday, December 9, 2011

Christmas Cookies - Second Batch

Finished the second batch of Christmas cookies!  These candy cane cookies are my son's particular favorites.  The recipe comes from A Cookbook by Sunset House Auxiliary Toledo, Ohio.


Candy Cane Cookies

½ cup margarine, softened
½ cup butter, softened
1 cup confectioner’s sugar, sifted
1 egg
1 ½ teaspoons almond extract
1 teaspoon vanilla
2 ¼ cups flour, sifted
¾ -1 teaspoon salt
½ teaspoon red food coloring


Preheat oven to 375 degrees.
Cream butter, margarine and sugar.  Add egg, almond extract and vanilla.
Sift together flour and salt, and add to creamed mixture.
Divide dough into halves.  Blend red food coloring into one half of dough.  Roll one teaspoon of each color dough into a strip about 4 inches long.  Place strips side by side; press lightly together and twist like rope. 
Place on lightly greased (I spray lightly with cooking spray) cookie sheet and curve one end to form handle of cane.  Bake about 9 minutes.  Cool on wire racks.

Thursday, December 8, 2011

Christmas Cookies - First Batch

The first batch of Christmas cookies are baked and in the freezer!  In my last post, I talked about my family's tree cutting tradition.  Well, we also have cookie traditions.  Everyone has his or her favorite Christmas cookies, and I am expected to bake all of them every year.  I usually throw in something different each year, too, just to spice things up.

The first cookie on my list this year is the Italian Wedding Cookie.  You may know these as Mexican Wedding Cookies, Swedish Wedding Cookies, or even Hawaiian Wedding Cookies depending on where you are from and your own background.  In our family, they are definitely Italian.  I got this recipe from my Italian-American mother-in-law.  Despite the widespread popularity of this cookie, I had never had these until the first Christmas I spent with my in-laws.  Mmmm, melt-in-your-mouth goodness.  I had to make them myself.

The first time I made these cookies, I knew I'd done something wrong.  While my mother-in-law's cookies were little bites of powdered goodness, mine were hard little rocks.  Turns out I had both underworked and overworked the dough. What?  It's true.  I'll tell you the secret.  You want to be sure to beat the dough until it actually is, well, dough.  I had not beaten mine enough, so it was still kind of shaggy and crumbly.  And that was when the overworking came in.  I had to really squeeze the dough into those little balls to make them hold together.  If you beat the dough sufficiently, however, you can form the balls very lightly -- just pinch off the dough and gently roll with your palms.  Once you know the secret, the cookies turn out perfectly every time!


Italian Wedding Cookies

½ cup butter, softened
2 tablespoons granulated sugar
1 teaspoon vanilla
1 cup flour, sifted
1 cup ground pecans
powdered sugar for rolling

Preheat oven to 275 degrees. 
Beat butter, sugar and vanilla until soft. 
Add flour and pecans; mix well, until dough forms. 
Form dough into small balls, about ¾ inch.
Bake 45 minutes.  Remove from oven and immediately roll in powdered sugar.  Let cookies cool and roll in powdered sugar again.

Friday, October 14, 2011

Shortbread

abbey ruins at Holyrood Palace

When our family discovered fresh shortbread in a cafe at Holyrood Palace in Edinburgh several years ago, we were all hooked.  It was heavenly.  And it was baked for mere tourists, not for her majesty.  What is it like when the queen is in residence?  I have read that Queen Elizabeth stays there only one week a year, early each summer.  I would stay the whole summer just for the shortbread, but I suppose she has good cooks down in London, too.

When we returned home, I knew I had to make shortbread in my own kitchen.  Store-bought shortbread is not remotely in the same league as fresh.  I soon realized that I already had a very good shortbread recipe on my cookbook shelf in The Frugal Gourmet on Our Immigrant Ancestors: Recipes You Should Have Gotten from Your Grandmother by Jeff Smith. There are only four ingredients. I love the simplicity of this cookie. It is so easy to mix up, bake, and devour.  We eat them warm, we eat them cool, we eat them with ice cream, we eat them plain.  I just love this cookie!

This is my reworded version of the recipe found in The Frugal Gourmet on Our Immigrant Ancestors.  The quality of the butter really makes a difference in this cookie, as there are so few ingredients.  When I want to splurge, I use Kerrygold.


Shortbread

1/2 pound butter, softened
2 cups all-purpose flour
1 heaping tablespoon cornstarch
1/2 cup sugar
about 1/2 teaspoon of extra fine baker's sugar (optional)

Preheat oven to 325 degrees.

Sift the flour and cornstarch together into a mixing bowl.  Blend in the sugar with a spoon.  Cut the butter into 1/2" slices or cubes and add to the flour mixture.  Use a heavy-duty mixer to blend in the butter.

Turn the dough out onto a very lightly floured board and knead gently five or six times.  Line a baking sheet with parchment paper.  Place the dough on the baking sheet and form into a circle or rectangle a little less than 1/2" thick.  I use a lightly floured rolling pin to get a smooth surface.  Gently prick all over the surface of the dough with a fork.  If desired, lightly sprinkle the baker's sugar over the top (just a very small amount).

Bake at 325 for 30 minutes (I always check after 25 minutes) until the edges turn light brown.  Transfer on the parchment paper to a cooling rack.  Cut into wedges or squares before it is completely cool.

Fit for a queen!